Garmin GPSMAP 2006, Installation Manual
The Garmin GPSMAP 2006 is a reliable navigation tool for boaters, featuring detailed maps and easy-to-use functions. Ensure smooth sailing by downloading the free Owner's Manual from manualshive.com, providing step-by-step instructions for optimal use. Stay on course with this essential manual at your fingertips.
Share
Download


Reviews:
No comments
Related manuals for GPSMAP 2006

Optima
Brand: Eagle Pages: 36

GV55LITE
Brand: Queclink Pages: 16

LW-360HR
Brand: Globalsat Pages: 27

DRIVETRACK 71
Brand: Garmin Pages: 38

78-641
Brand: Blow Pages: 20

VizComm F4
Brand: Sensitech Pages: 2

ECHOMAP UHD2 5 Series
Brand: Garmin Pages: 76

nav-u NV-U83
Brand: Sony Pages: 2
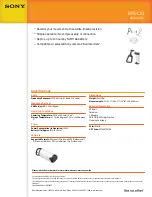
GPS-CS1 - Digital Camera GPS Unit
Brand: Sony Pages: 1
GXB5005
Brand: Sony Pages: 15
GU-BT1
Brand: Sony Pages: 16

NAV-U NVD-U11E
Brand: Sony Pages: 25

NAV-U NVD-U13E NAV-U NVD-U13R
Brand: Sony Pages: 51

NAV-U NV-U71T
Brand: Sony Pages: 56
GPS-CS1 - Digital Camera GPS Unit
Brand: Sony Pages: 59

GPS-CS1KA
Brand: Sony Pages: 75

HKDW-704
Brand: Sony Pages: 144

nav-u NV-U50
Brand: Sony Pages: 216


