Garmin eTrex Venture - Hiking GPS Receiver, Руководство пользователя и справочное руководство
Garmin eTrex Venture - навигатор для пеших прогулок с возможностью загрузки бесплатного руководства по эксплуатации. Характеристики устройства позволяют легко и точно ориентироваться в походах. Скачайте руководство с manualshive.com и начните использовать GPS-приемник для наилучшего опыта на природе.
Поделиться
Скачать


Отзывы:
Нет отзывов
Похожие инструкции для eTrex Venture - Hiking GPS Receiver

Raynav 780
Бренд: Raymarine Страницы: 127

LCD CHART
Бренд: B&G Страницы: 42
N10
Бренд: LG Страницы: 54

N11
Бренд: LG Страницы: 48

UX0GPGxx
Бренд: Seiwa Страницы: 5
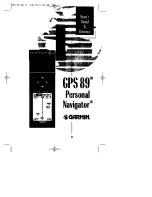
GPS 89
Бренд: Garmin Страницы: 68

T322
Бренд: BONITEL Страницы: 21

GPS III Plus
Бренд: Garmin Страницы: 114

RC435
Бренд: Raymarine Страницы: 128

MinPad
Бренд: Javad Страницы: 20

DL-800
Бренд: EverTrack Страницы: 9

GST8000
Бренд: PORTMAN Страницы: 34

SXBlue II
Бренд: Geneq Страницы: 160

RECOVERY
Бренд: MVP Страницы: 12

CPN1010i
Бренд: Standard Horizon Страницы: 188

XT4970D
Бренд: Xirgo Technologies Страницы: 14

EDGE 820
Бренд: GA Project Страницы: 30

9602-LP
Бренд: NAL RESEARCH CORPORATION Страницы: 42


