Garmin BMW Motorcycles Navigator, Owner'S Manual And Reference Manual
The Garmin BMW Motorcycles Navigator comes with comprehensive Owner's Manual and Reference Manual, offering users all the necessary guidance for effortless navigation. Easily download these manuals for free from our website, ensuring you have the ultimate resource to maximize your experience with this top-of-the-line motorcycle navigation device.
Share
Download


Reviews:
No comments
Related manuals for BMW Motorcycles Navigator

XT2500
Brand: Xirgo Pages: 92
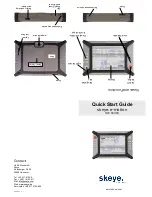
e-motion HW 90400
Brand: skeye. Pages: 2

T-Box/GPS-800
Brand: Teltonika Pages: 25

GPS 3000
Brand: Magellan Pages: 82

EDW-310BB
Brand: Eddy Wireless Pages: 21

EaziTRAC 1000
Brand: Daviscomms Pages: 35

ITrax02
Brand: Fastrax Pages: 20

SANAV FV-M7
Brand: Sanav Pages: 26

MU-201 S2
Brand: Sanav Pages: 43

MU-201 S1
Brand: Sanav Pages: 45

GS-818
Brand: Sanav Pages: 79

SP100
Brand: SonarPhone Pages: 38

L80 EVB
Brand: Quectel Pages: 21

FM-Eco4 light T
Brand: RUPTELA Pages: 52
Stagetracker II
Brand: TTA Pages: 44

RSA-1200L
Brand: RoyalTek Pages: 18

i-Geo+
Brand: Polstar Technologies Pages: 12

X-360
Brand: X-Trax Pages: 6


