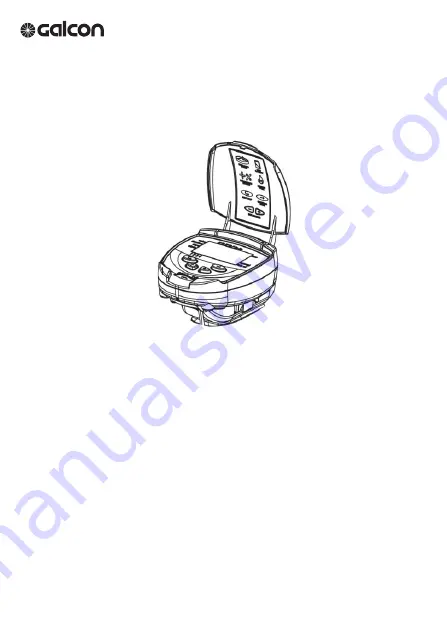
background image


Series 61XXX


Battery Operated Irrigation Controller 

Installation and Operating Instructions


Main Features 

(Not including "S" series*)

:


  Independent programming of each individual valve


  Weekly or cyclical programming


  Up to 4 operations per day in weekly program mode


  Irrigation duration 1 minute to 12 hours


  Irrigation frequency starts from one day to once every thirty days 

in a cyclical program


  Waterproof (IP68)


  Rain off sensor option


  Weather resistant


  Irrigation duration modifiable as a function of percentage entered


  Operation of one to 6 valves and a master valve


  Computerized "manual" operation of individual valves


  Sequential "manual" operation


  Batteries: 9V alkaline batteries (not included)


  Operation temperature -10° to 70°


* "S" series features are detailed in chapter 8


Summary of Contents for 61 Series

Page 1: ...minute to 12 hours Irrigation frequency starts from one day to once every thirty days in a cyclical program Waterproof IP68 Rain off sensor option Weather resistant Irrigation duration modifiable as...

Page 2: ...Time Format 5 3 Valve Selection 5 4 Setting the IrrigationDuration 5 5 Selecting Days of the Week for Irrigation 5 6 Setting Irrigation StartTimes 5 7 Example Programming aWeekly Irrigation Schedule 6...

Page 3: ...tional Instructions for S Series DC 1S DC 4S DC 6S 24 8 1 Irrigation Window In the Cyclical Program Mode 8 2 Opening an Irrigation Window after Start Time has passed 8 3 Sensor 9 Maintenance Troublesh...

Page 4: ...4...

Page 5: ...The irrigation valve can be opened and closed independent of the controller s operation by mechanical opening lever Manual operation is useful when immediate irrigation is required andthe controller i...

Page 6: ...nds on model 2 NOTE AII the controller display elements appears briefly at the display followed by a blinking 12 00 The controller is now ready to be programmed Make sure to locate the battery compart...

Page 7: ...installed on the solenoid or on the wall 4 1 Installing on the solenoid Place the controller 1 on the adaptor Locate the solenoid adaptor 2 on top of the solenoid 3 Verify Click sound NOTE Assembly o...

Page 8: ......

Page 9: ...2 Installing on the wall a Place the mounting plate 1 on the wall using 3 screws 2 not included b Remove bracket 3 from controller and slide onto the mounting plate c Press the controller 4 to the bra...

Page 10: ...the letter S representing the rain sensor connection Connect each of the controller wire sets each with red and black to each solenoid wire red and black Connect the red wire from the controller to t...

Page 11: ...feguard the waterproof characteristics compliance with the following is essential Do not remove protective covers from cables that are not connected to valves Exposed cable ends canshort circuit with...

Page 12: ...4 buttons Enter Button Used to select the desired programming screen e g clock setting mode Set Button Used to select the parameter to be changed e g hour minute etc The selected parameter can only be...

Page 13: ...ppears at the top of the display Move the arrow to the current day of the week using the Plus or Minus button If the most recent data item stops blinking before you finish programmingit press Set to c...

Page 14: ...o the desired valve number by pressing Plus and Minus button 4 Press Enter to proceed to the next step 5 4 Setting the Irrigation Duration This setting determines how long the irrigation lasts 1 Press...

Page 15: ...inks under the next day of the week You can select additional days of the week in the same manner 5 Canceling Scheduled Irrigation Days Have the arrow blink under the day you want to cancel Press Minu...

Page 16: ...designation Repeat actions 2 and 3 to set start times Il Ill and IV as needed 4 To cancel a specific start time select it by pressing Enter Next press Set The hour digits blink Press Plus or Minus un...

Page 17: ...king Arrow appears at the top of the display under Monday Press Set until the blinking arrow appears under Tuesday and then press Plus The arrow under Tuesday will stop blinking and advance one positi...

Page 18: ...ical Irrigation This option is used to program the irrigation controller to operate the irrigation system in a cyclical manner once every x days for the irrigation duration NOTE Duration for which val...

Page 19: ...esired opening time by pressing Plus or Minus Take note of AM and PM designations 4 Press Set until the digit to the right of the opening time blinks The digit above the word days 5 Set the number of...

Page 20: ...Operation via the Irrigation Controller This function operates the selected valve for the irrigation duration The valve will close automatically at the end of the irrigation duration NOTE that the or...

Page 21: ...lves The valves can be operated sequentially one after the other 1 Press Enter until the Clock appears 2 When nothing is blinking on the display press and hold down Plus for 5 seconds Valve 1 will ope...

Page 22: ...he controller press Enter until the Clock appears and then press and holddown Minus until the No Irrigation disappears 4 Suspension can also be implemented while a valve is activated 5 If an attempt i...

Page 23: ...ant The percentage cannot be changed for an individual valve 7 Additional Displays 7 1 Valve in Wait Mode This section does not apply to the DC 1 and DC 2 Models When two valves are currently open and...

Page 24: ...ttery warning When the batteries are low and not replaced in a timely manner the Battery is permanently displayed All other display elements disappear all valves will close and all programs will disap...

Page 25: ...y In the event of rainfall the sensor prevents the opening of all the valves there is also the option of using any type of dry contact sensor When the sensor contact is opened all valves will close an...

Page 26: ...Inthe Cyclical Program Mode The irrigation window function is incorporated in the S series of professional controllers The irrigation window is an advanced feature which enables you to define that the...

Page 27: ...il Close window appears with 12 00 AM or the last Close window time setting displayed 5 Press Plus and Minus to set the desired Close window time pay attention to the AM PM designation To cancel the i...

Page 28: ...rt time taking into account the window you have set 8 3 Sensor In the S series each valve is associated to the sensor as needed 1 Select the valve to which you want to associate the sensor 2 Press Ent...

Page 29: ...hydraulic valve Recommended water pressure 1 8 ATM bar Problem Event Cause Solution Valve does not open during Automatic operation or during Manual operation via irrigation controller The connection...

Page 30: ...r BSP 1 Waterproof connector Extension cable for solenoid cables 10 2 Two way 2W Controllers Valve DC solenoid from Galcon 2W 3 4 valve solenoid 2W 1 valve solenoid 2W 1112 valve solenoid 2W 2 valve s...

Page 31: ...Auxiliary Table for Irrigation Planning with Galcon Controllers 29...

Page 32: ...r any failure to install and or use any product in full compliance with Galcon s instructions ii other systems components devices technologies and or the integration interface thereof with any product...

Page 33: ...nd or the customer shall have been made aware of the possibility of such loss 10 In any event any liability which Galcon may have in connection with the product and or this warranty including without...

Page 34: ...ce will not occur in a particular installation If this equipment does cause harmful interference to radio or television reception which can be determined by turning the equipment off and on the user i...

Page 35: ...Galcon Kfar Blum Tel 972 4 6900222 Email info galconc com Website www galconc com GDB622...

Reviews: