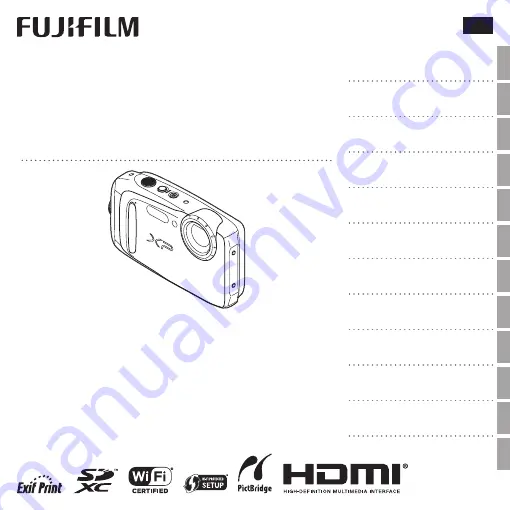
background image

FINEPIX XP90 Series

DIGITAL CAMERA

Owner’s Manual

For information on related products, visit our website at

http://www.fujifilm.com/products/digital_cameras/index.html

EN

Before You Begin

First Steps

Basic Photography and Playback

More on Photography

More on Playback

Movies

Connections

Menus

Technical Notes

Troubleshooting

Appendix

BL00004743-200

Wireless Networks

Downloaded from www.vandenborre.be

Содержание FINEPIX XP120 series

Страница 1: ...p www fujifilm com products digital_cameras index html EN BeforeYou Begin First Steps Basic Photography and Playback More on Photography More on Playback Movies Connections Menus Technical Notes Troubleshooting Appendix BL00004743 200 Wireless Networks D o w n l o a d e d f r o m w w w v a n d e n b o r r e b e ...

Страница 2: ... service centre if unsure Waterproof dustproof products are excluded from prohibition against water dust exposure Keep this in mind when reading following notes and cautions WARNING Unplugfrom powersocket If a problem arises turn the camera off remove the battery and disconnect and unplug the AC power adapter Continued use of the camera when it is emitting smoke is emitting any unusual odor or is ...

Страница 3: ...plied with the camera Using the charger to charge conventional batteries or other types of rechargeable batteries can cause the battery to leak fluid overheat or burst WARNING Danger of explosion if battery is incorrectly replaced Replace only withthesame Do not use in the presence of flammable objects explosive gases ordust When carrying the battery install it in a digital camera or keep it in th...

Страница 4: ...nd cause a fire or electric shock Do not use the AC power adapter when the plug is damaged or the plugsocketconnectionisloose This could cause a fire or electric shock CAUTION DonotcoverorwrapthecameraortheACpoweradapterinaclothor blanket This can cause heat to build up and distort the casing or cause a fire When you are cleaning the camera or you do not plan to use the camera for an extended peri...

Страница 5: ...Battery Life At normal temperatures the battery can be recharged about 300 times A noticeable decrease in the length of time the battery will hold a charge indicates that it has reached the end of its service life and should be replaced Storage Performance may be impaired if the battery is left unused for extended periods when fully charged Run the battery flat before storing it If the camera will...

Страница 6: ...r Q Q CAUTION Do not use the discharge option with alkaline batteries The camera draws a small amount of current even when off Ni MH batteries that have been left in the camera for an extended period may be drawn down to the point that they no longer hold a charge Battery performance may also drop if the batteries are run down in a device such as a flashlight Use the discharge option in the camera...

Страница 7: ...ter for at least 15 minutes and then seek medical assistance If liquid crystal is swallowed rinse your mouth thoroughly with water Drink large quantities of water and induce vomiting then seek medical assistance Although the display is manufactured using extremely high precision technology it may contain pixels that are always lit or that do not light This is not a malfunction and images recorded ...

Страница 8: ...evice in locations subject to magnetic fields static electricity or radio interference Do not use the transmitter in the vicinity of microwave ovens or in other locations subject to magnetic fields static electricity or radio interference that may prevent reception of wireless signals Mutual interference may occur when the transmitter is used in the vicinity of other wireless devices operating in ...

Страница 9: ... entire manual The principal camera operations are listed here Having a specific problem with the camera Find the answer here WarningMessagesandDisplays P107 Find out what s behind that flashing icon or error message in the display Memory Cards Pictures can be stored in the camera s internal memory or on optional SD SDHC and SDXC memory cards P12 referred to in this manual as memory cards D o w n ...

Страница 10: ... up b Taking Pictures During Playback y To return instantly to shooting mode press the shutter button halfway View Shoot Turning the Camera on in Playback Mode y When the camera is off playback can be started by pressing the a button for about a second D o w n l o a d e d f r o m w w w v a n d e n b o r r e b e ...

Страница 11: ... Use 1 Inspect the water resistant seal and adjacent surfaces and remove any dust sand or other foreign matter using a soft dry cloth Q Q Have the water resistant seal replaced if it is deformed or otherwise damaged note that a fee is charged for this service contact your retailer or a FUJIFILM authorized repair technician for more information Failure to replace the seal could result in leaks and ...

Страница 12: ...m 49 ft or less and periods shorter than 120 minutes Clean and dry the camera within one hour of using it underwater Q Q The interior of the camera is not waterproof Do not open or close the battery chamber cover while under water After cleaning the camera be sure it is completely dry before opening or closing the battery chamber cover Q Q Do not use in hot springs or heated pools Q Q The camera m...

Страница 13: ... free of water droplets open the battery chamber cover and use a soft dry cloth to remove any water dust or other foreign matter from the battery chamber Q Q Remove any foreign matter from the water resistant seal and adjacent surfaces Foreign matter could damage the seal lowering water resistance Q Q Liquid soaps detergents alcohol and other cleansers may affect water resistance and should never ...

Страница 14: ...ion can be removed by leaving the battery chamber cover open in a location with a steady temperature that is free of heat humidity sand and dust Condensation Condensation is particularly likely to occur if the camera is placed in cold water after being exposed to high temperatures or taken from a cold to a warm environment or if the battery chamber is opened in a humid location Cold Climates Q Q B...

Страница 15: ...ooting Mode 17 Playback Mode 17 Basic Setup 19 Basic Photography and Playback Taking Pictures in Q Scene Recognition Mode 20 Viewing Pictures 24 More on Photography Shooting Mode 25 Choosing a Shooting Mode 25 Shooting Mode Options 26 g ACTION CAMERA 28 j PRO LOW LIGHT 29 k HDR 30 YADVANCED FILTER 31 r MOTION PANORAMA 360 32 b Intelligent Face Detection 34 Focus Lock 35 d Exposure Compensation 37 ...

Страница 16: ...igh DefinitionTVs 61 Printing Pictures via USB 62 Printing the DPOF Print Order 64 Viewing Pictures on a Computer 66 Copying Pictures to a Computer 66 Windows Downloading and Installing MyFinePix Studio to a Computer 66 Windows Installing MyFinePix Studio 67 Windows Uninstalling MyFinePix Studio 69 Connecting the Camera 70 Menus Using the Menus Shooting Mode 72 Using the Shooting Menu 72 Shooting ...

Страница 17: ... Setup Menu Options 88 FDATE TIME 88 NTIME DIFFERENCE 88 La 88 oSILENT MODE 88 RRESET 89 KFORMAT 89 AIMAGE DISP 89 BFRAME NO 90 GOPERATIONVOL 91 HSHUTTERVOLUME 91 eSHUTTER SOUND 91 IPLAYBACKVOLUME 91 JLCD BRIGHTNESS 91 hLCD POWER SAVE 92 MAUTO POWER OFF 92 LIS MODE 92 b DIGITAL IMAGE STABILIZER 92 BRED EYE REMOVAL 92 R INTELLIGENT DIGITAL ZOOM 93 pMOVIE ZOOMTYPE 94 C AF ILLUMINATOR 94 m AUTOROTATE...

Страница 18: ...JIFILM 97 Caring for the Camera 98 Storage and Use 98 Condensation 98 Cleaning 99 Traveling 99 Troubleshooting Problems and Solutions 100 Warning Messages and Displays 107 Appendix Memory Card Capacity 111 Specifications 112 D o w n l o a d e d f r o m w w w v a n d e n b o r r e b e ...

Страница 19: ...mation may be found Menus and other text in the LCD monitor are shown in bold In the illustrations in this manual displays may be simplified for explanatory purposes Supplied Accessories The following items are included with the camera NP 45Srechargeable battery AC power adapter Plug adapter USB cable Strap User Guide Basic Manual Attaching the Strap Attach the strap as shown Shape of adapter vari...

Страница 20: ... cursor down h self timer button P41 MENU OK button Move cursor right N flash button P39 Move cursor up d exposure compensation button P37 b delete button Px Move cursor left F macro button P38 The illustrations in this manual have been simplified for explanatory purposes D o w n l o a d e d f r o m w w w v a n d e n b o r r e b e ...

Страница 21: ...om out button 21 48 J T zoom in button 21 48 K Latch 7 10 L Safety lock 7 10 M a playback button 24 N Strap eyelet 1 O DISP display BACK button 6 19 P Burst mode button 46 W wireless transfer button 55 Q Speaker 60 R Tripod mount S Water resistant seal xi 10 T USB connector 62 70 U Memory card slot 9 V Micro HDMI connector 61 W Battery chamber 7 X Battery latch 8 11 D o w n l o a d e d f r o m w w...

Страница 22: ...mage size and quality 73 74 K Temperature warning 108 L FINEPIX color 74 M White balance 75 N Battery level 5 O IS mode 92 P Location data download status 95 Q Exposure compensation 37 R Date and time 19 S Blur warning 40 107 T Focus warning 22 107 U Date stamp 95 V Self timer indicator Interval shooting Time lapse movie 41 W Macro close up mode 38 X Flash mode 39 a indicatesthatnomemorycardisinse...

Страница 23: ...mode indicator 88 G Gift image 47 H Frame number 90 I Location data 95 J Photobook assist 52 K Favorites 47 L DPOF print indicator 64 M Protected image 83 Battery Level Battery level is shown as follows Indicator Description D white Battery partially discharged C white Battery more than half discharged B red Low battery Charge as soon as possible A blinks red Battery exhausted Turn camera off and ...

Страница 24: ... Press DISP BACK to cycle through shooting and playback indicators as follows Shooting Indicators displayed indicators hidden best framing HD framing Playback Indicators displayed indicators hidden Ifavorites D o w n l o a d e d f r o m w w w v a n d e n b o r r e b e ...

Страница 25: ... w and open the battery chamber cover e R R Be sure the camera is off before opening the battery chamber cover Q Q Do not open the battery chamber cover when the camera is on Failure to observe this precaution could result in damage to image files or memory cards Q Q Do not use excessive force when handling the battery chamber cover Q Q Remove water droplets and other foreign matter with a dry clo...

Страница 26: ...o the camera keeping the battery latch pressed to one side Confirm that the battery is securely latched Q Q Insertthebatteryinthecorrectorientation Do not use force or attempt to insert the battery upside down or backwards The battery will slide in easily in the correct orientation Battery latch Orange stripe D o w n l o a d e d f r o m w w w v a n d e n b o r r e b e ...

Страница 27: ...se force If the memory card is not correctly inserted or no memory card is inserted a will appear in the LCD monitor and internal memory will be used for recording and playback Click Q Q SD SDHC SDXC memory cards can be locked making it impossible to format the card or to record or delete images Before inserting an SD SDHC SDXC memory card slide the write protect switch to the unlocked position Wr...

Страница 28: ...faces Q Q When closing the battery chamber cover do not subject it to excessive horizontal forces Failure to observe this precaution could cause the water resistant seal to become misaligned allowing water into the camera Q Q Check that the cover is secure by rotating the latch in the opposite direction and confirming that the cover does not open ConfirmingThat the Cover Is Latched Make sure that ...

Страница 29: ... the battery press the battery latch to the side and slide the battery out of the camera as shown Battery latch To remove the memory card press it in and release it slowly The card can then be removed by hand When a memory card is removed the card could come out of the slot too quickly Use your finger to hold it and gently release the card D o w n l o a d e d f r o m w w w v a n d e n b o r r e b ...

Страница 30: ... before first use and be sure to reformat all memory cards after using them in a computer or other device For more information on formatting memory cards see KFORMAT P89 Memory cards are small and can be swallowed keep out of reach of children If a child swallows a memory card seek medical assistance immediately miniSD or microSD adapters that are larger or smaller than the standard dimensions of ...

Страница 31: ...iginals Q Q Batteries Remove dirt from the battery terminals with a clean dry cloth Failure to observe this precaution could prevent the battery from charging Do not affix stickers or other objects to the battery Failure to observe this precaution could make it impossible to remove the battery from the camera Do not short the battery terminals The battery could overheat Read the cautions in The Ba...

Страница 32: ...ach the plug adapter as shown making sure that it is fully inserted and clicks into place on the AC power adapter terminals Q Q The plug adapter is exclusively for use with the supplied AC power adapter Do not use it with other devices AC power adapter Plug adapter 2 Open the battery chamber cover Keeping the safety lock pressed q rotate the latch w and open the battery chamber cover e D o w n l o...

Страница 33: ...er lamp shows battery charge status as follows Self timer lamp Self timer lamp Battery status Action On Battery charging Blinks Battery fault See page 101 Off Charging complete Can not charge Unplug the AC power adapter from the power outlet and reinsert the battery in the correct orientation P101 Q Q The battery will not charge while the camera is on R R The camera operates in external power mode...

Страница 34: ...he camera directly to the computer do not use a USB hub or keyboard Q Q If the camera is turned on charging is not available Q Q If the computer goes into sleep mode while charging charging will stop To continue charging disable sleep mode on the computer and disconnect and connect the USB cable Q Q Charging may be impossible depending on computer specifications settings or conditions D o w n l o ...

Страница 35: ... Q Q You may be prompted to confirm that the battery chamber cover is locked but this does not indicate a malfunction PlaybackMode To turn the camera on and begin playback press the a button for about a second Press the a button again or press the ON OFF button to turn the camera off R R Switching to Shooting Mode To exit to shooting mode press the shutter button halfway Press the a button to retu...

Страница 36: ... The ON OFF button does not completely end the supply of power to the camera R R Auto Power Off The camera will turn off automatically if no operations are performed for the length of time selected for MAUTO POWER OFF P92 To turn the camera on use the ON OFF button or press the a button for about a second D o w n l o a d e d f r o m w w w v a n d e n b o r r e b e ...

Страница 37: ...U ENGLISH NO SET DEUTSCH FRANCAIS ESPAÑOL PORTUGUÊS 2 The date and time will be displayed Press the selector left or right to highlight the year month day hour or minute and press up or down to change To change the order in which the year month and day are displayed highlight the date format and press the selector up or down Press MENU OK when settings are complete R R The Camera Clock If the batt...

Страница 38: ...ndicators will be displayed The g Icon This icon indicates that the camera continuously searches for faces to select the appropriate scene increasing the drain on the battery The Scene Icon The camera selects the scene according to shooting conditions and the type of subject the scenes in brackets are selected if the camera detects that the subject is moving dPORTRAIT a c LANDSCAPE cc dNIGHT cd eM...

Страница 39: ...icator Holding the Camera Hold the camera steady with both hands and brace your elbows against your sides Shaking or unsteady hands can blur your shots To prevent pictures that are out of focus or too dark underexposed keep your fingers and other objects away from the flash and from the protective glass covering the lens D o w n l o a d e d f r o m w w w v a n d e n b o r r e b e ...

Страница 40: ... normal If the subject is poorly lit the AF assist illuminator may light see CAF ILLUMINATOR P94 for information on disabling the illuminator If the camera is able to focus it will beep twice If the camera is unable to focus the focus frame will turn red s will be displayed Change the composition or use focus lock P35 Double beep D o w n l o a d e d f r o m w w w v a n d e n b o r r e b e ...

Страница 41: ...ly lit the flash may fire when the picture is taken For information on using the flash when lighting is poor see N Using the Flash Intelligent Flash P39 The Shutter Button The shutter button has two positions Pressing the shutter button halfway sets focus and exposure to shoot press the shutter button the rest of the way down Click D o w n l o a d e d f r o m w w w v a n d e n b o r r e b e ...

Страница 42: ...t shot and check the results 1 Press the a button The most recent picture will be displayed 2 View additional pictures Press the selector right to view pictures in the order recorded left to view pictures in reverse order Press the shutter button halfway to exit to shooting mode D o w n l o a d e d f r o m w w w v a n d e n b o r r e b e ...

Страница 43: ...ng menu 2 Highlight ASHOOTING MODE and press the selector right to display shooting mode options SET SHOOTING MENU EXIT SHOOTING MODE 3 Highlight the desired mode and press MENU OK QSCENE RECOGNITION CANCEL SET Selects optimum camera settings for certain modes 4 Press DISP BACK to exit to shooting mode D o w n l o a d e d f r o m w w w v a n d e n b o r r e b e ...

Страница 44: ...t scenes The camera varies exposure over a series of shots and blends the results to preserve details in highlights and shadows P30 C NATURAL N The camera takes two shots one without the flash and one with h PORTRAIT Choose for portraits M LANDSCAPE Choose for daylight shots of buildings and landscapes Y ADVANCED FILTER Take photos with filter effects P31 r MOTION PANORAMA 360 Pan the camera to re...

Страница 45: ...ts that capture the brightness of sunlit beaches F UNDERWATER Choose for underwater photography s UNDERWATER MACRO Choose for underwater close ups of small objects U PARTY Capture indoor background lighting under low light conditions V FLOWER Choose for vivid close ups of flowers W TEXT Take clear pictures of text or drawings in print D o w n l o a d e d f r o m w w w v a n d e n b o r r e b e ...

Страница 46: ...utting the camera directly on the bicycle R R In Action Camera Mode the XP90 s lens turns into a fixed 18mm 35mm format equivalent and the LCD monitor automatically turns off when you start to shoot movies R R While recording a video the LCD monitor turns off and the self timer lamp blinks The self timer lamp blinks may affect the video depending on the scene R R When a video is recorded the frame...

Страница 47: ...g poorly lit subjects or static subjects at high zoom ratios R R A single combined photograph may not be created with some scenes or if the subject or camera moves during shooting Do not move the camera until shooting is complete PRO LOW LIGHT Q Q Keep the camera steady during shooting Q Q The camera may make fewer than four exposures in some situations D o w n l o a d e d f r o m w w w v a n d e ...

Страница 48: ...ingle image preserving detail in highlights and shadows Choose for high contrast scenes R R A single combined photograph may not be created with some scenes or if the subject or camera moves during shooting Do not move the camera until shooting is complete D RANGE PRIORITY Q Q Keep the camera steady during shooting D o w n l o a d e d f r o m w w w v a n d e n b o r r e b e ...

Страница 49: ...fect f FISH EYE Create a distorting effect of a fisheye lens X SOFT FOCUS 1 Create a look that is evenly soft throughout the whole image L CROSS SCREEN 1 Create a star pattern where lines radiate out from bright objects y SKETCH Create line drawing like pictures with contours of subjects remained u PARTIAL COLOR RED Areas of the image that are the selected color are recorded in that color All othe...

Страница 50: ... view a choice of pan directions Press the selector left or right to highlight a pan direction and press MENU OK 3 Press the shutter button all the way down to start recording There is no need to keep the shutter button pressed during recording 4 Pan the camera in the direction shown by the arrow Shooting ends automatically when the progress bar is full and the panorama is complete R R Shooting en...

Страница 51: ...ancels shooting Q Q The desired results may not be achieved with moving subjects subjects close to the camera unvarying subjects such as the sky or a field of grass subjects that are in constant motion such as waves and waterfalls or subjects that undergo marked changes in brightness Panoramas may be blurred if the subject is poorly lit For Best Results For best results move the camera in a small ...

Страница 52: ...escanbedetected with the camera in vertical or horizontal orientation if a face is detected it will be indicated by a green border If there is more than one face in the frame the camera will select the face closest to the center other faces are indicated by white borders Q Q In some modes the camera may set exposure for the frame as a whole rather than the portrait subject Q Q If the subject moves...

Страница 53: ...e focus frame U and press the shutter button halfway to lock focus and exposure Focus and exposure will remain locked while the shutter button is pressed halfway AF AE lock 2 Recompose Keep the button pressed halfway 3 Shoot Press the button all the way down D o w n l o a d e d f r o m w w w v a n d e n b o r r e b e ...

Страница 54: ...Subjects photographed through a window or other reflective object Darksubjectsandsubjectsthatabsorbratherthanreflect light such as hair or fur Insubstantial subjects such as smoke or flame Subjects that show little contrast with the background for example subjects in clothing that is the same color as the background Subjects positioned in front of or behind a high contrast object that is also in t...

Страница 55: ...e values to increase exposure Choose negative values to reduce exposure R R A d icon and exposure indicator are displayed at settings other than 0 Exposure compensation is not reset when the camera is turned off to restore normal exposure control choose a value of 0 R R Turn the flash off when using exposure compensation R R Exposure compensation is available only when P PROGRAM AE is selected for...

Страница 56: ...is in effect the camera focuses on subjects near the center of the frame Use the zoom buttons to compose pictures P21 To exit macro mode press the selector left F and select H R R Use of a tripod is recommended to prevent blur caused by camera shake OFF OFF D o w n l o a d e d f r o m w w w v a n d e n b o r r e b e ...

Страница 57: ...n shooting at night or indoors under low light Press the selector right N and choose from the following flash modes P AUTO FLASH According to shooting conditions Option Description AUTO K AUTO FLASH The flash fires when required Recommended in most situations N L FORCED FLASH The flash fires whenever a picture is taken Use for backlit subjects or for natural coloration when shooting in bright ligh...

Страница 58: ...ecommended R R The flash may fire several times with each shot Do not move the camera until shooting is complete R R The flash may cause vignetting Red Eye Removal When Intelligent Face Detection P34 and red eye removal P82 are on red eye removal is available in auto K RED EYE REDUCTION flash on L FORCED FLASH and slow sync M RED EYE SLOW modes Red eye removal minimizes red eye caused when light f...

Страница 59: ... shutter is released two seconds after the shutter button is pressed Use to reduce blur caused by the camera moving when the shutter release button is pressed The self timer lamp will blink as the timer counts down g GROUPTIMER The camera will start the timer when it detects the selected number of portrait subjects Press the selector up to choose the number of subjects R R To stop the timer before...

Страница 60: ...t eINTERVAL SHOOTING 2 Press MENU OK to display the settings screen 3 Set the interval and the shooting duration Select the items by pressing g or h and then set the time by pressing e or f SETTING INTERVAL SHOOTINGDURATION 30 SEC 60 SEC 5 SEC 10 SEC 15SEC 5 MIN CANCEL SET INTERVAL Set the interval time SHOOTING DURATION Set the time to stop shooting 4 Press MENU OK to display the next settings sc...

Страница 61: ...n addition to still pictures R R The frame size and frame rate for time lapse movies are specified by TIME LAPSE MOVIE MODE P79 in the shooting mode R R If there is not enough free space on the memory card the movie s recordable time is displayed in red time remaining is less than 1 second or yellow time remaining is less than 6 seconds Check the amount of free space on the memory card 6 Press MEN...

Страница 62: ...es as though watching slow moving subjects such as plant growth and cloud movement in fast forward R R If you press the shutter button before shooting ends interval shooting stops R R The LCD monitor turns off and the self timer lamp flashes during interval shooting The LCD monitor turns on three seconds before shooting starts R R Only the first frame is displayed when playing back photos taken by...

Страница 63: ...amount of battery remaining Q Q Interval shooting may end suddenly if there is not enough free space on the memory card Check the amount of free space on the memory card Q Q Depending on shooting settings or status settings may not be applied or interval shooting may not be possible Q Q You can only use the ON OFF button a button DISP BACK button and shutter button during interval shooting Q Q Con...

Страница 64: ... single frame shooting and the burst mode selected using the Continuous option in the shooting menu P76 R R When a burst mode is selected the camera displays the icon for the selected mode No icon is displayed in single frame mode P D o w n l o a d e d f r o m w w w v a n d e n b o r r e b e ...

Страница 65: ...age icon during playback ContinuousShooting In the case of pictures taken in continuous shooting mode only the first frame of each series will be displayed Press the selector down to view the other pictures in the series R R Pictures taken in continuous shooting mode have file names that start with S e g S0010001 JPG IFavorites RatingPictures To rate the picture currently displayed in full frame p...

Страница 66: ...ed to view areas of the image not currently visible in the display Navigation window shows portion of image currently displayed in LCD monitor Zoom indicator Press DISP BACK to exit zoom R R The maximum zoom ratio varies with image size Playback zoom is not available with cropped or resized copies saved at a size of a or smaller D o w n l o a d e d f r o m w w w v a n d e n b o r r e b e ...

Страница 67: ...background Press W to increase the number of images displayed to two nine or one hundred T to view fewer images 100 0001 When two or more images are displayed use the selector to highlight images and press MENU OK to view the highlighted image full frame In the nine and hundred frame displays use the selector to view more pictures D o w n l o a d e d f r o m w w w v a n d e n b o r r e b e ...

Страница 68: ...mation dialog then highlight OK and press MENU OK to delete the selected pictures ALL FRAMES A confirmation dialog will be displayed highlight OK and press MENU OK to delete all unprotected pictures if a memory card is inserted only the pictures on the memory card will be affected the pictures in internal memory are only deleted if no memory card is inserted Pressing DISP BACK cancels deletion not...

Страница 69: ...FAVORITES Search by rating BY SCENE Find all pictures that match a selected scene BYTYPE OF DATA Find all still pictures or all movies 2 Select a search condition Only pictures that match the search condition will be displayed To delete or protect selected pictures or to view the search results in a slide show press MENU OK and choose AERASE P50 DPROTECT P83 or ISLIDE SHOW P82 D o w n l o a d e d ...

Страница 70: ...nd press the selector up to select or deselect To display the current image on the cover press the selector down Press MENU OK to exit when the book is complete R R The first picture selected becomes the cover image Press the selector down to select a different image for the cover 3 Select COMPLETE PHOTOBOOK to select all photos or all photos matching the specified search conditions for the book c...

Страница 71: ...tor left or right to scroll through the pictures EditingandDeletingPhotobooks Display the photobook and press MENU OK The following options will be displayed select the desired option and follow the on screen instructions EDIT Edit the book as described in Creating a PhotoBook P52 ERASE Delete the book D o w n l o a d e d f r o m w w w v a n d e n b o r r e b e ...

Страница 72: ...p To pause playback press the selector down press the selector down again to resume To exit to full frame playback press the selector up while panorama playback is in progress Once displayed in full frame playback panoramas can be zoomed in or out using the zoom control or deleted by pressing the selector up b PLAY STOP PAUSE D o w n l o a d e d f r o m w w w v a n d e n b o r r e b e ...

Страница 73: ...work When connecting to smartphones you can use the following functions Taking pictures using smartphones Uploading pictures to smartphones Browsing and downloading the pictures on the camera using smartphones Downloading location data from smartphones Before proceeding download the free FUJIFILM Camera Remote app and install it on your smartphone This option can also be enabled by rWIRELESS COMMU...

Страница 74: ...yback to save pictures to a computer over a wireless network Before proceeding install the free FUJIFILM PC AutoSave application to the destination computer and adjust settings as desired This option can also be enabled by sPC AUTO SAVE from playback menu D o w n l o a d e d f r o m w w w v a n d e n b o r r e b e ...

Страница 75: ...f photos that can be taken during recording To end recording press the t button again Recording ends automatically when the movie reaches maximum length or memory is full Automatic Scene Selection InQmode thecameraselectsthesceneaccordingtoshooting conditions and the type of subject d portraits d poorly lit landscapes dd poorly lit portraits c landscapes e close ups or a other subjects REC 1 12m34...

Страница 76: ...the setup menu P94 R R If the subject is poorly lit the AF assist lamp may light to assist the focus operation To turn the AF assist lamp off select OFF for C AF ILLUMINATOR P94 R R Focus exposure and white balance are adjusted automatically throughout recording the focus mode can be selected using the F MOVIE AF MODE option in the shooting menu P77 The color and brightness of the image may vary f...

Страница 77: ...y rise if it is used to record movies for an extended period or if the ambient temperature is high This is normal and does not indicate a malfunction Q Q The mode selected may vary with shooting conditions D o w n l o a d e d f r o m w w w v a n d e n b o r r e b e ...

Страница 78: ...e selector up will delete the movie Adjust speed Press the selector left or right to adjust playback speed during playback Adjust volume Press MENU OK to pause playback and display volume controls Press the selector up or down to adjust the volume and press MENU OK to exit Volume can also be adjusted from the setup menu PLAY Playback Speed Press the selector left or right to adjust playback speed ...

Страница 79: ...cable is connected pictures and sound are played back on theTV 2 Tune the television to the HDMI input channel See the documentation supplied with the television for details 3 Press the a button for about a second to turn the camera on The camera monitor turns off and pictures and movies are played back on theTV Note that the camera volume controls have no effect on sounds played on the TV use the...

Страница 80: ...l the functions described below may be supported 1 Connect the USB cable as shown and turn the printer on 2 Turn the camera on 3 Press the selector left or right to display a picture you wish to print 4 Press the selector up or down to choose the number of copies up to 99 5 Repeat steps 3 4 to select additional pictures Press MENU OK to display a confirmation dialog when settings are complete D o ...

Страница 81: ...SB csable R R Pictures can be printed from internal memory or a memory card that has been formatted in the camera R R If no pictures are selected the camera will print one copy of the current picture R R Page size print quality and border selections are made using the printer Printing the Date of Recording To print the date of recording on pictures press DISP BACK in the PictBridge display and sel...

Страница 82: ...des the pictures to be printed and the number of copies of each picture 1 Select playback mode and press MENU OK to display the playback menu 2 Highlight KPRINT ORDER DPOF and press MENU OK 3 Highlight one of the following options and press MENU OK WITH DATE s Print the date of recording on pictures WITHOUT DATE Do not print the date of recording on pictures R R Some printers do not support date p...

Страница 83: ...OK when settings are complete 7 A confirmation dialog will be displayed Press MENU OK to save the print order R R Remove the memory card to create or modify a print order for the pictures in internal memory R R Print orders can contain a maximum of 999 pictures R R If a memory card is inserted containing a print order created by another camera a message will be displayed Create a new print order a...

Страница 84: ...ies to Mac Proceed to Connecting the Camera P70 Windows DownloadingandInstallingMyFinePixStudiotoaComputer If CD ROM is not included in the Supplied Accessories P1 download MyFinePix Studio from the following website http fujifilm dsc com mfs Double click the downloaded file MFPS_Setup EXE to start the installer and follow the on screen instructions to install MyFinePix Studio When installation is...

Страница 85: ...r or better Other Built in USB port recommended Operation is not guaranteed with other USB ports NET Framework 3 5 Service Pack 1 required when uploading images or using Map Viewer Internet connection broadband recommended required to install NET Framework if necessary to use auto update feature and when performing such tasks as sharing pictures on line or via e mail 1 Other versions of Windows ar...

Страница 86: ... Studio and follow the on screen instructions to install MyFinePix Studio If the Installer Does Not Start Automatically Windows 7 WindowsVista If the installer does not start automatically select Computer or My Computer from the Start menu then double click the FINEPIX CD icon to open the FINEPIX CD window and double click setup or SETUP EXE If the Installer Does Not Start Automatically Windows 8 ...

Страница 87: ... re install the software Installation is now complete Proceed to Connecting the Camera P70 Windows UninstallingMyFinePixStudio Only uninstall the software when it is no longer required or before beginning reinstallation 1 Afterquittingthesoftwareanddisconnectingthecamera openthecontrol panel and use Programs and Features to uninstall MyFinePix Studio 2 Under Windows one or more confirmation dialog...

Страница 88: ...damage to internal memory or the memory card Charge the battery before connecting the camera 2 Turn the camera off and connect the supplied USB cable as shown making sure the connectors are fully inserted Connect the camera directly to the computer do not use a USB hub or keyboard 3 Press the a button for about a second to turn the camera on and follow the on screen instructions to copy pictures t...

Страница 89: ...der to transfer pictures Q Q Make sure that the computer does not display a message stating that copying is in progress before turning the camera off or disconnecting the USB cable Failure to observe this precaution could result in loss of data or damage to internal memory or the memory card Q Q Disconnect the camera before inserting or removing memory cards Q Q The user bears all applicable fees ...

Страница 90: ...ccording to the type of subject P25 NISO Control the camera s sensitivity to light Higher values can reduce blur note however that mottling may appear in pictures taken at high sensitivities 100 ISO 6400 Bright Scene Dark Less noticeable Noise mottling More noticeable Option Description AUTO 1600 AUTO 800 AUTO 400 Sensitivity is adjusted automatically in response to shooting conditions but will no...

Страница 91: ... to be recorded O4 3 Size Aspect ratio Q Q When pictures are recorded to internal memory the default value is set to Q 4 3 SizeVersus Aspect Ratio Size Option Prints at sizes up to O 34 25cm 13 5 10in P 24 18cm 9 5 7in Q 17 13cm 7 5in Aspect ratio 4 3 Pictures have the same proportions as the camera display 3 2 Pictures have the same proportions as a frame of 35 mm film 16 9 Suited for display on ...

Страница 92: ...res in black and white Option Description c STANDARD Standard contrast and saturation Recommended in most situations a CHROME Vivid contrast and color Choose for vivid shots of flowers or enhanced greens and blues in landscapes b B W Take pictures in black and white f SEPIA Take pictures in sepia R R Settings other than c STANDARD are shown by an icon in the LCD monitor R R Depending on the subjec...

Страница 93: ...ts in direct sunlight j For subjects in the shade k Use under daylight fluorescent lights l Use under warm white fluorescent lights m Use under cool white fluorescent lights n Use under incandescent lighting g For underwater photography R R Results vary with shooting conditions Play pictures back after shooting to check colors in the LCD monitor D o w n l o a d e d f r o m w w w v a n d e n b o r ...

Страница 94: ... FINAL R R See page 113 for the frame rate and number of pictures taken in each mode R R Focus and exposure are determined by the first frame in each series R R In P mode OIMAGE SIZE is fixed at Q16 9 R R The flash turns off automatically R R Frame rate varies with shutter speed R R The number of pictures that can be recorded depends on the memory available bFACE DETECTION Choose whether the camer...

Страница 95: ... press the selector left Focus will track the subject as it moves through the frame R R Note that in x mode the camera focuses continuously increasing the drain on the battery and that the sound of the camera focusing may be audible F MOVIE AF MODE This option controls how the camera selects the focus area for movies Option Description r CENTER The camera focuses on the subject in the center of th...

Страница 96: ...s Standard definition k640 480 120fps High speed movie Q Q Sound is not recorded and focus exposure and white balance are not adjusted automatically Q Q Zoom can not be adjusted k320 240 240fps k160 120 320fps Q Q When pictures are recorded to internal memory the default value is set to f 640 480 Q Q No face is detected when shooting in i 1920 1080 60fps D o w n l o a d e d f r o m w w w v a n d e...

Страница 97: ...0 10fps f640 480 60fps Standard definition f640 480 30fps f640 480 10fps r WIRELESS COMMUNICATION When connecting to smartphones you can use the following functions Taking pictures using smartphones Uploading pictures to smartphones Browsing and downloading the pictures on the camera using smartphones Downloading location data from smartphones For information on using wireless networks visit http ...

Страница 98: ...he following functions Taking pictures using smartphones Uploading pictures to smartphones Browsing and downloading the pictures on the camera using smartphones Downloading location data from smartphones For information on using wireless networks visit http fujifilm dsc com wifi s PC AUTO SAVE Upload pictures to a computer over a wireless network For information on using wireless networks visit ht...

Страница 99: ...om the end of the copy proceed to Step 5 otherwise proceed to Step 6 5Press the selector down to begin playback and press it down again when the new closing frame is reached 6Press MENU OK to save the copy MOVIE JOIN Add existing footage to the end of the current movie to create an edited copy 1Display the desired movie 2Select nMOVIE EDIT MOVIE JOIN in the playback menu 3Press the selector left o...

Страница 100: ...re is marked with a g icon to indicate that it was taken with Intelligent Face Detection this option can be used to remove red eye The camera will analyze the image if red eye is detected the image will be processed to create a copy with reduced red eye 1Display the desired picture 2Select BRED EYE REMOVAL in the playback menu 3Press MENU OK R R Red eye may not be removed if the camera is unable t...

Страница 101: ...ctures Q Q Protected pictures will be deleted when the memory card or internal memory is formatted P89 GCROP Create a cropped copy of the current picture 1Display the desired picture 2Select GCROP in the playback menu 3Use the zoom buttons to zoom in and out and use the selector to scroll the picture until the desired portion is displayed 4Press MENU OK to display a confirmation dialog 5Press MENU...

Страница 102: ... tall orientation so that they are displayed in tall orientation in the LCD monitor 1Display the desired picture 2Select CIMAGE ROTATE in the playback menu 3Presstheselectordowntorotatethepicture90 clockwise uptorotateit90 counterclockwise 4Press MENU OK The picture automatically be displayed in the selected orientation whenever it is played back on the camera R R Protected pictures can not be rot...

Страница 103: ...rd to internal memory 3Highlight one of the following options and press MENU OK FRAME Copy selected pictures Press the selector left or right to view pictures and press MENU OK to copy the current picture ALL FRAMES Copy all pictures R R Copying ends when the destination is full R R DPOF print information is not copied P64 kPHOTOBOOK ASSIST Create books from your favorite photos P52 KPRINT ORDER D...

Страница 104: ... cable is connected Select 16 9 to display the image so that it fills the screen with its top and bottom cropped out 4 3 to display the entire image with black bands at either side 4 3 16 9 16 9 4 3 R R Photographs with an aspect ratio of 16 9 are displayed full screen those with an aspect ratio of 3 2 in a black frame D o w n l o a d e d f r o m w w w v a n d e n b o r r e b e ...

Страница 105: ...rent menu EXIT SET SET UP EXIT SET SET UP Tab 1 3 Press the selector down to highlight X 1 4 Press the selector right to place the cursor in the setup menu 2 Adjust settings Highlight items and press the selector right to view options then highlight an option and press MENU OK Press DISP BACK to exit when settings are complete D o w n l o a d e d f r o m w w w v a n d e n b o r r e b e ...

Страница 106: ...nutes 3Press MENU OK To switch between local time and your home time zone highlight gLOCAL or hHOME and press MENU OK Option Description hHOME Switch to the time currently selected for FDATE TIME see above gLOCAL Switch to local time If this option is selected g and the time and date will be displayed in yellow for three seconds each time the camera is turned on La Choose a language oSILENT MODE d...

Страница 107: ...he memory card or internal memory Be sure important files have been copied to a computer or other storage device Q Q Do not open the battery cover during formatting AIMAGE DISP default 1 5 SEC Choose how long pictures are displayed in the LCD monitor after shooting Option Description 1 5 SEC Pictures are displayed for 1 5 seconds 1 5 SEC or 0 5 seconds 0 5 SEC Colors may differ slightly from those...

Страница 108: ...Frame number 100 0001 Option Description CONTINUOUS Numbering continues from the last file number used or the first available file number whichever is higher Choose this option to reduce the number of pictures with duplicate file names RENEW Numbering is reset to 0001 after formatting or when a new memory card is inserted R R If the frame number reaches 999 9999 the shutter release will be disable...

Страница 109: ...fault i Choose the sound made by the shutter IPLAYBACK VOLUME default 7 Adjust the volume for movie playback JLCD BRIGHTNESS default AUTO Control the brightness of the display Option Description AUTO Display brightness is automatically adjusted during shooting in response to ambient lighting conditions Brightness is not adjusted during playback MANUAL Press the selector up or down to adjust bright...

Страница 110: ... in some situations the camera turns off automatically even when OFF is selected LIS MODE default l Choose whether image stabilization is performed at all times when the camera is in shooting mode lCONTINUOUS or only when the shutter button is pressed halfway mSHOOTING ONLY Choose OFF to turn image stabilization off when using a tripod b DIGITAL IMAGE STABILIZER default ON If ON is selected camera...

Страница 111: ...GENT DIGITAL ZOOM off W T Optical zoom R R Selecting another mode may end intelligent digital zoom R R When combined with optical zoom intelligent digital zoom offers zoom factors as high as 10 R R Intelligent digital zoom may sometimes produce lower quality images than optical zoom R R The time needed to record images increases R R The effects are not visible in the display during shooting R R In...

Страница 112: ...ra is unable to focus in macro mode try increasing the distance to the subject Q Q Avoid shining the AF assist illuminator directly into your subject s eyes m AUTOROTATE PB default ON Choose ON to automatically rotate tall portrait orientation pictures during playback OBACKGROUND COLOR Choose a color scheme hWIND FILTER Choose ON to reduce the noise of the wind when shooting movies r WIRELESS SETT...

Страница 113: ...n Description R S Stamp new photographs with the date and time of recording R Stamp new photographs with the date of recording OFF Do not stamp the time and date on new photographs Q Q Time and date stamps can not be deleted Turn UDATE STAMP off to prevent time and date stamps appearing on new photographs Q Q If the camera clock is not set you will be prompted to set the clock to the current date ...

Страница 114: ...urers USB cable supplied SD card slot or card reader Computer Computer Related Printing Printer PictBridge compatible printer USB cable Audio Visual SD SDHC SDXC memory card FINEPIX XP90 Series DIGITAL CAMERA HDTV HDMI cable sold separately Available separately D o w n l o a d e d f r o m w w w v a n d e n b o r r e b e ...

Страница 115: ...JIFILM representative or visit http www fujifilm com products digital_ cameras index html Rechargeable Li ion batteries NP 45S Additional large capacity NP 45S rechargeable batteries can be purchased as required Battery chargers BC 45W Replacement battery chargers can be purchased as required The BC 45W charges an NP 45S battery in about 120 minutes at 20 C 68 F D o w n l o a d e d f r o m w w w v...

Страница 116: ...xtremely cold subject to strong vibration exposed to strong magnetic fields such as near a broadcasting antenna power line radar emitter motor transformer or magnet in contact with volatile chemicals such as pesticides next to rubber or vinyl products Condensation Sudden increases in temperature such as occur when entering a heated building on a cold day can cause condensation inside the camera If...

Страница 117: ...LM lens cleaning paper to which a small amount of lens cleaning fluid has been applied Care should be taken to avoid scratching the protective glass or LCD monitor The camera body can be cleaned with a soft dry cloth Do not use alcohol thinner or other volatile chemicals Traveling Keep the camera in your carry on baggage Checked baggage may suffer violent shocks that could damage the camera D o w ...

Страница 118: ... Latch the battery chamber cover P10 The battery runs down quickly Thebatteryiscold Warmthebatterybyplacingitinapocketorotherwarmplaceandreinsert it in the camera immediately before taking a picture There is dirt on the battery terminals Clean the terminals with a soft dry cloth Q is selected for shooting mode Select B mode to reduce the drain on the battery P25 xTRACKING is selected for FAF MODE ...

Страница 119: ...plays are not in English Select ENGLISH for La P19 88 Shooting Problem Solution No picture is taken when the shutter button is pressed Memory is full Insert a new memory card or delete pictures P9 50 Memory is not formatted Format the memory card or internal memory P89 There is dirt on the memory card contacts Clean the contacts with a soft dry cloth The memory card is damaged Insert a new memory ...

Страница 120: ...the frame than the main subject Recompose the picture or turn face detection off and frame the picture using focus lock P35 The flash does not fire Theflashisnotavailableinthecurrentshootingmode Chooseadifferentshootingmode P25 Thebatteryisexhausted Chargethebatteryorinsertafully chargedsparebattery P7 14 Thecameraisincontinuousmode Presstheburstmodebuttontoselectsingle framemode P46 The camera is...

Страница 121: ...sly at high temperatures Turn the camera off and wait for it to cool down Smear in the form of vertical purple or white lines appears in the display Vertical purple or white lines may appear after the camera has been used continuously at high temperatures or when a very bright object is in the frame this phenomenon is common to all CCD image sensors and does not indicate a malfunction These lines ...

Страница 122: ...hone was obstructed Hold the camera correctly during recording P21 57 The speaker is obstructed Hold the camera correctly during playback P60 Selected pictures are not deleted Some of the pictures selected for deletion are protected Remove protection using the device with which it was originally applied P83 File numbering is unexpectedly reset The battery chamber cover was opened while the camera ...

Страница 123: ... printed The printer is not PictBridge compatible The camera is unresponsive Temporary camera malfunction Remove and reinsert the battery P7 The battery is exhausted Charge the battery P14 or insert a fully charged spare battery P7 The camera is connecting to a wireless network Disconnect from the wireless network The camera does not function as expected Remove and reinsert the battery P7 If the p...

Страница 124: ...es The smartphone is connected to another device The smartphone and camera can connect to only one device at a time End the connection and try again There are several smartphones in the vicinity Try connecting again The presence of multiple smartphones can make connection difficult The current image is a movie or was created on another device and can not be uploaded to a smartphone Smartphone will...

Страница 125: ...d Ifthesubject is dark use the flash P39 FOCUS ERROR Camera malfunction or moving parts of lens obstructed Turn the camera off and then on again taking care not to touch the lens If the message persists contact a FUJIFILM dealer TURN OFFTHE CAMERA ANDTURN ON AGAIN LENS CONTROL ERROR CARD NOT INITIALIZED The memory card or internal memory is not formatted or the memory card was formatted in a compu...

Страница 126: ... pictures or insert a memory card with more free space b MEMORY FULL INTERNAL MEMORY IS FULL INSERT A NEW CARD WRITE ERROR Memory card error or connection error Reinsert the card or turn the camera off and then on again If the message persists contact a FUJIFILM dealer Not enough memory remaining to record additional pictures Delete pictures or insert a memory card with more free space The memory ...

Страница 127: ...n 999 frames were selected for deletion Perform a different search or select fewer pictures PROTECTED FRAME Anattemptwasmadetodeletetoaprotectedpicture Removeprotectionandtryagain P83 a CAN NOT crop a pictures can not be cropped CAN NOT crop The picture is damaged or was not created with the camera PCANNOT EXECUTE An attempt was made to create a resized copy at a size equal to or larger than the o...

Страница 128: ...er printer error Check printer see printer manual for details To resume printing turn the printer off and then turn it back on PRINTER ERROR RESUME Printeroutofpaperorink orotherprintererror Checkprinter seeprintermanualfordetails If printing does not resume automatically press MENU OK to resume CANNOT BE PRINTED An attempt was made to print a movie a picture not created with the camera or a pictu...

Страница 129: ...0 3 870 2 580 NORMAL 970 1 060 1 310 1 290 1 840 2 090 2 450 2 480 3 740 3 260 5 360 3 710 8GB FINE 1 070 1 190 1 400 1 400 2 110 2 340 2 810 2 870 5 010 4 380 7 640 5 150 NORMAL 2 030 2 220 2 700 2 680 3 810 4 350 5 050 5 160 7 800 6 790 11 250 7 760 Movies i1920 1080 60fps 1 i1920 1080 30fps 1 h1280 720 60fps 1 f640 480 30fps 2 k640 480 120fps 3 k320 240 240fps 3 k160 120 320fps 3 4GB 36min 36mi...

Страница 130: ...O 16 9 4 608 2 592 O 1 1 3 456 3 456 P 4 3 3 264 2 448 P 3 2 3 264 2 176 P 16 9 3 264 1 840 P 1 1 2 432 2 432 Q 4 3 2 048 1 536 Q 3 2 2 304 1 536 Q 16 9 1 920 1 080 Q 1 1 1 728 1 728 Lens Fujinon 5 optical zoom lens F3 9 wide angle F4 9 telephoto Focal length f 5 0mm 25 0mm 35 mm format equivalent 28mm 140mm Digital zoom Up to about 2 with intelligent digital zoom up to 10 when combined with optic...

Страница 131: ...al and electronic shutter Q B P g k C h M Y N O Q R s F s U V W 1 4s 1 2 000s j 1 8 s 1 2 000 s r 1 30 s 1 2 000 s H 4 s 1 2 000 s Continuous Approx frame rate fps 1 Continuous frames Image size 2 O 3 0 10 OP 40 Q K 5 0 10 OP 20 Q J 10 10 OP 20 Q P 60 70 Q16 9 Q 3 0 10 OP 20 Q N 5 0 10 OP 20 Q M 10 10 OP 20 Q 1 The frame rate varies with shooting conditions and the number of images recorded 2 Use ...

Страница 132: ...ctiverangewhensensitivityissettoAUTOisapprox 70cm 4 4m 2 3ft 14 4ft wide angle 1 0m 3 8m 3 2ft 12 4ft telephoto effective range in macro mode is approx 30cm 2 0m 1 0ft 6 5ft wide angle 1 0m 3 0m 3 2ft 9 8ft telephoto Flash mode Auto fill flash off slow sync red eye removal off auto with red eye removal fill flash with red eye removal off slow sync with red eye removal red eye removal on LCD monito...

Страница 133: ...e using battery supplied with camera and SD memory card Note Number of shots that can be taken with battery varies with battery charge level and will decline at low temperatures Charging time Approx 120 minutes 20 C 68 F Camera dimensions W H D 109 6mm 71 0mm 27 8mm 4 3in 2 7in 1 0in excluding projections Shooting weight Approx 203g 7 1oz including battery and memory card Camera weight Approx 186g...

Страница 134: ...5S rechargeable battery Nominal voltage DC 3 7V Nominal capacity 740mAh Dimensions W H D 31 4 mm 39 5 mm 5 8 mm 1 2in 1 5in 0 2in Weight Approx 19 0g 0 6oz AC power adapter Rated input 100V 240V AC 50 60Hz Input capacity 100V 11 6VA 240V 15 5VA Rated output 5 0V DC 1000mA Operating temperature 0 C 40 C 32 F 104 F Weight Approx 32g 1 1oz Weight and dimensions vary with the country or region of sale...

Страница 135: ...anomalous colors may appear particularly in the vicinity of text This is normal for this type of LCD monitor and does not indicate a malfunction images recorded with the camera are unaffected Digital cameras may malfunction when exposed to strong radio interference e g electric fields static electricity or line noise Due to the type of lens used some distortion may occur at the periphery of images...

Страница 136: ...7 3 AKASAKA 9 CHOME MINATO KU TOKYO 107 0052 JAPAN http www fujifilm com products digital_cameras index html D o w n l o a d e d f r o m w w w v a n d e n b o r r e b e ...

Страница 137: ...4 4 4 4 4 4 4 4 e i 4 4 4 4 4 4 4 4 4 4 4 4 4 4 4 4 4 4 F F 4 4 4 4 4 4 4 41 41 41 H 4 4 4 4 4 4 41 41 4 41 41 41 41 41 41 41 41 41 d 4 N AUTO 41 41 41 41 41 41 41 41 41 41 41 41 41 41 41 41 41 41 41 41 41 AUTO 1600 4 AUTO 800 4 AUTO 400 4 6400 4 3200 4 1600 4 800 4 400 4 200 4 100 4 O O 4 4 4 4 4 4 4 4 4 4 4 4 4 4 4 4 4 4 4 P 4 4 4 4 41 41 4 4 4 4 4 4 4 4 4 4 4 4 4 4 4 Q 4 4 4 4 4 4 4 4 41 4 4 4 ...

Страница 138: ...4 4 4 4 f640 480 30fps 4 4 4 4 4 4 4 4 4 4 4 4 4 4 4 4 4 4 4 4 4 4 k640 480 120fps 4 4 4 4 4 4 4 4 4 4 4 4 4 4 4 4 4 4 4 4 4 k320 240 240fps 4 4 4 4 4 4 4 4 4 4 4 4 4 4 4 4 4 4 4 4 4 k160 120 320fps 4 4 4 4 4 4 4 4 4 4 4 4 4 4 4 4 4 4 4 4 4 F F r 4 4 4 4 4 4 4 4 4 4 4 4 4 4 4 4 4 4 4 4 4 4 u 4 4 4 4 4 4 4 4 4 4 4 4 4 4 4 4 4 4 4 4 4 4 L l 4 4 4 4 4 4 4 4 4 4 4 4 4 4 4 4 4 4 4 4 4 4 m 4 4 4 4 4 4 4...

Отзывы: