Frigidaire LAD254NTL0, Use & Care Manual
The Frigidaire LAD254NTL0 is a high-quality appliance designed for your convenience. To ensure optimal performance and longevity, it is important to refer to the Use & Care Manual. You can easily download this manual for free from our website, allowing you to make the most of your Frigidaire LAD254NTL0.
Share
Download


Reviews:
No comments
Related manuals for LAD254NTL0

23.690.40
Brand: EINHELL Pages: 96

CFO-16E
Brand: Sinclair Pages: 36

HD60002
Brand: Emerson Pages: 12

MoistAIR HD1405
Brand: Emerson Pages: 16

MoistAIR HD1205
Brand: Emerson Pages: 16

MoistAir MA 1200
Brand: Emerson Pages: 20

HD13002
Brand: Emerson Pages: 16
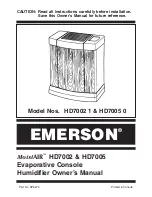
HD7002-1
Brand: Emerson Pages: 16

MA0800
Brand: Emerson Pages: 16

MA1200-1
Brand: Emerson Pages: 19

CRN100
Brand: Champion Pages: 12

CRN Series
Brand: Champion Pages: 20

HM5080
Brand: Holmes Pages: 2

HM1701
Brand: Holmes Pages: 2

L4
Brand: CorroVenta Pages: 44

T90
Brand: MICROWELL Pages: 20

BASIC BCHA
Brand: Swegon Pages: 6

albert little
Brand: Stadler Form Pages: 29


