Frigidaire 316257124, Use & Care Manual
The Frigidaire 316257124 Use & Care Manual is a must-have for owners of this appliance. This comprehensive manual provides detailed instructions and essential tips for optimal use and care. Download it for free from manualshive.com, ensuring you have all the information you need to maximize your product's performance.
Share
Download


Reviews:
No comments
Related manuals for 316257124

JGBS23WELWW
Brand: GE Pages: 2

Modernist Pro DOP36M94D
Brand: Dacor Pages: 76

HC90CMV1
Brand: Fisher & Paykel Pages: 12

PROFESSIONAL GR-600B
Brand: Mueller Pages: 36
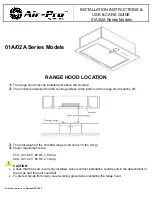
01A series
Brand: Air-Pro Pages: 18

Renaissance Series MRES30S
Brand: Dacor Pages: 16

EXB-4J
Brand: Multistore Pages: 7

4365A
Brand: Southbend Pages: 34

PRO-STYLE PRG3010
Brand: Jenn-Air Pages: 18

HB1113223
Brand: Cannon Pages: 16

MCSRG24S
Brand: Magic Chef Pages: 44

FE-R500WW
Brand: Samsung Pages: 62

NX58R9421SS
Brand: Samsung Pages: 156

CGEF3055MBB
Brand: Frigidaire Pages: 44

CGEF3055KBB
Brand: Frigidaire Pages: 35

CGEF3057KFC
Brand: Frigidaire Pages: 40

KGSS907SBL01
Brand: KitchenAid Pages: 20

JGSPIOGEK
Brand: GE Pages: 28


