Flymo Contour Power Plus EIT250, Important Information Manual
The Flymo Contour Power Plus EIT250 is a powerful and efficient electric grass trimmer that will make your lawn maintenance a breeze. To ensure its optimal usage and safety, it comes with an Important Information Manual that you can easily download for free from manualshive.com. Stay informed and maximize your trimming experience with this handy manual.
Share
Download


Reviews:
No comments
Related manuals for Contour Power Plus EIT250

EasyCut 400/25
Brand: Gardena Pages: 15

ComfortCut 450/25
Brand: Gardena Pages: 16

EasyCut Li-18/23 R
Brand: Gardena Pages: 16

EasyCut Li-18/23 R
Brand: Gardena Pages: 11

HHSI 6055
Brand: Hurricane Pages: 124

HCA-2620ES-HD
Brand: Echo Pages: 176
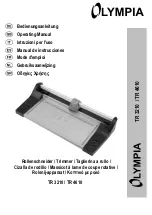
TR 4610
Brand: Olympia Pages: 16

52742
Brand: Gardenline Pages: 36

14732
Brand: Gardena Pages: 11

9830
Brand: Gardena Pages: 14

LGT777-5
Brand: XTline Pages: 47

EM19
Brand: TEM Pages: 2

GTC18LI
Brand: Draper Pages: 22

PBC254YES
Brand: Ryobi Pages: 199

B33 P
Brand: McCulloch Pages: 368

EHT 600 PROXH 600E-PRO
Brand: Alpina Pages: 11

8401020
Brand: Haussmann Pages: 24

AHS 1845 T Lion
Brand: Grizzly Tools Pages: 145


