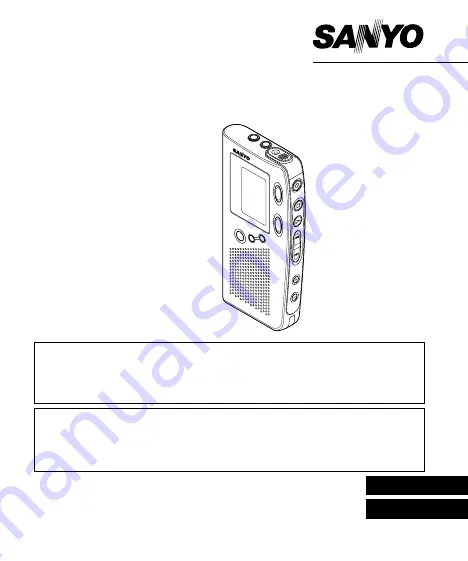
background image

ICR-B50

INSTRUCTION MANUAL

Digital Voice Recorder

ENGLISH

ESPAÑOL

SANYO'S HELP-LINE
Call the toll-free number below if you have any difficulties operating this
product.
1-877-999-1840 (Weekdays 8:00 AM - 5:00 PM, Pacific Time)

LlNEA DE CONSULTA SANYO
Llame gratis al número indicado a continuación si tiene dificultades al
utilizar este producto.
1-877-999-1840 (días laborables de 8:00 AM a 5:00 PM, hora del Pacífico)

1AD6P1P1429--A
ICR-B50, Issue Number 2, Printed in China

Summary of Contents for ICR-B50

Page 1: ...difficulties operating this product 1 877 999 1840 Weekdays 8 00 AM 5 00 PM Pacific Time LlNEA DE CONSULTA SANYO Llame gratis al n mero indicado a continuaci n si tiene dificultades al utilizar este p...

Page 2: ...on or malfunction of the unit we recommend that you save a backup copy of your recorded massages on the PC etc ENGLISH CONTENTS ACCESSORIES 2 PRECAUTIONS 2 CONTROLS 3 POWER SUPPLY 4 BEFORE OPERATION 5...

Page 3: ...2...

Page 4: ...3...

Page 5: ...4 POWER SUPPLY Batteries 1 Open the battery compartment lid 2 Install two AAA batteries Observe proper polarity Battery indicator...

Page 6: ...button to turn on the power The display appears as shown right The unit is now in standby mode To turn off the power press the n button for at least 1 second in the stop mode Auto power off function...

Page 7: ...s 5 Set the month day hour and minute by following steps 3 4 above The time can be set accurately by pressing the TIME SET button when a time signal is heard 6 Press the n button to return the origina...

Page 8: ...odes below 4 Press the TIME SET button to set it 5 Repeat steps above to change other settings 6 Press the n button to return to the original display Various menu modes FOLDER Selecting folder mode PE...

Page 9: ...rding time mode REC STAND Standard wv REC LONG REC STAND For better sound quality The unit can record for up to approx 80 minutes REC LONG For longer recording The unit can record for up to approx 110...

Page 10: ...he desired folder name VAS and recording time modes See SELECTING THE MENU MODE 4 Press the m button red Recording starts with new file number Example The display appears as shown below Folder name Cu...

Page 11: ...se Press the m button The elapsed recording time blinks on the display To resume recording press the button again EDITING THE RECORDED DATA Overwrite recording To overwrite recorded material Previous...

Page 12: ...k then press the a button to pause 3 Press the m button Insertion recording starts from the paused position The CUE INDEX button will not function during insertion recording 4 Press the n button to st...

Page 13: ...desired file select the file number by pressing the c or d button then press the a button If no data was recorded in the selected folder NO DATA appears 4 Press the or VOLUME button as desired 5 Pres...

Page 14: ...le File search If the c or d button is pressed during playback the unit will search at high speed in the forward or reverse direction while the button is being pressed When the button is released norm...

Page 15: ...time v Recording time mode Current file number Total file number Remaining playing time v Original dis play returns In stop mode Recording time mode Remaining recording time v Current time v Original...

Page 16: ...number and ERASE blink 3 While the display is blinking press the TIME SET button ERASE ap pears briefly The file memory in the selected folder is erased All the file numbers after the file that was e...

Page 17: ...ile ERASE END is blinking press the TIME SET button ERASE appears briefly The section between points A and B in the selected file is erased Playback pause is issued Notes The ERASE button will not fun...

Page 18: ...links 10 Set the timer ON time by using the TIME SET c or d button Refer to Adjusting the date and time 11 Press the MENU button to select the other folder as desired See SELECTING THE MENU MODE When...

Page 19: ...emo Scriber CD ROM in the CD ROM drive of the PC The set up program starts automatically Note If the set up program doesn t start 1 Choose Run on the Start menu 2 Type the following line D PCMEMO setu...

Page 20: ...19...

Page 21: ...ViaVoice User Wizard screen appears 4 Select First Voice Model Sanyo ICR B50 Wavefile in the Voice Model field Select Sanyo ICR B50 Wavefile in the Device field 5 Click Next The Setting Up and the En...

Page 22: ...process Place the unit 5 to 8 cm 2 to 3 inches away from your mouth To prevent the microphone from picking up your breathing do not place the microphone right in front of your mouth Hold it a little b...

Page 23: ...n to turn on the power 2 Select the DICTATING recording mode 3 Select the STANDARD recording time mode 4 Press the m button then start dictating when dictating pay attention to Notes on enrolling Tran...

Page 24: ...23 CLEANING THE CABINET Clean the outside of the unit with a clean soft cloth moistened with lukewarm water Do not use benzene thinner or alcohol since they will mar the finish of the surfaces...

Page 25: ...teries HOLD appears when the operation button is pressed Hold function is set Set the HOLD switch to OFF No sound The earphone is plugged in Unplug the earphone The volume is turned down completely Pr...

Page 26: ...and related media materials printed materials documents such as user manu als andelectronicdocumentswhetherornotretrievedbylicensee on line and shall include any updates and upgrades thereof supplied...

Page 27: ...one any proprietary product to Licensor Separation or division of the Software prohibited This license hereby is granted for a single use only In no circumstances shall Licensee separate divide or com...

Page 28: ...nttothisAgreementtoacquireanyright title orinterest in any trademark copyright patent or other intellectual property of Licensor and shall do nothing to prejudice the value or validity of the respecti...

Page 29: ...LIABLE FOR ANY CON SEQUENTIAL INCIDENTAL DIRECT INDIRECT SPECIAL PUNI TIVE OR OTHER DAMAGES WHATSOEVER INCLUDING WITHOUT LIMITATION DAMAGES FOR LOSS OF BUSINESS PROFITS BUSI NESS INTERRUPTION LOSS OF...

Page 30: ...ditions herein Licensee may also terminate this Agreement at any time by destroying the Software and Documentation and all copies thereof The provisions of sections 2 3 4 5 6 and 7 shall survive any t...

Page 31: ...two conditions 1 this device may not cause harmful interference and 2 this device must accept any interference received including interference that may cause undesired operation FOR HOME OR OFFICE US...

Page 32: ...ain Service Plus Warranty service product operation information or for problem resolution call Toll Free 1 877 999 1840 Weekdays 8 00 AM 5 00 PM Pacific Time THIS WARRANTY IS VALID ONLY ON SANYO DICTA...

Page 33: ...ols as explained in the appropriate model s instruction manual or B the repair of any product whose serial number has been altered defaced or removed This warranty shall not apply to the cabinet or co...

Page 34: ...RRANTY DUE TO CAUSES BEYOND ITS CON TROL SOME STATES DO NOT ALLOW LIMITATIONS ON HOW LONG AN IMPLIED WARRANTY LASTS AND OR DO NOTALLOW THE EXCLU SION OR LIMITATION OF CONSEQUENTIALDAMAGES SO THEABOVE...

Reviews: