background image

MYPOS SMART 2

 | Informazioni preliminari |  1

WITOUCH CORE 6E

USER GUIDE

Summary of Contents for WITOUCH CORE 6E

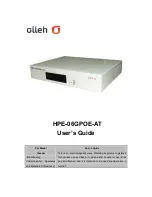
Page 1: ...MYPOS SMART 2 Informazioni preliminari 1 WITOUCH CORE 6E USER GUIDE...

Page 2: ...Dec 2021 User guide realized by FEC ITALIA info fecpos it...

Page 3: ...tions 9 2 Introducing 11 2 1 Front view 15 2 2 Back view 15 2 3 Side view right 16 2 4 Side view left 16 2 5 Bottom view 17 2 6 Motherboard 18 2 7 Package contents 20 2 8 Technical specifications 21 3...

Page 4: ...WITOUCH CORE 6E USER GUIDE 4...

Page 5: ...MYPOS SMART 2 Informazioni preliminari 5 1 PRIOR INFORMATION...

Page 6: ...23 EEC concerning the safety of electrical products and subsequent variations Il simbolo sul prodotto o sulla confezione indica che il prodotto non deve essere considerato come un normale rifiuto dome...

Page 7: ...effect collect et recyclage du mat riel lectrique et lectronique En proc dant la mise la casse r glem entaire de l appareil nous pr servons l environnement et notre s curit s assurant ainsi que les d...

Page 8: ...nde compr el producto O simbolo no produto ou na embalagem indica que este producto n o pode ser tratado como lixo dom stico Em vez disso deve ser entregueado ao centro de recolha selectiva para a rec...

Page 9: ...ce Do not expose the device to high levels of direct sunlight high humidity or wet Do not obstruct ventilation openings or airflow in any way DO NOT expose or use close to liquids rain or humidity DO...

Page 10: ...WITOUCH CORE 6E USER GUIDE 10...

Page 11: ...MYPOS SMART 2 Informazioni preliminari 11 2 INTRODUCING THE SYSTEM...

Page 12: ...rocessors allows top performance and low power consumption with high silence even for high definition graphics applica tions The 21 5 LCD display supports a full HD resolution of 1920 x 1080 px 16 9 f...

Page 13: ...tment of more than 90 or on the wall thanks to the convenient VESA 100 mount The new 10 generation Intel Celeron or Core processors with Intel UHD graphic integrated allow very high performance with l...

Page 14: ...altek integrated WiFi 1 HDMI port 1 VGA port integrated WebCAM 2 0Mpixel 2 integrated 1 5 W speakers Capacitive touch screen 10 touches true flat Microphone jack Headphone jack Image 4 WITOUCH CORE 6...

Page 15: ...WITOUCH CORE 6 E Introducing the system 15 2 1 Front view 1 Webcam 2 LCD Display 3 Power button 1 3 2 3 4 3 1 2 2 2 Back view 1 VESA mount 2 Stand 3 Speaker 4 2 x USB 2 0...

Page 16: ...WITOUCH CORE 6 E USER GUIDE 16 2 3 Side view right 2 4 Side view left 1 2 x USB 2 0 2 Power button Wide display rotation angle 1 2...

Page 17: ...ng the system 17 2 5 Bottom view 1 1 headphone jack 2 1 microphone jack 3 1 x porta LAN Gigabit Ethernet Realtek su RJ45 4 1 x VGA 5 1 x HDMI 6 2 x USB 2 0 7 2 X USB 3 2 Gen 8 Power connector 9 1 x CO...

Page 18: ...hone header For All In One Specification 8 F_AUDIO Front panel audio header 9 BT Battery 10 VGA_HDR VGA D sub header 11 CASE Case open header 12 SATA_PWR SATA power connector 13 USB_CR_CAM USB 2 0 hea...

Page 19: ...e LAN port to connect your compu ter to the Network 7 Line out green It is used to connect to speakers or headphones 8 Microphone pink It is used to connect to a microphone 19 CPU_FAN 4 pin CPU coolin...

Page 20: ...WITOUCH CORE 6 E USER GUIDE 20 2 7 Package contents Witouch Core 6 E n1 Power supply n 1 Keyboard n 1 Mouse...

Page 21: ...to 1TB HDD 500GB Wireless LAN Wi Fi 5 802 11 AC with Bluetooth integrated VESA mount VESA standard 100x100mm Weight about 4 5kg Panel PC only Size LxHxP mm 515x320x50 mm Panel PC only Power supply sta...

Page 22: ...WITOUCH CORE 6E USER GUIDE 22...

Page 23: ...MYPOS SMART 2 Informazioni preliminari 23 3 OPERATING INSTRUCTION...

Page 24: ...is recommended to use only the power supply supplied with the system to avoid damaging the system itself and any connected peripherals Attention The system is supplied with its own power supply Use on...

Page 25: ...WITOUCH CORE 6 E Operating Instruction 25 3 2 Desktop positioning Arrange the display at an angle of 10 to 35 degrees 3 3 ON OFF Connect keyboard mouse LAN and press the power button...

Page 26: ...4 VESA wall mount optional The system can also be installed on the wall using a bracket or arm compati ble VESA 100x100mm The VESA bracket by FEC Italia is designed for wall installation with a suppo...

Page 27: ...on the screen 3 6 Touch screen The touch screen simulates the use of a mouse 1 One touch is the left mouse click 2 Tap and hold is the right mouse click 3 7 Using BIOS BIOS Basic Input and Output Sys...

Page 28: ...WITOUCH CORE 6E USER GUIDE 28...

Reviews: