background image

IL3 / IL4 Quick Start Guide

Equipment

1

2

3

4

5

6

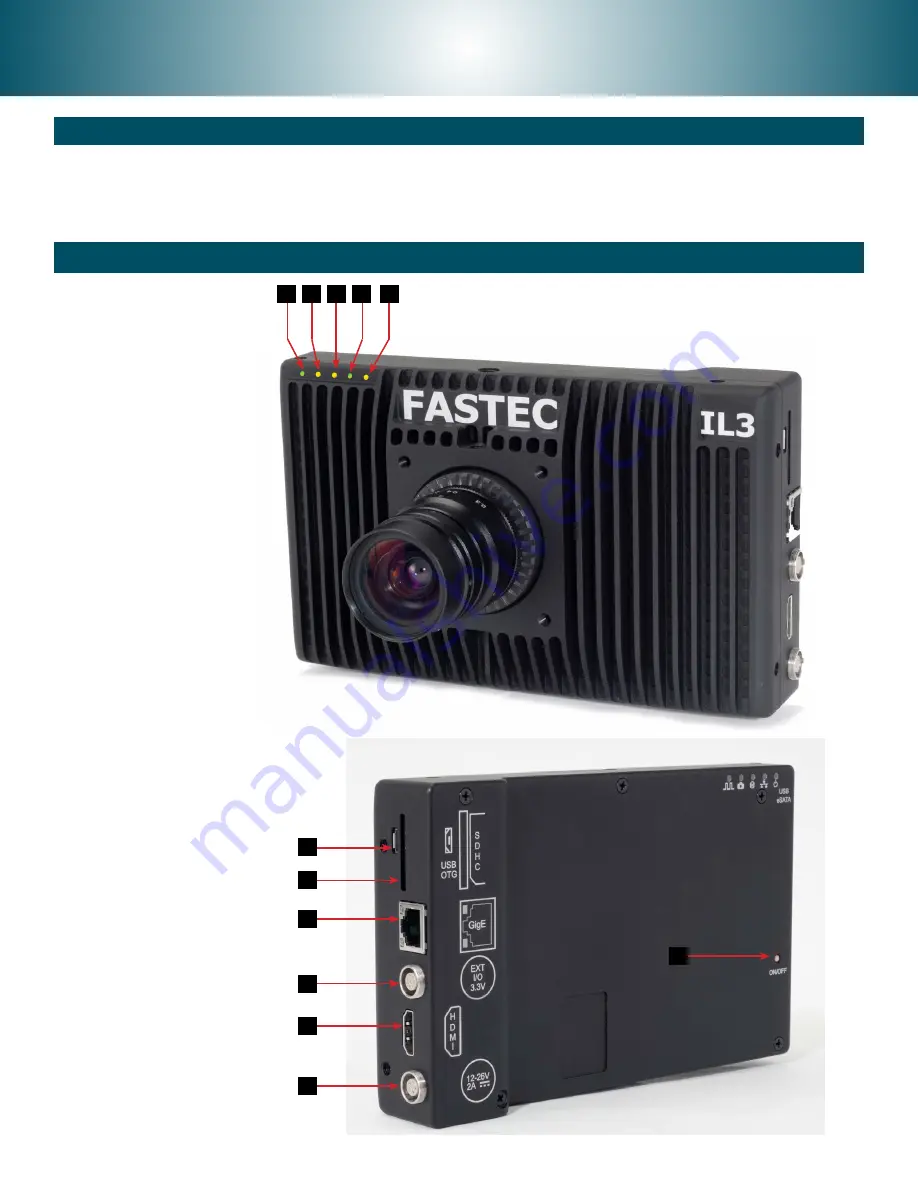
1. USB OTG  (Micro A/B)
2. SDHC (SD-Card slot)
3. GigE Port (RJ45)
4. Sync I/O, Trigger (Lemo)*
5. HDMI Port (Type A)
6. DC Power In (Lemo)**

7. On/Off button

1. Power LED

2. Network Activity LED

3. Storage Activity LED
4. Camera Status LED
5. Sync Activity LED

Figure 1: Camera Views

Unpack the camera and assemble the following:

1.  IL3 / IL4 camera and power adapter with AC power cord

2. 

Lens: ILx ships with a C-Mount adapter installed unless otherwise specified

3. 

Software and documentation on USB Flash drive (included with camera)

4. 

CAT 5e or CAT 6 Ethernet cable

2 3

4

5

1

1

7

*Warning: LVTTL 3.3v max 

**10vdc to 26vdc

Summary of Contents for IL3

Page 1: ...ED 3 Storage Activity LED 4 Camera Status LED 5 Sync Activity LED Figure 1 Camera Views Unpack the camera and assemble the following 1 IL3 IL4 camera and power adapter with AC power cord 2 Lens ILx ships with a C Mount adapter installed unless otherwise specified 3 Software and documentation on USB Flash drive included with camera 4 CAT 5e or CAT 6 Ethernet cable 2 3 4 5 1 1 7 Warning LVTTL 3 3v m...

Page 2: ...green and stay on Within about 45 seconds both the Camera LED and the Power LED will be green At this point the camera is booted up The On Off button on the camera may be used to turn the camera off and on while con nected to power Once connected to FasMotion the camera may be powered down via the software Camera Control Buttons Set the Language in FasMotion To Set the Language for FasMotion 1 Sel...

Page 3: ...trols the relative size and quality of JPEG and AVI files saved from the ILx The range goes from 1 to 100 80 the default setting is a good compromise between quality and size Set Default Gamma Set the Gamma to the setting in which the displayed image on the computer display or HDMI monitor best matches the scene Most LCD and LED monitors will look best at 2 2 Use 1 0 the default if in doubt to pre...

Page 4: ...hosen bumper to the present frame Start and End Clip locations are also used to choose the portion of the recording to be saved The playback buttons function as follows move to beginning one frame back play backwards pause play one frame forward move to end move to trigger frame Start Clip Bumper End Clip Bumper Playback Bug To Save captured video 1 Set the Start and End Clip bumpers to where you ...

Reviews: