Fagor Premium, User Manual
Introducing the Electrolux Premium, a cutting-edge appliance designed to enhance your home. To make the most of its incredible features, download our free Quick Reference Manual from manualshive.com. This comprehensive manual will guide you through every aspect of your Electrolux Premium, ensuring optimal performance and convenience.
Share
Download


Reviews:
No comments
Related manuals for Premium

7320201
Brand: Clarke Pages: 28

157245.01
Brand: ENKHO Pages: 86

Professional Barber HSM1101
Brand: DCG Pages: 20

SEZ-3
Brand: Southbend Pages: 52

PS80544D
Brand: Power Stroke Pages: 40

OBT8418
Brand: HOFFEN Pages: 46

14/534
Brand: Olsberg Pages: 72

NO!NO!
Brand: MY-NO-NO Pages: 30

DBRH001
Brand: Monzana Pages: 8
138.75275
Brand: Craftsman Pages: 23
021022
Brand: Craftsman Pages: 2

16225 - Power Washer With 10 Ft. Chemical Draw Hose
Brand: Craftsman Pages: 12

1250
Brand: Craftsman Pages: 16

2611650
Brand: Craftsman Pages: 2

480.991170
Brand: Craftsman Pages: 32

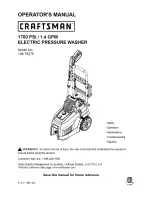
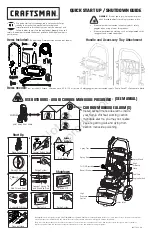
1750
Brand: Craftsman Pages: 20

580.672200
Brand: Craftsman Pages: 40

580.676640
Brand: Craftsman Pages: 52


