1
Thank you for purchasing this 2-Port SATA3 RAID PCI PCIe Card. It is
designed to support up to 2 SATA3 ports in RAID 0 and RAID 1 modes.
It supports SATA3 hard drives with up to 6.0Gbps data rate. It is an
ideal solution to add new external SATA3 drives for your system.
Features:
✓
Supports 1-lane 5.0Gb/s PCI Express Data Transfer Rate
✓
Built-in 2 eSATA3 Ports
✓
Supports RAID 0 and RAID 1 for the 2 SATA3 Ports
✓
Supports Windows based RAID GUI
✓
Supports SATA3 transfer rate up to 6.0Gb/s (600Mbytes/sec)
✓
Supports RAID 1 Rebuild by BIOS Setup Utility
✓
Supports Windows 2000, XP, Vista and Win 7
1.
Power down the computer, remove the computer cover.
EX-3512
2-Port eSATA3 RAID PCIe Card
1. Introduction
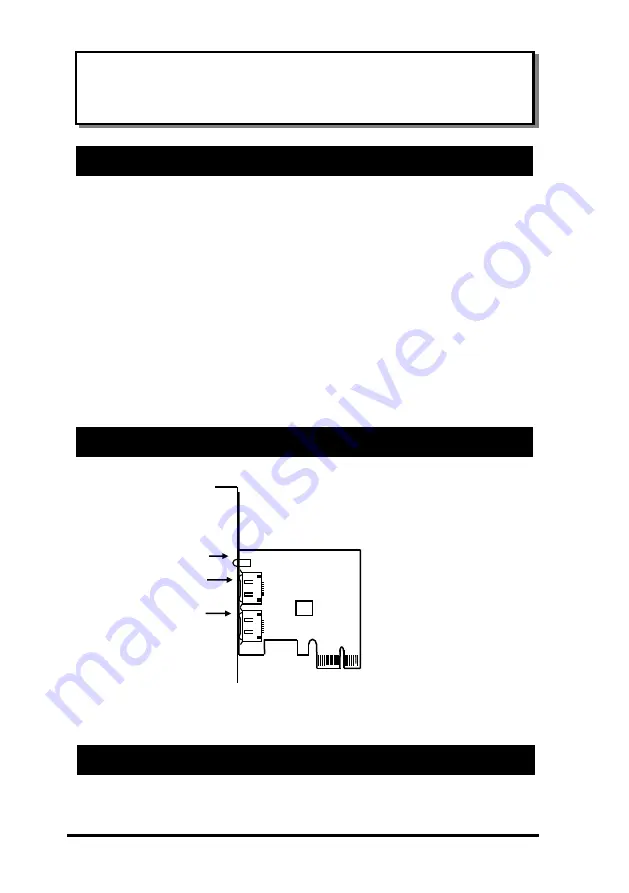
2. Board Layout
3. Hardware Installation
External
eSATA Port 1
External LEDs
External
eSATA Port 0