EUTECH INSTRUMENTS Alpha pH 550, Manual
The EUTECH INSTRUMENTS Alpha pH 550 is a top-notch pH meter for accurate readings. With its user-friendly interface, this practical device ensures precise measurements for various applications. Unlocking the full potential of this innovative tool is a breeze with the free and easily accessible user manual available for download on our website.
Share
Download


Reviews:
No comments
Related manuals for Alpha pH 550

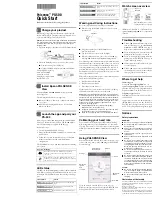
SyncMaster T24A350
Brand: Samsung Pages: 155

Wall Display
Brand: 3M Pages: 4

Be Strong. NV915
Brand: Nautilus Pages: 30

SyncMaster S22A460B
Brand: Samsung Pages: 50

203VW+
Brand: AOC Pages: 25

SUPREME CONNECT 2
Brand: Luvion Pages: 102

2060u
Brand: Mitsubishi Pages: 84

TechTouch MO140RX
Brand: Safety 1st Pages: 10

MPD 06AG
Brand: CyberResearch Pages: 186

HP3-138U
Brand: HORI Pages: 17

19207548
Brand: Bang & Olufsen Pages: 70

BM3510
Brand: VTech Pages: 2

Life Source UA-851THW
Brand: A&D Pages: 72

Sharp XM-2001N
Brand: Atari Pages: 23

Planar PZN2410
Brand: Leyard Pages: 27

MultiSync M981
Brand: NEC Pages: 113

RXi
Brand: Emerson Pages: 69
Pulsense PS-500
Brand: Epson Pages: 4


