Eurolux HBE 2I2G FV, Operating And Installation Instructions
The Eurolux HBE 2I2G FV is a high-quality kitchen rangehood that combines functionality with sleek design. Ensure optimum performance with our thorough Operating and Installation Instructions manual, available for free download from manualshive.com. Get the most out of your product and enjoy a clean, fresh kitchen atmosphere.
Share
Download


Reviews:
No comments
Related manuals for HBE 2I2G FV
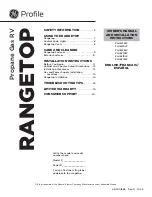
Profile PLU612RW
Brand: GE Pages: 60

HHI8F2BSF
Brand: Hanseatic Pages: 70

GWS 4711.0 M
Brand: Kuppersbusch Pages: 16

VG425115F
Brand: Gaggenau Pages: 16

ZKT 3110S
Brand: ZANKER Pages: 35

JLBIGH602
Brand: John Lewis Pages: 24

GKT814
Brand: Pelgrim Pages: 98

HC411521GB
Brand: AEG Pages: 24

HE614500
Brand: AEG Pages: 52

EKMUE 4.77
Brand: AEG Pages: 17

FM 4360G-an
Brand: AEG Pages: 32

HG653431
Brand: AEG Pages: 20

HE634079XB
Brand: AEG Pages: 36

FM 7803 K-AN
Brand: AEG Pages: 40

FM4300G-AN
Brand: AEG Pages: 28

HG644351
Brand: AEG Pages: 20

HE834080XB
Brand: AEG Pages: 68

FM 7530 K-AN
Brand: AEG Pages: 36


