Epson C11CA31101, User Manual
The Epson C11CA31101 is a high-performance printer designed to efficiently meet all your printing needs. Enhance your experience by getting the most out of this device with the user manual, available for download for free on our website. Discover the full potential of your printer with our comprehensive manual at manualshive.com.
Share
Download


Reviews:
No comments
Related manuals for C11CA31101

ECP5 Versa
Brand: Lattice Semiconductor Pages: 15

NEO-D9S
Brand: Ublox Pages: 17

ThunderLAN TNETE100A
Brand: Texas Instruments Pages: 179

7510 DSU
Brand: Paradyne Pages: 10

Fan Tray 8820-S2-900
Brand: Paradyne Pages: 6

SNMP06
Brand: Xmart Pages: 8

USB-87P1
Brand: ICP DAS USA Pages: 62

G2080TiFE
Brand: Glacier Pages: 2

HiGain H2TU-R-402 List 7A
Brand: ADC Pages: 7

H8S/2633
Brand: Renesas Pages: 28

68568r1
Brand: Proxim Pages: 65

X5
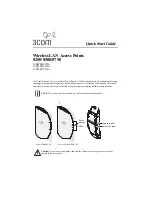
Brand: 3Com Pages: 2
3CRWE825075A
Brand: 3Com Pages: 8

AirProtect Enterprise Engine 6100
Brand: 3Com Pages: 12
i3812V
Brand: 2Wire Pages: 20

4500G Series
Brand: 3Com Pages: 82

ETHERLINK III
Brand: 3Com Pages: 78

iBOX-155
Brand: ASROCK Pages: 2


