background image

Instruction manual

B01 SERIES

Smart Toilet

Summary of Contents for B01 Series

Page 1: ...Instruction manual B01 SERIES Smart Toilet...

Page 2: ......

Page 3: ...Please read this manual thoroughly before using the product Please do not hesitate to contact us if you have any questions in the installation or usage Please safekeeping this manual after reading...

Page 4: ...rts name 10 Remote control panel overview 12 Using instructions 13 Side push button instruction 14 Instructions for remote control Installation 15 Take care of product when long time not in use 16 Inl...

Page 5: ...t if you ignore this sign it may cause personal injury or death It means that if you ignore this sign it may cause personal injury or property damage The following signs are used to indicate important...

Page 6: ...as it might trigger electric shock or ring It is not allowed to pull out and plug in the electric plug by wet hand as it might trigger electric shock or ring It is not allowed to touch the electric pl...

Page 7: ...with heart disease need to carefully and cautiously use this product or use it under the guardian person It is not allowed to let child to play this product child is not allowed to use or touch this p...

Page 8: ...cs EXPANSION SCREW COMPONENT EACH 2pcs 20CM INLET HOSE FAST MOUNTING PLATE ADJUSTMENT SHEET 2pcs REMOTE CONTROL HOLDER Instruction manual B01 SERIES Smart Toilet QC Rev 1 1 Inspector Product Model Pro...

Page 9: ...n turn to stat the posterior cleaning in a average power 2 Maximum power water pressure is 0 18MPa 0 02MPa under the ambient temperature of 23 2 Andunder the condition of 5 1 water inflow theperature...

Page 10: ...extension line which is made by manufacturers Only for reference Please be subject to the physical truth Connect to ground electrode waterproof sockets More than 500mm Connect to ground electrode uni...

Page 11: ...sting Deodorization Seat sensor Soft close function LED Prevent the low temperature scald Heat seat and keep temperature Warm dry cleaned body parts Adjusting temperature of water seat or warm dry Aut...

Page 12: ...t install baseboard and push cover seas as the arrow shown cover seat is installed after sounded Fast install button Tips for installation of fast baseboard 1 Install the baseboard and cover seat ont...

Page 13: ...PT After finish installation turn on the inflow valve to make sure that the seat sensor is sensible and then press each button to check if the toilet is worked after sitting induction is ok The produc...

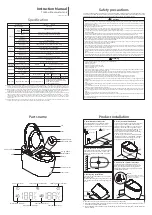
Page 14: ...10 Parts name Posterior cleaning button Ring Spray Posterior cleaning Feminine cleaning Sitting induction Warm dry Decoration panel Poweer indicator Cover Pads Warm dry button Feminine cleaning button...

Page 15: ...or receiving Deodorization window Inlet connector Decorative sheets The appearance of some models is different Power cord buckle Fast install baseboard Fast install button Expansion bolt components Wa...

Page 16: ...ry Turn down temperature of water or wind Turn down ring temperature Water indicator Ring temperature indicator Decrease water outflow Water wind temperature indicator Swing Move forward the spray bar...

Page 17: ...ature setting Under rear mode or bidet mode the initial gear is 3 press plus button will increase the water temperature press minus button will decrease the water temperature Total 5 gears and corresp...

Page 18: ...nderdry mode press the dry button to stop drying Push button function show Function 1 Under posterior feminine cleaning mode push forward the side button to adjust the position of the nozzle default g...

Page 19: ...lazed tiles glass and smooth walls Drill hole of 46mm 52mm length and 22mm depth on the wall by the drill with the diameter of 6mm Note the position of the hole shall be satisfied when the person is s...

Page 20: ...urn off inlet valves And turn on the long braided pipe 30cm and drain water out of pipe Press water outflow button to drain water out of toilet Press fast install button remove cover seat from toilet...

Page 21: ...all the water inflow filter screen Open the water inflow valve Close the water inflow valve Take off the water inflow filter Pull the plug and then unscrew the hose Press the quick installation button...

Page 22: ...e or smooth cloth with soap or mild detergent After installing the nozzle Press the Stop button or press the Posterior cleaning button Bidet Button after 2 second the nozzle will be antomatic retracti...

Page 23: ...activated carbon filter Please close to the position of the sensor as far as possible when you use it Adjust the seat temperature with remote control Adjust the water temperature with remote control T...

Page 24: ...s If the power light glitters 4 times as it lights for 2 seconds If the power light glitters 7 times as it lights for 2 seconds When the product is in use the leakage protection switch on the power su...

Page 25: ...nty period the following situations need to be repaired for a fee Faults or damages caused by the improper operation repair or reinstall Faults or damages caused by forced movement after the product i...

Page 26: ...22 Maintenance record Cutting line...

Page 27: ...20180815 REV1 0...

Page 28: ......

Reviews: