Elmo Gold Solo Double Twitter Series, Installation Manual
The Elmo Gold Solo Double Twitter Series offers top-quality audio performance for professional musicians and sound enthusiasts. To ensure seamless and hassle-free installation, make sure to download the free Installation Manual from our website. Explore the wide range of features and functions this product has to offer at manualshive.com.
Share
Download


Reviews:
No comments
Related manuals for Gold Solo Double Twitter Series

Ultrium 3580
Brand: IBM Pages: 20

DS6125mini
Brand: MKS Pages: 5

300820U - DVD+/-RW Drive Slim Design
Brand: LaCie Pages: 34

FR-A5NP
Brand: Mitsubishi Electric Pages: 59

FR-A 500
Brand: Mitsubishi Electric Pages: 66
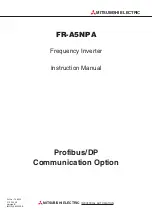
FR-A5NPA
Brand: Mitsubishi Electric Pages: 73

FR-A500 Series
Brand: Mitsubishi Electric Pages: 303

QnA Series
Brand: Mitsubishi Electric Pages: 22

FR-A700 EC
Brand: Mitsubishi Electric Pages: 826

+Q957
Brand: ABB Pages: 20

10.300
Brand: BTR Pages: 28

SINAMICS GL150
Brand: Siemens Pages: 168

Sinamics S120M
Brand: Siemens Pages: 186

Sinamics GM150 6SL3835-2LN44-2AA0
Brand: Siemens Pages: 238

SINAMICS PM240-2
Brand: Siemens Pages: 144

SINAMICS S150
Brand: Siemens Pages: 520

SINAMICS PERFECT HARMONY GH180
Brand: Siemens Pages: 538

SINAMICS G150
Brand: Siemens Pages: 680


