Elkron ELR60RT, Manual For Installation And Use
The Elkron ELR60RT is a cutting-edge security system that provides advanced protection for your home or business. With its sleek design and state-of-the-art features, this product ensures peace of mind. Take advantage of our free download for the comprehensive "Manual For Installation And Use" at manualshive.com, empowering you to effortlessly install and utilize your Elkron ELR60RT system.
Share
Download


Reviews:
No comments
Related manuals for ELR60RT
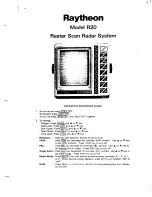
R20
Brand: Raytheon Pages: 22

PL-990x
Brand: Tecsun Pages: 36

7720V2
Brand: ADEMCO Pages: 24

WS-8318U
Brand: La Crosse Technology Pages: 19

SpeedFighter 2
Brand: Mali Racing Pages: 40

2000629
Brand: Radio Shack Pages: 12

Sangean- RCR-3
Brand: Sangean Pages: 24

TX3550S
Brand: GME Pages: 39

420855102108
Brand: I-Rad Pages: 15

Model Two
Brand: Tivoli Audio Pages: 2

NetWorks Speaker
Brand: Tivoli Audio Pages: 24

SongBook
Brand: Tivoli Audio Pages: 14

Model One Digital
Brand: Tivoli Audio Pages: 429

PR 570 PLLS
Brand: Hyundai Pages: 28

B36Q
Brand: Clas Ohlson Pages: 44

Q2
Brand: Armour Home Electronics Pages: 25

UH037
Brand: Uniden Pages: 11

TP7110
Brand: Tait Pages: 2


