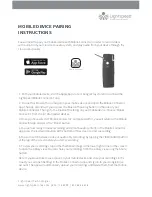
background image

Summary of Contents for HP-2002APn

Page 1: ......

Page 2: ...time in the contents hereof without obligation to notify any person of such revision or changes The product you have purchased and the setup screen may appear slightly different from those shown in this QIG For more detailed information about this product please refer to the User Manual on the CD ROM The software and specifications are subject to change without notice Please visit our web site www...

Page 3: ...y in arrangement of a new network with your existing wired or wireless network No extra cost is needed This product complies with the HomePlug AV mode and IEEE802 11b g compatible with 1T1R 802 11n wireless standards which providing up to 200Mbps 150Mbps data transfer rate This product enables you to create a network easily and cost effectively it is a good choice for you to create a new network o...

Page 4: ...ne CD ROM Including all the software utilities drivers Multi languages Quick Installation Guide and User s Manual If any item is missing or damaged please contact your local resellers for service Note CD ROM with the management Utility could help you to manager all of the HomePlug devices in the LAN The Utility is not necessary when you use the internet via HP 2002APn ...

Page 5: ... device runs normally Off Power is off or the device is down WLAN Green On Radio switch is turned on Green Blink Data is being transmitted Off Radio switch is shut off WPS Green On Connection succeeds under Wi Fi Protected Setup Green Blink Negotiation is in progress under Wi Fi Protected Setup ...

Page 6: ... are provided 2 Connect the HomePlug product to the device which you want to add to a powerline network through the Ethernet cable 3 Plug the HomePlug product to the power outlet 4 This device with the HomePlug will join in the powerline network automatically 5 Buttons Reset The Reset button can restore the factory defaults Group The button is used to synchronous the private network name WPS This ...

Page 7: ...5 The following is the architecture of various applications of the HomePlug products Picture 1 ...

Page 8: ...agnostics by setting user defined secure powerline networks The Utility could help you to manager all of the HomePlug devices in the LAN The Utility is not necessary when you use the internet via HP 2002APn Please follow the procedures below to install the utility Please note that the following procedures are running in Windows XP for other Windows operating systems the procedures are similar 1 Cl...

Page 9: ...7 2 The following screen will be displayed Click Next 3 Click Next to install the utility in the default folder or assign the destination folder where you would like to install the HomePlug utility ...

Page 10: ...8 4 Click Finish to complete the installation ...

Page 11: ...d all 14Mbps 85Mbps 200Mbps Powerline devies But the 14Mbps and 85Mbps Powerline devices complies with HomePlug 1 0 and 1 1 standards can not connect with 200Mbps Powerline devices complies with HomePlug AV standard 6 1 Main The Main screen provides lists of all HomePlug devices logically connected to the computer when the utility is running After connecting a HomePlug device to your computer the ...

Page 12: ...the name by either clicking on the Rename button or by clicking on the name and editing in place An icon is usually shown with the name A color distinction in icons is made between HomePlug 1 0 HomePlug 1 0 Turbo and HomePlug 1 1 devices By default the icon is always accompanied by a device name Password by default the password column is blank and Enter Password button can be used to enter it To s...

Page 13: ...o add a remote device to the existing network by entering the device password of the device A dialog box will appear as below The dialog box allows the user to enter both a device name and the password A confirmation box will appear if the password was entered correctly and if the device was found in the powerline network If a device was not found the user will be notified and suggestions to resol...

Page 14: ...d to the Powerline network By default the utility automatically scans every few seconds and updates the display screen 6 2 Privacy The Privacy screen provides the user with an option to maintain security for their logical network and also to select the devices that has to be included in the network ...

Page 15: ...used to change the private network name to all of the local devices If a new network name is entered all the devices seen on the top panel of Main screen prior to this will be no longer present in the new network You have to set the new network name to all local devices Set All Devices The button is used to set the new network name network password to all HomePlug devices whose password has been e...

Page 16: ...e card connected to the computer versions of all drivers and utilities etc Lower Panel The Lower panel contains a history of all remote devices seen on the computer over a certain period of time All devices that were on the powerline network are listed here along with a few other parameters Devices that are active on the current logical network will show a transfer rate in the Rate column devices ...

Page 17: ...ved to a text file for later use or can be printed for reference for a technical support call Devices which are not part of the network anymore can be deleted using the delete button A dialog window pops up with a confirmation message if we try to delete a device whose password has been entered 6 4 About The About screen shows the software version information You can select AutoScan to turn on or ...

Page 18: ...up Wizard is given here If you lost the CD ROM or you prefer the traditional web setup please follow the procedures in this Manual to configure the HP 2002APn The default IP address of HP 2002APn is 192 168 2 8 Before you start the Wizard or start to login HP 2002APn you should make sure your computer s IP address is in the same segment 192 168 2 XXX where XXX 10 253 of HP 2002APn 1 Click Start bu...

Page 19: ...n 192 168 2 XXX where XXX 10 253 then click OK Note If your original setting of computer is Obtain an IP address automatically Obtain DNS server address automatically you should reset to original settings when you finish the following HP 2002APn configuration ...

Page 20: ...d follow the easy steps in the Wizard No instruction for the Setup Wizard is given here If you lost the CD ROM or you prefer the traditional web setup please follow the procedures in this Manual to configure the HP 2002APn Note If your original setting of computer is Obtain an IP address automatically Obtain DNS server address automatically you should reset to original settings when you finish the...

Page 21: ...he default IP address of HP 2002APn is 192 168 2 8 Please input admin in User name field and 1234 in Password field and click OK button to enter web configuration interface After login the default page Status appears and this page shows the status information including firmware version LAN interface wireless channel and MAC address and statistic information ...

Page 22: ... information LAN For you to setup HP 2002APn s IP address enable disable DHCP IGMP and IP address pool Wireless You can setup SSID wireless security and ACL here Management For you to upgrade HP 2002APn s firmware save current settings reboot reset to default settings and change password ...

Page 23: ...same segment with current IP address of your desktop you will not configure HP 2002APn unless you change computer s IP address again Field Description IP Address The IP address of LAN interface The default IP address is 192 168 2 8 Subnet Mask The subnet mask of the IP address of the LAN interface The default subnet mask is 255 255 255 0 LAN 2 Enable or disable the second IP address of the LAN ...

Page 24: ...mary DNS server that DHCP server assigns Secondary DNS Server The secondary DNS server that DHCP server assigns Default Gateway The gateway that DHCP server assigns Lease Time The lease time of the IP address Statically Assigned For binding MAC and IP 802 1d Spanning Tree It can provide redundant link and prevent network from generating loop You may select Enable or Disable LLTD After enabling LLT...

Page 25: ...reless Network are described as follows Field Description Radio On Off Enable or disable wireless LAN interface Network Mode You may select a proper network mode in the drop down list 11b g mixed mode 11b only 11g only 11b g n mixed mode default Network The maximum character number for SSID is 32 ...

Page 26: ...ate each other BSSID The MAC address of the wireless interface Frequency Channel You may select a proper channel in the drop down list The default channel is Channel 6 Wireless Distribution System WDS WDS modes include Lazy Mode Bridge Mode and Repeater Mode You can also enable WDS 1 Lazy Mode In the lazy mode AP automatically connects to the WDS devices that use the same SSID channel encryption m...

Page 27: ...2 Bridge Mode In the bridge mode you can use the HP 2002APN to connect to your router for extending wireless coverage Meanwhile it can also decrease the working load of the AP that accesses the Internet In that case the wireless card does not directly communicate with the wireless device that accesses the Internet but it directly communicates with the HP 2002APN Step 1 On the Basic Wireless Settin...

Page 28: ...ical mode and encryption type with the peer AP and then enter the MAC address of the peer AP After finishing the settings click the Apply button to apply the settings The HP 2002APN will work in the Bridge mode Step 3 Enter the Wireless Security Encryption Settings page set the security mode of the HP 2002APn to accord with the peer AP 3 Repeater Mode In the Repeater mode you can use the HP 2002AP...

Page 29: ...WDS On the Basic Wireless Settings page set the WDS mode to be Repeater Mode set the same physical mode and encryption type with the peer AP and then enter the MAC address of the peer AP After finishing the settings click the Apply button to apply the settings The HP 2002APN will work in the Repeater Mode ...

Page 30: ...security mode of the HP 2002APN to accord with the peer AP Note In the WDS mode don t set any mixed modes for example WPA PSK WPA2 PSK Do not set all the WDS APs to be Lazy mode please ensure that at least one WDS AP acts as Root Bridge and enter the MAC addresses in the WDS table on the Basic Wireless Settings page ...

Page 31: ...om 0 to 32 The default MCS is Auto Reverse Direction Grant RDG You may select Disable or Enable The default RDG setting is Enable Extension Channel When the channel bandwidth is set to be 20 40 MHz the extension channel will provide a channel that is adjacent to the primary channel but not overlaps The wireless network will acquire diploid bandwidth by this extension channel that is 20MHz bandwidt...

Page 32: ...essage format of 802 11 one by one A MSDU aggregates multiple A MSDU Subframes and encapsulates them to be an 802 11 message In this way PLCP Preamble PLCP Header and 802 11 MAC overhead that are needed to send an 802 11 message decrease At the same time the acknowledge frames also decrease and the efficiency for sending message is improved Auto Block ACK Enable or disable Auto Block ACK In order ...

Page 33: ...ed wireless parameters such as beacon interval data beacon rate and Tx power Note The advanced wireless setting is only for advanced user For the common user do not change any setting on this page Advanced Wireless The parameters of Advanced Wireless are described as follows ...

Page 34: ...Short Preamble is mainly applied to improvement the efficiency of real time applications such as streaming video and Voice Over IP telephony Short Slot Enable or disable short slot Tx Burst Tx Burst can be used to improve the efficiency of data transmission It can make system transmit more data during a period of time Pkt_Aggregate Pkt_Aggregate can aggregate multiple data packets together for imp...

Page 35: ... to transmit If the channel is sensed as busy the station has to defer its transmission The random interval provides a fair transmission chance for all the devices When each priority queue waits for sending packets it has to wait a fixed time AIFSN and a random time CW They define time values by multiple time slots For 802 11b its time slot is 20ms The time slot of 802 11a and 802 11g is 9 ms CW i...

Page 36: ...l or Web service you should set a bigger value in the fields of AC_BE and AC_BK Cwmin Cwmin Mini Contention Window also influences the delay time of WMM access category The difference between AC_VI and AC_VO should be smaller but the difference between AC_BE and AC_BK should be bigger Cwmax Cwmax Max Contention Window Txop Txop Opportunity to Transmit may optimize the WMM access Compared to the WM...

Page 37: ...s of your WMM products 3 DLS Direct Link Setup HP 2002APN provides DLS function Suppose that there are two WMM devices Enter the MAC address of a WMM device in the DLS setting of the other device and then connect the two WMM devices to the HP 2002APN In this way the two WMM devices can transmit message directly If you want to configure WMM DLS do as follows Step 1 Prepare two wireless network card...

Page 38: ...ess card B and vice versa Multicast to Unicast Converter Enable or disable Multicast to Unicast After enabling this function the transmission quality of wireless multicast stream can be improved 7 3 2 Security Click Wireless Settings Security to display the Wireless Security Encryption Settings page ...

Page 39: ...encryption keys to prevent unauthorized access and monitoring Select SSID SSID choice select SSID that you want to configure Security Mode This page provides 10 types of security modes including OPEN SHARED WEPAUTO WPA WPA PSK WPA2 WPA2 PSK WPAPSKWPA2PSK WPA1WPA2 and 8021 X ...

Page 40: ...escription Security Mode Select OPEN Default Key Select a key as the default key WEP Keys WEP Key1 2 3 4 Set 64 bit or 128 bit key The key format is Hex or ASCII 2 SHARED The parameters of SHARED mode are described as follows Field Description Security Mode Select SHARED ...

Page 41: ...pe You may select WEP or None Default Key Select a key as the default key WEP Keys WEP Key1 2 3 4 Set 64 bit or 128 bit key The key format is Hex or ASCII 3 WEPAUTO The parameters description of WEPAUTO mode please refer to OPEN mode ...

Page 42: ...P or AES Key Renewal Interval Set the key renewal interval WEP Keys WEP Key1 2 3 4 Set 64 bit or 128 bit key The key format is Hex or ASCII IP Address The IP address of RADIUS server Port The default port number is 1812 You may change it according to the server setting Shared Secret The shared key that RADIUS server needs to authenticate ...

Page 43: ... session time limit Idle Timeout Set the idle timeout 5 WPA PSK The parameters of WPA PSK mode are described as follows Field Description Security Mode Select WPA PSK WPA Algorithms Select TKIP or AES Pass Phrase Set 8 bit to 64 bit key Key Renewal Interval Set the key renewal interval ...

Page 44: ...l interval PMK Cache Period Set the PMK Pairwise Master Key cache period PMK scheme allows the roaming users that pass through the 802 11X EAP handshake protocol roam to the previous AP again PMK can decrease the roaming delay and improve the roaming speed Pre Authentication Enable or disable pre authentication WEP Keys WEP Key1 2 3 4 Set 64 bit or 128 bit key The key format is Hex or ASCII ...

Page 45: ...rver needs to authenticate Session Timeout If this value is 0 it indicates that there is no session time limit Idle Timeout Set the idle timeout 7 WPA2 PSK The parameters of WPA2 PSK mode are described as follows Field Description Security Mode Select WPA2 PSK WPA Algorithms You may select TKIP AES or TKIPAES Pass Phrase Set 8 bit to 64 bit key Key Renewal Interval Set the key renewal interval ...

Page 46: ...44 8 WPAPSKWPA2PSK The parameters description of WPAPSKWPA2PSK mode please refer to WPA2 PSK ...

Page 47: ...ey Renewal Interval Set the key renewal interval IP Address The IP address of RADIUS server Port The default port number is 1812 You may change it according to the server setting Shared Secret The shared key that RADIUS server needs to authenticate Session Timeout If this value is 0 it indicates that there is no session time limit Idle Timeout Set the idle timeout ...

Page 48: ...P Address The IP address of RADIUS server Port The default port number is 1812 You may change it according to the server setting Shared Secret The shared key that RADIUS server needs to authenticate Session Timeout If this value is 0 it indicates that there is no session time limit Idle Timeout Set the idle timeout ...

Page 49: ...ow the access control to the wireless devices in the MAC list Reject Reject the access control to the wireless devices in the MAC list Add a station Mac Enter the MAC address of wireless device that you want to allow or reject After finishing the settings click the Apply button to apply the settings 7 3 2 1 WPS Click Wireless Settings WPS to display the Wi Fi Protected Setup page ...

Page 50: ...48 On this page you can modify the WPS settings WPS can make your client automatically synchronize with the AP setting and establish connection WPS Config ...

Page 51: ... operation modes including Enrollee mode Registrar mode and PBC mode Enrollee and Registrar modes need to apply PIN code negotiation 1 Enrollee Mode Step 1 Select Enrollee mode on the wireless client the software of wireless client will generate a random PIN code for example 12345678 Step 2 On the Wi Fi Protected Setup page enter the PIN code of wireless client for example 12345678 Step 3 Click th...

Page 52: ...g figure 3 PBC Mode Step 1 On the Wi Fi Protected Setup page select the PBC mode and then click the Apply button You may also press the WPS button on the rear panel Step 2 Enable the PBC function on the wireless client In that case HP 2002APN and wireless client will automatically establish connection WPS Status ...

Page 53: ...less Settings Station List to display the Station List page On this page you can view the wireless networks that connect to the HP 2002APN If there is any wireless network connects to HP 2002APN refresh this page and the connection information of the wireless network is displayed ...

Page 54: ...trator Settings The parameters of Administrator Settings are described as follows Field Description Account Enter the account that you want to change Password Enter the password for the new username Note If you forget the account and the password please press the Reset button The system will return to the factory default settings The default account and the password are Admin ...

Page 55: ...the Apply button System begins to upgrade firmware After upgrading system reboots and automatically enters the Web page The procedure for upgrading Bootloader is similar to that of the firmware upgrade Note Upgrading firmware will make the AP return to the factory defaults In order to avoid the settings loss please save the settings before upgrading firmware During upgrading do not cut off the pow...

Page 56: ...ibed as follows Field Description Export Settings Click the Export button to save the settings on your local PC Import Settings Click the Browse button to choose the settings on your PC and then click the Import button to import the settings to AP Load Factory Defaults Click the Load Default button the system returns to the factory default settings ...

Page 57: ...t to power stripe Important Safety Instructions This product is intended for connection to the AC power line The following pre cautions should be taken when using this product Please read all instructions before installing and operating this product Please follow all warnings and instructions marked on the product Do not operate this product near water This product should never be place near or ov...

Page 58: ...ditions If liquid has been spilled into the product If the product has been exposed to rain or water If the product does not operate normally when the operating instructions are followed If the product exhibits a distinct change in performance ...

Page 59: ...57 ...

Reviews: