background image

 FHZ1000 House Control Unit

FHT 8W Heat Demand Relay

Installation and User Guide

Product Code EHC-FH06

1

 Product Code EHC-FH01

13

- Attach the second half, as shown in figure 7.

Figure 7

- Engage the plug that you have prepared in the wall holder

as shown in figure 8.

Figure 8

- Plug the power supply into a proper socket (230V~/50Hz).

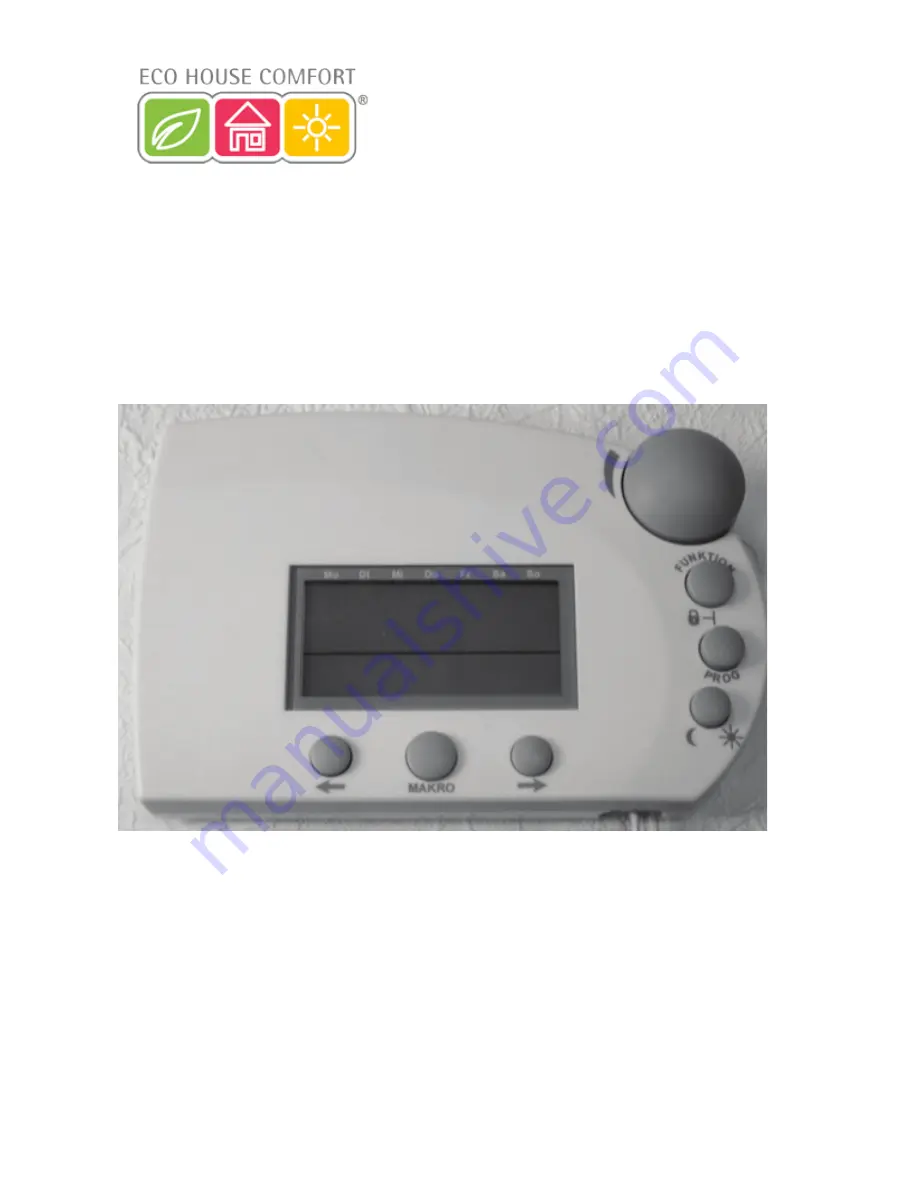
- Slide the control centre onto the wall holder from above.

See figure 9.

Figure 9

- If you purchased the economy set (set comprising FHZ1000 and valve operating mechanism), this is how you now

install the valve operating mechanism.

- If you purchased the FHZ1000 individually, what you do next depends on the available components (if necessary,

install the valve operating mechanism, etc., or register the available heating controls with the FHZ1000).

FHT 8W Heat Demand Relay

Installation and User Guide

Product Code EHC-FH06

1

Summary of Contents for EHC-FH01

Page 1: ... Product Code EHC FH06 1 Product Code EHC FH01 ure 9 00 and valve operating mechanism this is how you now ext depends on the available components if necessary e available heating controls with the FHZ1000 FHT 8W Heat Demand Relay Installation and User Guide Product Code EHC FH06 1 ...

Page 2: ...ly ask you to carefully follow the instructions in this user manual All company and product names contained herein are trademarks of their respective owners All rights reserved Should you have any further questions please contact our technical service Germany Tel no 49 9604 40 88 80 Fax no 49 9604 40 88 48 e mail tkb conrad de Mon to Thur 8 00am to 4 30pm Fri 8 00am to 2 00pm FHT 8W Heat Demand Re...

Page 3: ...FHT 8W Heat Demand Relay Installation and User Guide Product Code EHC FH06 1 ...

Page 4: ... operating mechanism 15 c Setting up the radio connection between the control centre and the room control 17 1 Operating principle 17 2 Necessary preparations 17 3 Registering the room control 17 4 Deleting room controls 19 d Registering and managing the components of the wireless control system 20 1 The house code 20 2 Setting the house code 20 3 Address system 21 4 Managing the addresses 22 5 Ex...

Page 5: ...e name of the macro 42 3 Programming or editing a macro 43 3a Room controller and control centre 43 3b Remote switching components 46 e Status indicator 48 f Alarms 48 1 Alarm triggers alarm priorities 48 2 Alarm confirmation alarm dialler HMS FHZ radio telephone dialler 50 3 Low temperature alarm 51 7 Special internal functions 53 a Setting the time for the decalcification cycle CALC 53 b Selecti...

Page 6: ...wireless control system Ö Please also read the detailed description in 4 System description 2 Scope of delivery FHZ1000 Wall mounting set screws dowels Power supply for FHZ1000 Valve operating mechanism with valve adapters only with the economy set item no 617500 User manual 3 Safety instructions The product s guarantee becomes invalid if the product is damaged as a result of failure to observe th...

Page 7: ...y instructions In such cases the product s guarantee becomes invalid Do not use this product in hospitals or medical institutions Although the product emits only relatively weak radio signals these may cause life support systems to malfunction This may also be the case in other areas The product is only suitable for use in dry indoor rooms For safety and licensing CE reasons any unauthorised alter...

Page 8: ... telephone mobile phone Using the room control FHT8b heating control the room temperature can be individually controlled for up to 15 rooms The control centre communicates with the individual room controls which in turn adjust the temperature locally that is in the corresponding rooms via the valve operating mechanisms All settings for the rooms can be conveniently carried out on the control centr...

Page 9: ...o the legal restriction of transmission duration in this band to a maximum 36 seconds per hour 1 duty cycle the danger of interference from other radio services is minimised Furthermore an additional security code is used for the data exchange A plug in power supply unit and a 9V block battery is used for the power supply The battery also serves to preserve data when there is a power failure The c...

Page 10: ... telephone system Ö The FS20TS telephone remote control is not supplied with the FHZ1000 or the economy set but is available separately e HMS FHZ radio telephone dialler alarm dialler Activated by the control centre the alarm dialler dials up to 3 different pre programmed numbers max 22 digits in order to provide your mobile phone office or your appointed neighbours or friends during periods of ab...

Page 11: ...0 from the wall holder for example for the purposes of programming operation or control Please observe the following points when selecting the installation location The installation location should occupy a central position in the room in which the temperature is to be controlled be easily accessible be at eye level not be on a poorly insulated exterior wall not be in direct sunlight not be on lar...

Page 12: ...d month using the scroller and confirm by pressing the PROG button again Setting the day Figure 3 Use the scroller to set the day and confirm your setting by pressing the PROG button Setting the time hours Figure 4 Use the scroller to set the hours and confirm your setting by pressing the PROG button FHT 8W Heat Demand Relay Installation and User Guide Product Code EHC FH06 1 ...

Page 13: ...from underneath into the FHZ1000 To install the device open out the installation hinge on the back Wall mounting Remove the wall holder from the back of the control centre by sliding it downwards Hold the wall holder vertically on the wall with the rounded off corners facing upwards Mark the positions of the bore holes through the two slotted holes Remove the wall holder and drill on the markings ...

Page 14: ... See figure 9 Figure 9 If you purchased the economy set set comprising FHZ1000 and valve operating mechanism this is how you now install the valve operating mechanism If you purchased the FHZ1000 individually what you do next depends on the available components if necessary install the valve operating mechanism etc or register the available heating controls with the FHZ1000 FHT 8W Heat Demand Rela...

Page 15: ... Remove the mechanical thermostat If the screw connections have seized up you can use multigrip pliers Release the screw connection carefully by turning it anticlockwise See the arrow in figure 10 Figure 10 X X X X X 2 Inserting the batteries into the valve operating mechanism Remove the battery compartment cover of the valve operating mechanism by sliding it down and out Insert two AA batteries p...

Page 16: ... code must now be transmitted This is described in detail in section 7 d After the security code has been transmitted not normally required for the economy set replace the battery compartment cover The valve operating mechanism acknowledges receipt of the first wireless protocol with a signal tone The antenna symbol is now permanently displayed and the valve operating mechanism now responds to rad...

Page 17: ...daptors should be fastened using the enclosed screw and nut For valves of the type RAV you should also place the cylindrical extension piece onto the valve pin For later valve operating mechanism error signals please see section 13 There you will find information on troubleshooting and removing errors FHT 8W Heat Demand Relay Installation and User Guide Product Code EHC FH06 1 ...

Page 18: ...tre and confirm register the desired room controls Ö In order to ensure that the room control only cooperates with your control centre and not for example with that of your neighbour s a room control can only be registered with a single control centre If registration is to be carried out on a different control centre the room control must first be reactivated You can find a detailed description of...

Page 19: ...be done as follows Use the scroller to select the room name concerned for example Kinderz children s room Confirm your selection by pressing the MAKRO button A cursor appears at the end of the LCD s line the blinking square is the cursor If no changes are to be carried out confirm the entry by pressing the MAKRO button The display briefly shows gespeich saved If changes are to be carried out the c...

Page 20: ...eleted repeat the steps previously described If no further room controls are to be deleted press the w button three times briefly one after the other Afterwards the FHZ1000 is in the normal operating mode again Ö Please note If the control centre itself is not to control any valve operating mechanism the internal control should be deleted as described above To do this use the scroller to select th...

Page 21: ...hin the FS20 wireless control system is very secure and several neighbouring systems can be operated simultaneously for instance if your neighbour uses the same wireless control system The FS20 wireless control system has a so called house code a total of 65536 different house codes possible In the delivery state each transmitter in the FS20 wireless control system also the FHZ1000 has its own ran...

Page 22: ...nce The display briefly shows gespeich saved and the house code has been saved in the FHZ1000 You now find yourself in the Schalter switch menu again After pressing the w button three times the FHZ1000 is in the normal operating mode again X X X X X 3 Address system So that the receivers can be addressed directly and in combination the FS20 wireless control system has a total of 256 different addr...

Page 23: ...a relevant single address for one garage door while all the garage doors can be opened via a hand held transmitter with a programmed function group address or all the doors can be automatically closed in the evening via an FS20 timer Ö The various address types and addresses are only set on the transmitter for example FHZ1000 and these settings are transmitted to the receivers via the address assi...

Page 24: ...have an overview of the addresses that have already been assigned and so that you can jointly control the programmed receivers simply and logically in groups 1111 1144 4411 4444 1122 1144 4444 1131 1144 4444 1211 1212 4411 4444 1311 4411 4444 1411 4411 4444 1412 4444 A B C D Global master address 4444 Local master address e g 1144 House code e g 1234 1234 Function group 44xx e g 4411 ceiling lamps...

Page 25: ... address group 44 subaddress 11 and can therefore be jointly controlled To select one of the 15 function groups you need to set 44 as the address group and a value between 11 and 43 11 12 13 14 21 22 23 24 31 32 33 34 41 42 43 as the subaddress X X X X X 6 Registering adding the remote switching components Ö Before starting to register add the remote switching components with the control centre yo...

Page 26: ...pe lamp Lüfter ventilator Kaffema coffee machine Markise awning If the desired name is not there select the name which is most similar to the desired name This name can be changed later Use the scroller to select the name concerned for example Lampe lamp Confirm your selection by pressing the MAKRO button Afterwards a cursor blinks at the end of the LCD s line the blinking square is the cursor If ...

Page 27: ...e normal operating mode again X X X X X 8 Programming associating the remote switches or remote dimmers After the remote switching components have been added as described under item 6 above the remote switches or remote dimmers must now be programmed to their address addresses so that the switching processes can be carried out For this the remote switching component must first be set to the progra...

Page 28: ... the button once or change the status by turning the scroller To execute the switching operation briefly press the MAKRO button once The display briefly shows gespeich saved The remote switch or remote dimmer receives this radio signal and automatically exits the programming mode LED on the remote switch stops blinking This completes the programming Press the w button twice in order to return to n...

Page 29: ...he following meaning x button Go to the menu selected by the scroller MAKRO button Confirm save an entry w button Go back to the previous menu The battery compartment the power supply connection for the included power supply and the mounting bracket are all located on the back of the FHZ1000 X X X X X 2 Operating menu structure of the FHZ1000 In order to make programming simple and intuitive the F...

Page 30: ...r Alarms Configuration Macros Programming the parameters Programming the switching times Status indicators Add Delete Add a name Add Delete Modify a name House code Status Installation Teleph numbers 1 3 Dialout number PIN Call acceptance Test alarm Batteries Reception Low temperature Contrast setting Back light configuration Alarm priorities Edit Modify a name FHT 8W Heat Demand Relay Installatio...

Page 31: ...ontrols 1 to 15 the individual remote switches 1 to 15 and the special functions by turning the scroller Programming level The device to be handled or the special function in question has already been selected before the programming level is accessed Here the parameters are entered X X X X X 3 Setting the display s contrast The display contrast can be optimised for different lighting conditions To...

Page 32: ...the scroller Briefly press the x button once Select Beleucht back light using the scroller Briefly press the x button once Select the desired setting on off auto for the back light using the scroller To save briefly press the MAKRO button once The display briefly shows gespeich saved Press the w button four times to return to the normal operating mode X X X X X 5 Button lock The device is equipped...

Page 33: ...o has 3 different operating modes that can be selected using the FUNKTION button Automatic mode In the automatic operating mode Auto appears on the display the room temperature is controlled according to the program set for the day of the week The temperature history for the current day of the week is shown by a curve progression on the lower part of the display The and symbols indicate whether th...

Page 34: ...perature and comfort temperature is performed automatically a curve progression on the lower part of the display indicates the time of day when the comfort and lowering temperatures will be active A sun symbol on the display indicates that the comfort temperature is active a moon symbol indicates that the lowering temperature is active To change the comfort and lowering temperatures proceed as fol...

Page 35: ... a weekdays Mon Fri b the weekend Sat Sun c all days Mon Sun After selecting the weekday days confirm your selection by pressing the PROG button The display for the first comfort temperature time appears Figure 26 Use the scroller to select the time at which the comfort temperature should start The curve progression on the lower part of the display follows your settings Briefly press the PROG butt...

Page 36: ...riefly Ö This change will then be overwritten by the next programmed temperature change X X X X X 5 Heating pause When the heating is switched off during the summer the actuator s batteries can be preserved The valve is opened completely and remains in this position The weekly decalcification cycle is still carried out Proceed as follows to activate the heating pause Switch to the Manu operating m...

Page 37: ...se the scroller to select the room controller whose code you wish to change Briefly press the x button once Press the PROG button until Sond special appears on the display and then release the button Use the scroller to select the CodE function Confirm your selection by pressing the PROG button CodE 1 and a 2 digit number appear on the display This number is the first part of the currently active ...

Page 38: ... the button you can switch between upper and lower case as well as between special characters for the character set see appendix B After entering the desired name briefly press the MAKRO button once to save your entry The display briefly shows gespeich saved Afterwards the FHZ is back in the Schalter switch menu If no further changes are to be made press the w button three times The FHZ1000 then r...

Page 39: ... mode Holiday party mode Z Z Z Z Z Automatic mode In the automatic operating mode display Auto the remote switching component is switched according to the weekday programme that has been set Ö The times at which on and off switching occurs for the current day of the week are displayed by a curve progression on the lower part of the display The sun and moon symbols as well as On and Off indicate wh...

Page 40: ...nent remains in a specific switching state for a defined period of time for the duration of a party or a holiday for example Afterwards the automatic mode is automatically activated To activate the holiday party function for a specific remote switching component proceed as follows Briefly press the x button once Use the scroller to select the remote switching component for which you wish to make a...

Page 41: ... 2 means Schalter 2 switch 2 and so on Using the scroller select the day for which the time program should be set You may either select each day of the week individually or program a combination of days in one block for a weekdays Mon Fri b the weekend Sat Sun c all days Mon Sun After selecting the weekday weekdays confirm your selection by pressing the PROG button The display for the first on tim...

Page 42: ...ch the previous day ends does not appear on the display For example If the previous day ended with On then this state remains for the next day However this is not displayed by the curve progression during programming X X X X X 5 Manually switching a remote component on and off A remote component can be switched on or off independently from the time program as follows Briefly press the x button onc...

Page 43: ...AKRO button Using the FS20TS telephone remote control Using the HMS FHZ radio telephone dialler alarm dialler To activate a macro directly on the device proceed as follows Briefly press the MAKRO button once Select the desired macro using the scroller Confirm the macro by pressing the MAKRO button once The display briefly shows aktiviert activated The FHZ1000 then returns to the normal operating m...

Page 44: ...riefly press the x button once By turning the scroller you can browse a list of all the available rooms room controllers and remote switching components The display line in the middle indicates whether you are dealing with a room controller a remote switching component or the control centre itself H 0 Control centre H 1 to H 15 Room controller S 1 to S 15 Remote switching components Using the scro...

Page 45: ...saved Using the scroller you can now select the next room and proceed as described above Pressing the w button 4 times returns you to the normal operating mode Example of a macro temperature setting for bathroom and living room When Makro 1 is activated the following parameters should become active 23 C temperature in the bathroom for 5 hours after the macro has been activated The comfort temperat...

Page 46: ...line of the display gespeich saved appears briefly Selecting the living room Select the living room using the scroller Function setting Keep pressing the FUNKTION button until the Manu symbol appears on the display Temperature setting Keep pressing the button until the symbol appears on the display Programming the temperature and length of time This is not necessary in this example Saving the sett...

Page 47: ...s For a time period longer than 23 5 hours the setting continues in days d in the upper left of the display Briefly press the PROG button once Save the settings by pressing the MAKRO button Using the scroller you can select the next remote component and proceed as described above Pressing the w button 4 times returns you to the normal operating mode Example of a macro remote switch setting For the...

Page 48: ...ngs by pressing the MAKRO button In the lower line of the display gespeich saved appears briefly Selecting the floor lamp Select the floor lamp using the scroller Function setting Keep pressing the FUNKTION button until the Auto symbol appears on the display Programming the length of time for the switching operation This is not necessary in this example Selecting the switching state Keep pressing ...

Page 49: ...le H 1 H 2 etc stand for the room controllers Lower display line Name of the room f Alarms X X X X X 1 Alarm triggers alarm priorities When malfunctions occur the FHZ1000 generates alarm signals Alarm signals are updated every 10 minutes which means that the maximum amount of time until an alarm is signalled or reset by the FHZ1000 is 10 minutes A total of 4 alarm signals can be displayed These ar...

Page 50: ...ure is Priorität 1 Priority 1 for the external alarm it is Priorität 0 Priority 0 To change the priorities proceed as follows Briefly press the x button once Select Sonderfkt special function using the scroller Briefly press the x button once Select Konfig configuration using the scroller Briefly press the x button once Select Alarmprio alarm priority using the scroller Briefly press the x button ...

Page 51: ...you to the normal operating mode X X X X X 2 Alarm confirmation alarm dialler HMS FHZ radio telephone dialler Proceed as follows to confirm an alarm Briefly press the x button once Select Sonderfkt special function using the scroller Briefly press the x button once Select Alarme alarms using the scroller Briefly press the x button once A list of the available alarms appears If no alarm is active t...

Page 52: ...temperature alarm If the temperature in a room goes below the programmed minimum temperature the FHZ1000 as described above sends out an alarm signal Ö Please note The low temperature alarm is not issued until approx 1 5 hours after the last temperature change The minimum temperature relates to the current target value You can program a maximum temperature difference for this target value above wh...

Page 53: ...once By turning the scroller you can browse a list of all the available room controllers Select the room for which the minimum temperature should be programmed Briefly press the x button once Keep the PROG button pressed until Sond special appears on the display Then release the button again Use the scroller to select the special t AL function Confirm your selection by briefly pressing the PROG bu...

Page 54: ...io connection to the control centre OFFS Offset setting this option appears if more than one valve operating mechanism is controlled T AL Programming the minimum temperature for the low temperature alarm a Setting the time for the decalcification cycle CALC The valve is completely opened and closed once a week This prevents deposits from blocking the valve The time at which the decalcification cyc...

Page 55: ...ssible settings which means that 10 000 different security codes are available To ensure communication between the control centre and the FHT 8V valve operating mechanism s the same security code has to be set for all the devices in a room Ö This is particularly important if more than one valve operating mechanism is used or no set control centre and valve operating mechanism was purchased When yo...

Page 56: ... a valve operating mechanism fails transmission of the security code to this valve operating mechanism can be repeated later Proceed as described above and skip the valve operating mechanisms that have already been encoded by briefly pressing the PROG button If the display shows the number of a valve operating mechanism that has not yet received a code then press the button on this valve operating...

Page 57: ...als to all valve operating mechanisms for approx 2 minutes instructing them to newly synchronise themselves Afterwards the normal transmission program is continued and the valve operating mechanisms generate a signal tone as soon as they receive the first synchronised signal Keep the PROG button pressed until Sond special appears on the display Then release the PROG button again Use the scroller t...

Page 58: ...of single radiators so that they give off more positive offset or less negative offset heat Keep the PROG button pressed until Sond special appears on the display Then release the PROG button Use the scroller to select the special OFFS function Confirm this by briefly pressing the PROG button Use the scroller to select the respective valve operating mechanism radiator Confirm the selected valve op...

Page 59: ... user manual of the FS20 TS Ö Please note In order to activate a macro the programming of the FS20 TS must be completely finished To activate a macro proceed as follows Call the FS20 TS The FS20 TS answers after the programmed number of call signs and confirms with a short high pitched tone Confirm this by pressing the asterisk button on the telephone A short tone is given as confirmation Now ente...

Page 60: ... Alarmw alarm dialler using the scroller Briefly press the x button once Select Installat installation using the scroller Briefly press the x button once Select Anmelden register using the scroller Briefly press the MAKRO button once The display shows warten wait while it communicates with the alarm dialler by radio The alarm dialler s LED briefly lights up at the same time angemeldet registered a...

Page 61: ...hone numbers telephone numbers 2 and 3 can now be entered as described above Pressing the w button once will transmit the new entries to the alarm dialler The display shows warten wait while it communicates with the alarm dialler by radio and the new settings are transmitted to the alarm dialler After a successful transmission the display shows Alles OK everything OK Pressing the w button again re...

Page 62: ...ly press the x button once Select Sonderfkt special function using the scroller Briefly press the x button once Select Alarmw alarm dialler using the scroller Briefly press the x button once Select Geheimcode PIN using the scroller Briefly press the x button once The display shows Geheimcode PIN Code 1 and 00 The number 00 is the first part of the 4 digit PIN security code Using the scroller enter...

Page 63: ...tted to the alarm dialler After a successful transmission the display shows Alles OK everything OK Pressing the w button twice returns you to the normal operating mode If the transmission fails K Empfang no reception appears on the display The FHZ1000 then attempts to transmit the settings again Ö The alarm dialler is ready for operation once the telephone numbers 1 to 3 the dialout number the PIN...

Page 64: ...ty H H Low temperature One or several rooms cannot reach the minimum temperature H H H Reception failure There is no more reception for one or several of the room controls Ö The alarm dialler repeats the alarm signal 10 times c Remote control of the FHZ1000 via the alarm dialler Macros can be activated with the help of the remote control operation For this purpose proceed as follows Call the devic...

Page 65: ...ample it may be necessary to operate the valve manually To do so proceed as follows Remove both batteries from the valve operating mechanism Remove the control pin by pressing on the position marked with a 1 Place the control pin correctly onto the peg marked with a 2 Turn the control pin Clockwise increase heat Anticlockwise reduce heat Figure 41 FHT 8W Heat Demand Relay Installation and User Gui...

Page 66: ...ll segments of the display are off You can speed this up by keeping the button on the valve operating mechanism pressed Insert two new AA batteries preferably alkaline in the battery compartment observing the correct polarity You will find corresponding figures in the battery compartment C1 is displayed followed by a two digit number C2 is then displayed followed by another two digit number These ...

Page 67: ... cause acid burns if they come into contact with skin Therefore please make sure you use suitable protective gloves Make sure that batteries rechargeable batteries are not short circuited or thrown into a fire They might explode Never disassemble batteries rechargeable batteries Conventional batteries must not be recharged They might explode If the device is not used for a longer period of time wh...

Page 68: ... the display see section 6 a item 5 no operation is possible Control centre emits a signal tone An alarm has been set off Verify the alarm exclamation mark on and eliminate the alarm trigger the display See section 6 f An alarm Open window Increase permitted deviation from for low temperature Valve operating mechanism target value has been set off faulty jammed Remove the cause of the error Valve ...

Page 69: ...t signal tone and Control range is too small Unsuitable valve F3 on the display Mountthevalveoperatingmecha nism again No radio symbol on the display Loss of radio transmission Install control unit at a different the valve operating mechanism due to interference location emits a tone sequence every hour Control unit batteries Replace the batteries The valve is approx 30 are empty Transmit the curr...

Page 70: ...antennas due to the distance from the transmitter or receiver to conductive surfaces or objects also to human bodies or the ground Broadband interference in urban areas that reduces the signal to noise ratio the signal is no longer recognised due to this noise Interference radiation resulting from insufficiently shielded electronic devices for example operating computers or similar 15 Handling Pro...

Page 71: ...d identifier is on the battery rechargeable battery for example under the rubbish bin icons on the left You can return your used batteries rechargeable batteries free of charge to any authorised disposal station in your area in our stores or in any other store where batteries rechargeable batteries are sold By doing so you comply with your legal obligations and also make a contribution to environm...

Page 72: ...mechanism s code House code 1 2 3 4 5 6 7 8 9 10 11 12 13 14 15 1 2 3 4 5 6 7 8 9 10 11 12 13 14 15 Room control Name room Code Remoteswitching components Name room Code FHT 8W Heat Demand Relay Installation and User Guide Product Code EHC FH06 1 ...

Page 73: ...20 Appendix B character set for the FHZ1000 Upper case Lower case Symbols Upper case Lower case Symbols FHT 8W Heat Demand Relay Installation and User Guide Product Code EHC FH06 1 ...

Reviews: