Eagle Explorer, Installation And Operation Instructions Manual
The Lenovo Explorer User Manual is a comprehensive guide that provides detailed instructions on how to set up and operate your Lenovo Explorer virtual reality headset. Easily accessible for free download at manualshive.com, this manual offers essential information to maximize your immersive VR experience with the Lenovo Explorer.
Share
Download


Reviews:
No comments
Related manuals for Explorer

53118
Brand: Hama Pages: 12

GPSMAP 431
Brand: Garmin Pages: 4

AV12G
Brand: Awetek Pages: 7
PASclub
Brand: Bricon Pages: 13

IK205
Brand: Icar Pages: 7

FlySense AoA PRO
Brand: TALOS AVIONICS Pages: 13

GH-601
Brand: Globalsat Pages: 18

GPS 35 LP
Brand: Garmin Pages: 41

BMW Motorcycles Navigator
Brand: Garmin Pages: 66
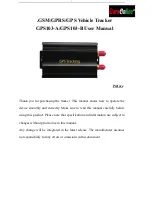
GPS103-A
Brand: Coban Pages: 19
GPS105
Brand: Coban Pages: 24

510
Brand: Morbella Pages: 43

UP106
Brand: UniGuard Pages: 5

QK-A012
Brand: Quark-Elec Pages: 13

QK-A026+
Brand: Quark-Elec Pages: 22

GT02D
Brand: Dyegoo Pages: 30

UT683KIT
Brand: UNI-T Pages: 2

LC-90 Mark-II
Brand: Furuno Pages: 2


