E-Tech IM100, User Manual
The E-Tech IM100 is a cutting-edge electronic device, designed for convenience and efficiency. For detailed instructions on how to optimize its features and functions, download the free User Manual from our website. Ensure smooth operation and maximize the potential of your E-Tech IM100.
Share
Download


Reviews:
No comments
Related manuals for IM100

Sangean RCR-5
Brand: Sangean Pages: 71

Xpress XMCK-20KC
Brand: Audiovox Pages: 2

T312
Brand: Timex Pages: 10

SF-DABA18
Brand: Sandstrom Pages: 36
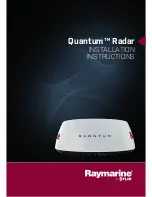
Quantum Radome
Brand: Raymarine Pages: 54

ADL Vantage
Brand: Pacific Crest Pages: 20

MUSICDOCK KC-80
Brand: KLH Pages: 16

GMRS600SLK
Brand: Audiovox Pages: 28

SCD 2300
Brand: SOUNDMASTER Pages: 4

21-1709
Brand: Radio Shack Pages: 24

KXP2290
Brand: Honeywell Pages: 62

Esser 80863x.10
Brand: Honeywell Pages: 56

KXP2290
Brand: Honeywell Pages: 11

H01UCC6DU3AN
Brand: Motorola Pages: 49

UH041/
Brand: Uniden Pages: 12

DF-540
Brand: Datexx Pages: 1

WORKTUBE
Brand: PERFECTPRO Pages: 63

UBOX 100
Brand: PERFECTPRO Pages: 64


