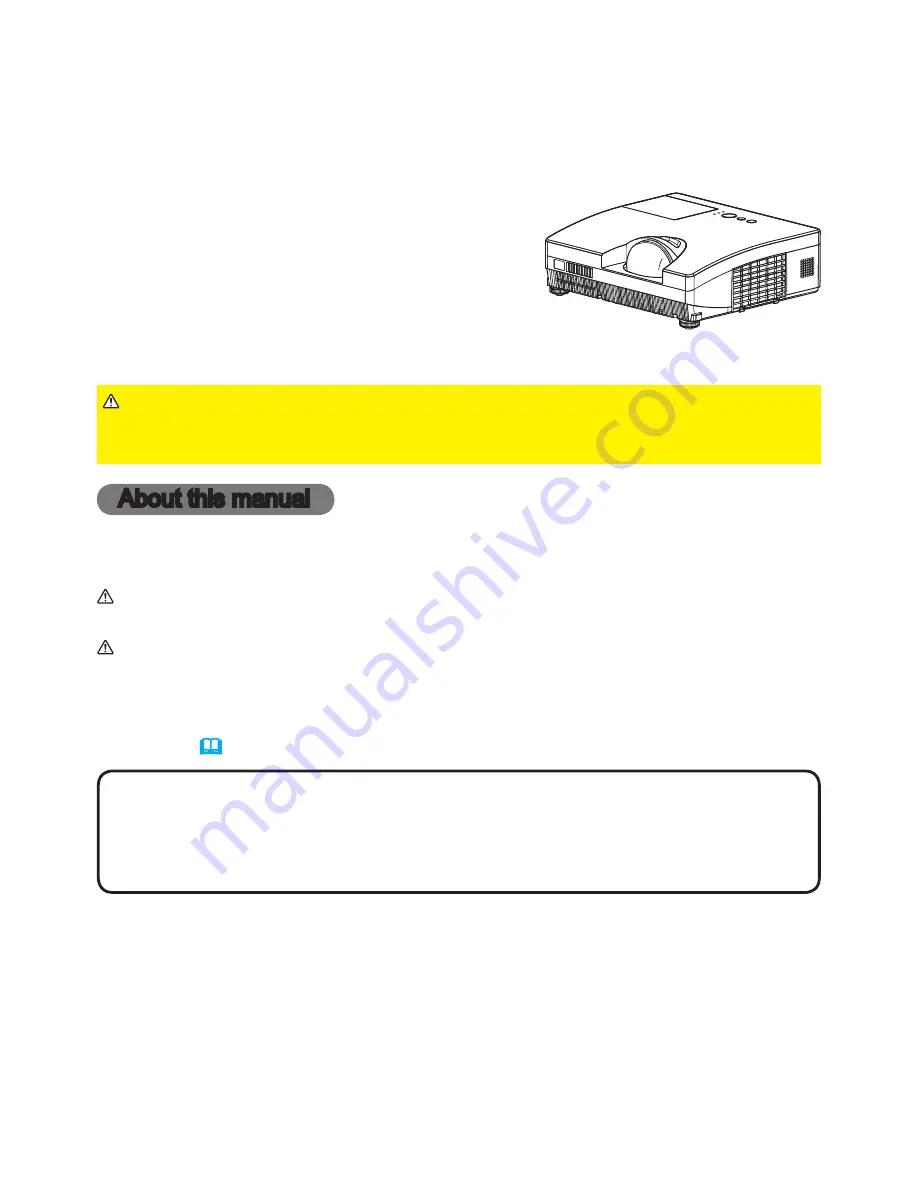
background image

1

Dukane 

Projector

8110H

User's Manual (detailed)  

Operating Guide

Thank you for purchasing this projector.

►Before using this product, please read all manuals for this 

product. Be sure to read “

Safety Guide

” first. After reading them, store them in a 

safe place for future reference.

WARNING

• The information in this manual is subject to change without notice.

• The manufacturer assumes no responsibility for any errors that may appear in 

this manual.

• The reproduction, transfer or copy of all or any part of this document is not 

permitted without express written consent.

NOTE

Trademark acknowledgment

Various symbols are used in this manual. The meanings of these symbols are 

described below. 

About this manual

WARNING

CAUTION

This symbol indicates information that, if ignored, could possibly 

result in personal injury or even death due to incorrect handling.
This symbol indicates information that, if ignored, could possibly 

result in personal injury or physical damage due to incorrect 

handling.

Please refer to the pages written following this symbol.

•  Mac

®

 is a registered trademark of Apple Inc.

•  Windows

®

 is a registered trademark of Microsoft Corporation in the U.S. and/or 

other countries.

•  VESA and DDC are trademarks of the Video Electronics Standard Association.
All other trademarks are the properties of their respective owners.

NOTICE

This entry notices of fear of causing trouble.

Summary of Contents for 8110H

Page 1: ...gment Various symbols are used in this manual The meanings of these symbols are described below About this manual WARNING CAUTION This symbol indicates information that if ignored could possibly result in personal injury or even death due to incorrect handling This symbol indicates information that if ignored could possibly result in personal injury or physical damage due to incorrect handling Ple...

Page 2: ...ASY MENU 24 Aspect D Zoom Keystone Picture mode Eco mode Mirror Reset Filter time Language Advanced menu Exit PICTURE menu 26 Brightness Contrast Gamma Color temp Color Tint Sharpness My memory IMAGE menu 29 Aspect Over scan V position H position H phase H size Auto adjust execute INPUT menu 31 Progressive Video nr Color space Video format Computer in Frame lock Resolution SETUP menu 34 D zoom D s...

Page 3: ...RA KEYSTONE ASPECT SEARCH BLANK MUTE MY BUTTON POSITION 1 2 ESC ENTER MENU RESET COMPUTER MY SOURCE AUTO MAGNIFY PAGE UP VOLUME DOWN ON OFF 㧗 FREEZE 4 Fastening the lens cover To avoid losing the cover please fasten the lens cover to the projector using the included strap Put the strap end into the slit of the lens cover with the knot on the side of the lens Make sure that the strap is inserted to...

Page 4: ... use or just after use since it is too hot Do not look into the lens or vent while the lamp is on since the strong light is not good for your eyes Do not handle the elevator buttons without holding the projector since the projector may drop down WARNING Maintain normal ventilation to prevent the projector from heating up Do not cover block or plug up the vents Do not place anything that can stick ...

Page 5: ...indicator 59 Rear panel 9 1 AUDIO IN1 port 2 AUDIO IN2 port 3 COMPUTER IN1 port 4 COMPUTER IN2 port 5 MONITOR OUT port 6 Shutdown switch 61 7 CONTROL port Use the shutdown switch only when the projector is not turned off by normal procedure since pushing this switch stops operation of the projector without cooling it down CAUTION 8 VIDEO port 9 S VIDEO port 10 AUDIO IN3 R L ports 11 AUDIO OUT R L ...

Page 6: ... FREEZE button 21 17 MY BUTTON 1 button 44 18 MY BUTTON 2 button 44 19 KEYSTONE button 20 20 POSITION button 19 23 21 MENU button 22 22 cursor buttons 22 23 ENTER button 22 24 ESC button 22 25 RESET button 22 26 Battery cover 12 Back of the remote control 2 1 6 5 16 8 9 19 17 20 22 24 10 4 3 7 12 14 11 13 15 18 21 23 25 26 VIDEO DOC CAMERA KEYSTONE ASPECT SEARCH BLANK MUTE MY BUTTON POSITION 1 2 E...

Page 7: ...s 64 and service may be required Before installing the projector consult your dealer about your installation The screen position may shift after installation if the projector is suspended from the ceiling or other location due to the flexibility of the plastic projector body If readjustment is necessary consult with your dealer or service personnel The projected image position and or focus may cha...

Page 8: ...ow on it directly Do not place anything near the projector lens or vents or on top of the projector Do not place anything that may be sucked into or stick to the vents on the bottom of the projector This projector has some intake vents also on the bottom Do not place the projector anyplace where it may get wet Getting the projector wet or inserting liquid into the projector could cause fire electr...

Page 9: ... appropriate accessory or designated cables Ask your dealer about non accessory cables which may be required a specific length or a ferrite core by the regulations For cables with a core only at one end connect the end with the core to the projector Make sure that devices are connected to the correct ports An incorrect connection may result in malfunction or damage to the device and the projector ...

Page 10: ...l of the corresponding laptop PC When the picture resolution is changed on a PC depending on an input automatic adjustment function may take some time and may not be completed In this case you may not be able to see a check box to select Yes No for the new resolution on Windows Then the resolution will go back to the original It might be recommended to use other CRT or LCD monitors to change the r...

Page 11: ... power cord for complete separation Never modify the power cord WARNING Using the security bar and slot A commercial anti theft chain or wire up to 10 mm in diameter can be attached to the security bar on the projector Also this product has the security slot for the Kensington lock For details see the manual of the security tool Do not use the security bar and slot to prevent the projector from fa...

Page 12: ...ing environment Be sure to use only the batteries specified Do not use batteries of different types at the same time Do not mix a new battery with used one Make sure the plus and minus terminals are correctly aligned when loading a battery Keep a battery away from children and pets Do not recharge short circuit solder or disassemble a battery Do not place a battery in a fire or water Keep batterie...

Page 13: ...nd Mode 2 HIGH If the remote control does not function properly attempt to change the signal frequency In order to set the Mode please keep pressing the combination of the two buttons listed below simultaneously for about 3 seconds 1 2 1 Set to Mode 1 NORMAL the VOLUME and the RESET buttons 2 Set to Mode 2 HIGH the MAGNIFY OFF and the ESC buttons Please remember that the REMOTE FREQ in the SERVICE...

Page 14: ...ton again while the message appears The projector lamp will go off and the POWER indicator will begin blinking in orange Then the POWER indicator will stop blinking and light in steady orange when the lamp cooling is complete 59 3 Attach the lens cover after the POWER indicator turns in steady orange Do not turn the projector on for about 10 minutes or more after turning it off Turning the project...

Page 15: ... item of the AUDIO menu 36 The C C Closed Caption is automatically activated when sound is muted and an input signal containing C C is received This function is available only when the signal is NTSC for the VIDEO or S VIDEO or 480i 60 for the COMPUTER IN1 or COMPUTER IN2 and when the AUTO is selected for the DISPLAY in the C C menu under the SCREEN menu 41 1 Press the INPUT button on the projecto...

Page 16: ... MY SOURCE AUTO MAGNIFY PAGE UP VOLUME DOWN ON OFF 㧗 FREEZE MY SOURCE DOC CAMERA button 1 Press the COMPUTER button on the remote control Each time you press the button the projector switches its input port from the current port as below COMPUTER IN 1 COMPUTER IN 2 While the ON is selected for the AUTO SEARCH item in the OPTION menu the projector will keep checking every port sequentially till an ...

Page 17: ...earching and display the image If no signal is found the projector will return to the state selected before the operation Searching an input signal While the ON is selected for the AUTO SEARCH item in the OPTION menu 42 the projector will keep checking the ports in above order repeatedly till an input signal is detected For a computer signal NORMAL 4 3 16 9 16 10 NATIVE For a video signal s video ...

Page 18: ...d height 3 Release the elevator buttons in order to lock the elevator feet To loose an elevator foot push the elevator button on the same side as it To finely adjust twist the foot 4 After making sure that the elevator feet are locked put the projector down gently 5 If necessary the elevator feet can be manually twisted to make more precise adjustments Hold the projector when twisting the feet Do ...

Page 19: ...pective input signal will be selected automatically This function is available only when the AUTO is selected for the VIDEO FORMAT item in the INPUT menu 32 The vertical position and horizontal position will be automatically set to the default The automatic adjustment operation requires approx 10 seconds Also please note that it may not function correctly with some input When this function is perf...

Page 20: ...ed While the magnifying glass icon is displayed on the dialog use the cursor buttons to adjust the magnification ratio The magnification ratio will be adjusted with fine steps And changes in the ratio in single steps are subtle so they may be hard to recognize Press the MAGNIFY OFF button on the remote control to exit magnification 1 Press the KEYSTONE button on the remote control A dialog will ap...

Page 21: ...mode which the picture is frozen To exit the FREEZE mode and restore the screen to normal press the FREEZE button again Temporarily freezing the screen The projector automatically exits from the FREEZE mode when some control buttons are pressed If the projector continues projecting a still image for a long time the LCD panel might possibly be burned in Do not leave the projector in the FREEZE mode...

Page 22: ...ns The basic operations of these menus are as follows In the EASY MENU MENU button Cursor buttons VIDEO DOC CAMERA KEYSTONE ASPECT SEARCH BLANK MUTE MY BUTTON POSITION 1 2 ESC ENTER MENU RESET COMPUTER MY SOURCE AUTO MAGNIFY PAGE UP VOLUME DOWN ON OFF 㧗 FREEZE RESET button ENTER button MENU button Cursor buttons VIDEO DOC CAMERA KEYSTONE ASPECT SEARCH BLANK MUTE MY BUTTON POSITION 1 2 ESC ENTER ME...

Page 23: ...n on the remote control during the operation Note that some items ex LANGUAGE VOLUME cannot be reset In the ADVANCED MENU when you want to return to the previous display press the cursor or the ESC button on the remote control Indication in OSD On Screen Display The meanings of the general words on the OSD are as follows Indication Meaning EXIT Selecting this word finishes the OSD menu It s the sa...

Page 24: ... distortion See the KEYSTONE item in the SETUP menu 34 The on screen menu might be displayed outside of the image display area depending on the adjustment value of the ASPECT D ZOOM and KEYSTONE Changing the values of ASPECT D ZOOM and KEYSTONE may fix the symptom PICTURE MODE Using the cursor buttons switches the picture mode The picture modes are combinations of the GAMMA and the COLOR TEMP sett...

Page 25: ...he OK using the cursor button performs resetting FILTER TIME The usage time of the air filter is shown in the menu Performing this item resets the filter time which counts usage time of the air filter A dialog is displayed for confirmation Selecting the OK using the cursor button performs resetting See the FILTER TIME item in the OPTION menu 43 LANGUAGE Using the cursor buttons changes the display...

Page 26: ... using the cursor buttons and adjust the level using the cursor buttons You can display a test pattern for checking the effect of your adjustment by pressing the ENTER or the INPUT button Each time you press the ENTER or the INPUT button the pattern changes as below No pattern ð Gray scale of 9 steps Ramp Gray scale of 15 steps The eight equalizing bars correspond to eight tone levels of the test ...

Page 27: ...n Each time you press the ENTER or the INPUT button the pattern changes as below No pattern ð Gray scale of 9 steps Ramp Gray scale of 15 steps Lines or other noise might appear on the screen when this function is operated but it is not a malfunction COLOR Using the cursor buttons adjusts the strength of whole color Weak ó Strong This item can be selected only for a video s video and component vid...

Page 28: ...stored of a memory will be lost by saving new data into the memory LOAD 1 LOAD 2 LOAD 3 LOAD 4 Performing a LOAD function loads the data from the memory linked in the number included in the function s name and adjusts the picture automatically depending on the data The LOAD functions whose linked memory has no data are skipped Remember that the current adjusted condition will be lost by loading da...

Page 29: ...dation may appear at the frame area of the picture In such a case please adjust small V POSITION Using the cursor buttons adjusts the vertical position Down ó Up Over adjusting the vertical position may cause noise to appear on the screen If this occurs please reset the vertical position to the default setting Pressing the RESET button on the remote control when the V POSITION is selected will res...

Page 30: ...his feature A dark picture may still be incorrectly adjusted Use a bright picture when adjusting For a video signal and s video signal The video format best suited for the respective input signal will be selected automatically This function is available only when the AUTO is selected for the VIDEO FORMAT item in the INPUT menu 32 The vertical position and horizontal position will be automatically ...

Page 31: ...xample jagged line of the picture for a quick moving object In such a case please select the OFF even though the screen image may lose sharpness VIDEO NR Using the cursor buttons switches the noise reduction mode HIGH ó MID ó LOW This function is performed only for a video signal s video signal or component video signal of 480i 60 or 576i 50 When this function is excessive it may cause a certain d...

Page 32: ... COMPUTER IN1 ó COMPUTER IN2 2 Use the cursor buttons to select the computer input signal type AUTO ó SYNC ON G OFF Selecting the AUTO mode allows you to input a sync on G signal or component video from the port In the AUTO mode the picture may be distorted with certain input signals In such a case remove the signal connector so that no signal is received and select the SYNC ON G OFF and then reco...

Page 33: ...uttons to select the CUSTOM and the RESOLUTION_CUSTOM box will be displayed Set the horizontal HORZ and vertical VERT resolutions using the cursor buttons This function is may not support all resolutions 2 Move the cursor to the OK on screen and press the cursor or the ENTER button The message ARE YOU SURE YOU WISH TO CHANGE RESOLUTION appears To save the setting press the cursor button The horizo...

Page 34: ...D ó BOTTOM The PICTURE POSITION is not changed if any of the following cases apply The ASPECT is set to 4 3 The input signal has an aspect ratio of 4 3 or vertically larger than 4 3 while the ASPECT is set to NORMAL Vertical size of the displayed image is full on the effective display area while the ASPECT is set to NATIVE One of the following messages is displayed on the screen NO INPUT IS DETECT...

Page 35: ... from the MONITOR OUT port in the standby state When the SAVING is selected the AUDIO OUT STANDBY setting of the AUDIO SOURCE 36 is invalid and no signal is output from the AUDIO OUT ports in the standby state MONITOR OUT The combination of a picture shown on screen and output from the MONITOR OUT port can be arranged in the menu The picture coming into the port selected in the 2 is output to the ...

Page 36: ... the 1 is on screen 1 Choose a picture input port using the cursor buttons Choose the AUDIO OUT STANDBY to select the audio output to the AUDIO OUT ports in the standby state The built in speaker does not work in the standby state While the RETURN is selected pressing the cursor or the ENTER button returns to the previous menu 2 Select one of the AUDIO IN ports using the cursor buttons AUDIO IN1 ó...

Page 37: ... remote control MyScreen ó ORIGINAL ó BLUE ó WHITE ó BLACK MyScreen Screen can be registered by the MyScreen item 38 ORIGINAL Screen preset as the standard screen BLUE WHITE BLACK Plain screens in each color To avoid remaining as an afterimage the MyScreen or the ORIGINAL screen will change to the plain black screen after several minutes START UP Using the cursor buttons switches the mode for the ...

Page 38: ...usts the frame position Please move the frame to the position of the image which you want to use The frame may not be able to be moved for some input signals To start registration press the ENTER or the INPUT button on the remote control To restore the screen and return to the previous dialog press the RESET or press the cursor and the INPUT buttons at the same time button Registration takes sever...

Page 39: ...SS while automatically adjusting NO INPUT IS DETECTED SYNC IS OUT OF RANGE INVALID SCAN FREQ NOT AVAILABLE Searching while searching for the input Detecting while an input signal is detected The indication of the input signal displayed by changing The indication of the aspect ratio displayed by changing The indication of the PICTURE MODE displayed by changing The indication of the MY MEMORY displa...

Page 40: ...rs will be erased The name can be a maximum of 16 characters 4 To change an already inserted character press the cursor button to move the cursor to the first line and use the cursor buttons to move the cursor on the character to be changed After pressing the ENTER or the INPUT button the character is selected Then follow the same procedure as described at the item 3 above 5 To finish entering tex...

Page 41: ... caption is not displayed when the OSD menu is active The Closed Caption is the function to display the dialogue narration and or sound effects of a television program or other video sources The Closed Caption availability is depending upon broadcaster and or content MODE Select the Closed Caption MODE setting from following options using the cursor buttons CAPTIONS ó TEXT CAPTIONS Display Closed ...

Page 42: ...ort Then when an input is found the projector will stop searching and display the image COMPUTER IN1 COMPUTER IN2 VIDEO ï S VIDEO DIRECT POWER ON Using the cursor buttons turns on off the DIRECT POWER ON function ON OFF When set to the ON the lamp in projector will be automatically turned on without the usual procedure 14 only when the projector is supplied with the power after the power was cut w...

Page 43: ... is the usage time of the lamp counted after the last resetting It is shown in the OPTION menu Pressing the cursor or the ENTER the RESET button displays a dialog To reset the lamp time select the OK using the cursor button CANCEL OK Please reset the lamp time only when you have replaced the lamp for a suitable indication about the lamp For the lamp replacement see the section the Replacing the la...

Page 44: ...data appears When the current adjustment is not saved to memory the dialog as shown in the right appears If you want to keep the current adjustment please press the cursor button to exit Otherwise loading a data will overwrite the current adjusted condition PICTURE MODE Changes the PICTURE MODE 24 FILTER RESET Displays the filter time reset confirmation dialogue 43 TEMPLATE Makes the template patt...

Page 45: ...hoose the DISABLE to disable the automatic adjustment and make adjustment manually GHOST 1 Select a color element of ghost using the cursor buttons 2 Adjust the selected element using the cursor buttons to disappear ghost FILTER MESSAGE Use the cursor button to set the timer for notifying by the message when to replace the filter unit 500h ó 1000h ó 2000h ó 3000h ó 4000h ó 5000h ó OFF After choosi...

Page 46: ...e on If the remote control does not function correctly disable either of them 13 It s not possible to disable both options at the same time INFORMATION Selecting this item displays a dialog titled INPUT_INFORMATION It shows the information about the current input The FRAME LOCK message on the dialog means the frame lock function is working This item can t be selected for no signal and sync out Whe...

Page 47: ...e the ENTER PASSWORD box is displayed press and hold the RESET or press the cursor and the INPUT buttons at the same time button for about 3 seconds 2 The 10 digit Inquiring Code will be displayed Contact your dealer with the 10 digit Inquiring Code Your password will be sent after your user registration information is confirmed If there is no key input for about 55 seconds while the Inquiring Cod...

Page 48: ...button will return to the MyScreen PASSWORD on off menu When a password is set for the MyScreen The MyScreen registration function and menu will be unavailable The MyScreen Lock menu will be unavailable The START UP setting will be locked on MyScreen and the menu will be unavailable Turning the MyScreen PASSWORD off will allow normal operation of these functions Please do not forget your MyScreen ...

Page 49: ...PIN code box will be displayed again If an incorrect PIN Code is input 3 times the projector will turn off Afterwards the projector will turn off every time an incorrect PIN code is input The projector will also turn off if there is no key input for about 5 minutes while the Enter PIN code box is displayed This function will activate only when the projector is started after AC power is turned off ...

Page 50: ...to the right side of the NEW PASSWORD AGAIN box and press the cursor or the ENTER button to display the NOTE NEW PASSWORD box for about 30 seconds please make note of the password during this time Pressing the cursor or the ENTER button will return to the TRANSITION DETECTOR on off menu Please do not forget your TRANSITION DETECTOR password This function will activate only when the projector is st...

Page 51: ...again 1 4 Move the cursor to the right side of the NEW PASSWORD AGAIN box and press the cursor or the ENTER button to display the NOTE NEW PASSWORD box for about 30 seconds then please make note of the password during this time Pressing the cursor or the ENTER button will return to the MY TEXT PASSWORD on off menu 2 Turning off the MY TEXT PASSWORD 2 1 Follow the procedure in 1 1 to display the MY...

Page 52: ...or the INPUT button to select and enter characters To erase 1 character at one time press the RESET or press the cursor and the INPUT buttons at the same time button Also if you move the cursor to the DELETE or the ALL CLEAR on screen and press the ENTER or the INPUT button 1 character or all characters will be erased The MY TEXT can be input up to 24 characters on each line 3 To change an already...

Page 53: ...d retighten firmly the 2 screws of the lamp that are loosened in the previous process to lock it in place 6 While putting the interlocking parts of the lamp cover and the projector together slide the lamp cover back in place Then firmly fasten the screw of the lamp cover 7 Turn the projector on and reset the lamp time using the LAMP TIME item in the OPTION menu In case of replacement by yourself f...

Page 54: ...tilate the room well and make sure not to breathe the gas that comes out of the projector vents or get it in your eyes or mouth Before replacing the lamp turn the projector off and unplug the power cord then wait at least 45 minutes for the lamp to cool sufficiently Handling the lamp while hot can cause burns as well as damaging the lamp Never unscrew except the appointed marked by an arrow screws...

Page 55: ...ers are damaged or heavily soiled replace them with new ones 7 Put the fine meshed filter on the coarse meshed one turning its stitched side up 8 Put the filter unit back into the projector 9 Turn the projector on and reset the filter time using the FILTER TIME item in the EASY MENU 1 Press the MENU button to display a menu 2 Point at the FILTER TIME using the cursor buttons then press the cursor ...

Page 56: ...ctor personally Doing is so dangerous Avoid wetting the projector or inserting liquids in the projector It could result in a fire an electric shock and or malfunction to the projector Do not put anything containing water cleaners or chemicals near the projector Do not use aerosols or sprays WARNING Please take right care of the projector according to the following Incorrect care could cause not on...

Page 57: ... contact your dealer or service company They will tell you what warranty condition is applied Never use the projector if abnormal operations such as smoke strange odor excessive sound damaged casing or elements or cables penetration of liquids or foreign matter etc should occur In such cases immediately disconnect the power plug from the power outlet After making sure that the smoke or odor has st...

Page 58: ...ture Is the air filter dirty Does the peripheral temperature exceed 35 C Does warm or cool air from an air conditioner or similar unit blow on the projector directly If the same indication is displayed after the remedy please set FAN SPEED of the SERVICE item in the OPTION menu to HIGH A note of precaution when cleaning the air filter Please immediately turn the power off and clean or change the a...

Page 59: ... Red Turned off Lighting In Red The lamp does not light and there is a possibility that interior portion has become heated Please turn the power off and allow the projector to cool down at least 20 minutes After the projector has sufficiently cooled down please make confirmation of the following items and then turn the power on again Is there blockage of the air passage aperture Is the air filter ...

Page 60: ...is a possibility that the interior portion has become heated Please turn the power off and allow the projector to cool down at least 20 minutes After the projector has sufficiently cooled down please make confirmation of the following items and then turn the power on again Is there blockage of the air passage aperture Is the air filter dirty Does the peripheral temperature exceed 35 C Does air fro...

Page 61: ... Neither sounds nor pictures are outputted The signal cables are not correctly connected Correctly connect the connection cables 9 Signal source does not correctly work Correctly set up the signal source device by referring to the manual of the source device The input changeover settings are mismatched Select the input signal and correct the settings 15 16 The BLANK function for pictures and the M...

Page 62: ...nnected Correctly connect the connection cables 9 The brightness is adjusted to an extremely low level Adjust BRIGHTNESS to a higher level using the menu function 26 The computer cannot detect the projector as a plug and play monitor Make sure that the computer can detect a plug and play monitor using another plug and play monitor 10 The BLANK screen is displayed Press the BLANK button on the remo...

Page 63: ... Caring for the lens 56 When the ASPECT is set to NATIVE PICTURE POSITION does not work even if the vertical size of the displayed image does not fit visually on the effective display area Vertical resolution of the input signal is equal to or more than the vertical resolution of display area that is determined by 1 5 x D ZOOM adjustment value Change input signal resolution or and D ZOOM adjustmen...

Page 64: ...lease refer to the following figure Weight mass approx 3 5 kg Ports Computer input port COMPUTER IN1 D sub 15 pin mini x1 COMPUTER IN2 D sub 15 pin mini x1 Computer output port MONITOR OUT D sub 15 pin mini x1 Video input port S VIDEO mini DIN 4 pin x1 VIDEO RCA x1 Audio input output port AUDIO IN1 Stereo mini x1 AUDIO IN2 Stereo mini x1 AUDIO IN3 R L RCA x2 AUDIO OUT R L RCA x2 Others CONTROL D s...

Page 65: ...65 333 131 303 103 67 125 Specifications continued unit mm Specificationsv ...

Reviews: