background image

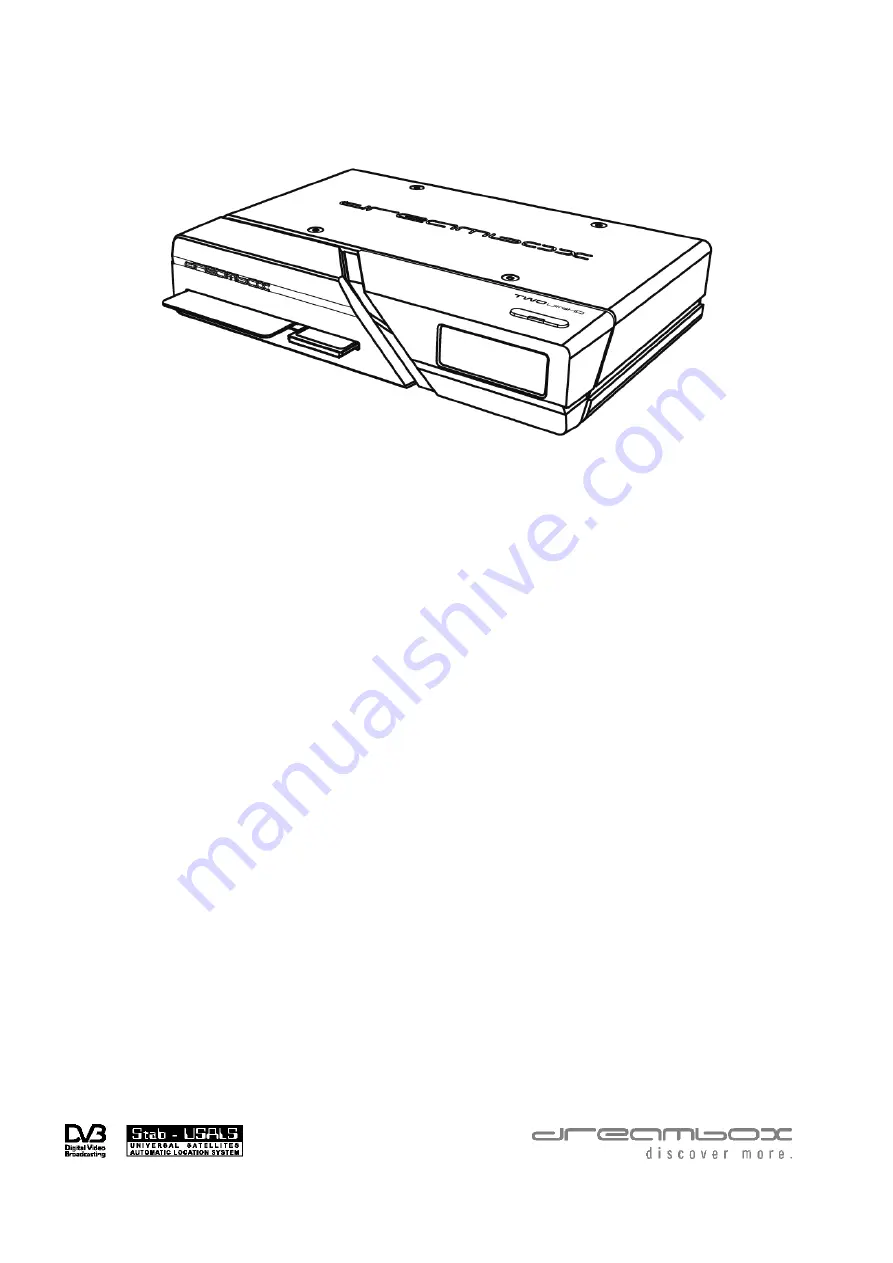
Dreambox Tw o UltraHD

User Manual

Digital satellite receiver to receive free and
encrypted DVB programs.

UltraHD

Twin DVB-S2x tuner

Gigabit network interface

WIFI 2.4 / 5 GhZ

Bluetooth

1x Smartcard-Reader Dreamcrypt

TM

1x Common Interface slot

1x USB 2.0

1x USB 3.0

HDMI 2.0 out

Dreambox OS

Dreambox API

Summary of Contents for Two UltraHD

Page 1: ...e receiver to receive free and encrypted DVB programs UltraHD Twin DVB S2x tuner Gigabit network interface WIFI 2 4 5 GhZ Bluetooth 1x Smartcard Reader DreamcryptTM 1x Common Interface slot 1x USB 2 0...

Page 2: ...reambox or find errors in the operating instructions please have a look in the download area of our homepage www leontechltd com for an updated version Operating instructions are available We hope you...

Page 3: ...Service selection 11 3 3 Changing channel using the service list 11 3 4 Controlling the volume 12 3 5 Changing the audio track 12 3 6 Sub Services 12 3 7 TV Radio switching 12 3 8 Subtitles 13 3 9 Inf...

Page 4: ...reset 36 6 Service searching 37 6 1 DVB S2 Tuner Configuration 38 6 1 1 Single satellite direct connection 38 6 1 2 Two satellites via Toneburst A B 38 6 1 3 Two satellites via DiSEqC A B 39 6 1 4 Fo...

Page 5: ...oftware 52 8 1 Backing up your settings 52 8 2 Restoring your settings 52 8 3 Updating a new software 53 8 3 1 With browser 53 9 Troubleshooting 55 10 Technical data 56 11 Features 59 12 Service Suppo...

Page 6: ......

Page 7: ...f the device Do not expose the device to dripping or splashing liquids Do not place open flame sources such as lit candles on top of the device The device may only be operated in moderate climate Do n...

Page 8: ...disconnect the device from the power outlet In case the device was exposed to humidity immediately disconnect the device from the power outlet In case you notice any serious damage to the outer shell...

Page 9: ...electronic equipment The separate collection and recycling of your waste equipment at the time of disposal will help to conserve natural resources and ensure that it is recycled in a manner that prot...

Page 10: ...mart card with the chip facing downwards and forwards into the smart card reader IR Sensor receives the infrared signals from your Dreambox remote control SD Card reader standby button switches your D...

Page 11: ...gned for devices that support the USB 2 0 standard The amount of supported USB devices depends on the installed image Software and is still under development 1x CI Slot You can insert a Common Interfa...

Page 12: ...ase read the safety instructions under Chapter 1 1 Safety instructions on page 1 In the following is described how to connect the dreambox to an a v receiver a tv device and a network 2 1 1 Satellite...

Page 13: ...n HDMI Kabel einen HDMI Ausgang Ihres AV Receivers mit ein 2 1 2 Connection via HDMI cable HDMI I Connect the dreambox with the hdmi cable to the TV input of your television At least use the hdmi inte...

Page 14: ...Turning your Dreambox on andoff on page 10 2 3 Start wizard If you switch on your Dreambox for the first time you will see the setup wizard The setup wizard will guide you through the first time inst...

Page 15: ...u might be o ered to install default services lists Otherwise you will be asked to perform a service scan Detailed information about the service scan can be found in Chapter 6 4 Automatic scan on page...

Page 16: ...tions 1 Holding down the Standby Button on your remote control for three seconds 2 Press the MENU Button with the Navigation Buttons choose the option Standby Restart and press the OK Button With the...

Page 17: ...e you to the previous or next service Pressing the 0 on the Numeric Keypad will enable you to skip back and forth between the two most recently watched services This feature is quite useful during com...

Page 18: ...to service AC3 Downmix Press the red Options Button to toggle AC3 Downmix See Chapter 5 4 A V Settings on page 31 on and off 3 6 Sub Services The green dot on the left side of Sub Services in the Inf...

Page 19: ...The screenshot on the left shows you an example how a subtitle looks Note Keep in mind that not every station o ers subtitles If no subtitles are available the subtitle list will be empty To deactivat...

Page 20: ...1 4 3 9 Infobar The Infobar appears when switching a channel and shows all necessary information about the selected service By pressing the OK Button you can open the Infobar if needed INFO MENU...

Page 21: ...ext show Pressing the yellow Options Button activates the Channel EPG see Chapter 3 10 Single EPG on page 19 and pressing the blue Options Button activates the Multi EPG see Chapter 3 10 auf Seite 19...

Page 22: ...about 2 seconds With the Navigation Buttons choose the option show single service epg and press the OK Button or 2 Press the Navigation Buttons to open the services list With the Navigation Buttons c...

Page 23: ...r 5 2 Customize on page 30 a selection of your bouquets will appear Select the bouquet for which you want the Multi EPG view This view shows the currently airing shows on the services listed in the le...

Page 24: ...the upcoming hours can be set to 1 5 hours with the Buttons 1 5 on the Numeric Keypad for the chosen bouquet To access the Graphical Multi EPG follow this steps 1 Press the blue Options Button or pres...

Page 25: ...Teletext regular navigation If you are viewing any Teletext page you can enter the interactive mode by pressing the OK Button Use the Navigation Buttons to select a text page number and press the OK B...

Page 26: ...adjust the transparency value of your Teletext Press the Navigation Buttons to adjust the alpha value Text level Press the Navigation Buttons to choose one of the following supported TeleText Versions...

Page 27: ...eleText in Picture TeleText will be shown as small picture in graphics pig Position and size see Position and size Background caching If you switch o background caching searching for the page will not...

Page 28: ...timer or to disabled to deactivate a set sleep timer Press the red Options Button to change the status Sleep timer action Select Standby to completely turn o you Dreambox or Idle mode to put it into...

Page 29: ...u favorites bouquet will stay untouched This way you can easily add newly found channels from the All list to your favorites bouquet To see how it is done refer to Chapter 4 2 Add a service to favorit...

Page 30: ...rrently selected bouquet 1 Press the Navigation Buttons to open the channellist 2 Use the Bouquet Buttons to switch to the desired bouquet to which you want to add channels As an alternative you can p...

Page 31: ...avigation Buttons move the channel to the desired position and press the OK Button to place the service at its new position You can move services as long as the move mode is activated 6 Press the Navi...

Page 32: ...ons 2 With the Navigation Buttons choose the option Protect services and switch to yes with the Navigation Buttons 3 With the Navigation Buttons choose the option Parental control type and choose betw...

Page 33: ...see a notice that the pincode has been changed If the entered pincode was false you will see this notice Press the OK Button to get back into the Change service PIN menu and to enter the correct new p...

Page 34: ...irmware version will show Navigate to this option and press the OK Button toget to the extended options of the inserted CI Module The option strongly depend on the type of module inserted and there fo...

Page 35: ...ed language and press the OK Button in order to activate 5 2 Customize 1 Press the Menu Button to open the main OSD menu 2 With the Navigation Buttons choose the option Setup and press the OK Button 3...

Page 36: ...for zap timers and not only for recordings Recordings always have priority If this option is set to Yes your Dreambox will automatically switch to the service which is supposed to be recorded in case...

Page 37: ...detection In normal case not needed just for some broken cable providers Please try the normal mode first 5 3 Timezone 1 Press the Menu Button to open the main OSD menu 2 With the Navigation Buttons c...

Page 38: ...e keep in mind that AC3 downmix will disable the output of real AC3 signals on every audio out even on the S P DIF output AC3 downmix If you re watching a show with a AC3 audio track it will be change...

Page 39: ...1 Press the Menu Button to open the main OSD menu 2 With the Navigation Buttons choose the option Setup and press the OK Button 3 With the Navigation Buttons choose the option Network and press the OK...

Page 40: ...save the settings and activate the network connection press the OK Button DNS Settings 1 With the Navigation Buttons choose the cable based network Wired and press the OK Button 2 Press the blue Opti...

Page 41: ...he USB ports of your Dreambox 6 A new menu entry WiFi will show 7 With the Navigation Buttons choose the option WiFi 8 Press the green Options Button to scan for available WiFi networks 9 With the Nav...

Page 42: ...y activate the skin the system needs to be restarted Use the Navigation Buttons to select your desired option and press the OK Button 5 8 Factory reset 1 Press the Menu Button to open the main OSD men...

Page 43: ...guration if you want to receive a single satellite with a Single Universal LNB The coax cable is directly connected from your Dreambox to the LNB Follow these steps 1 Press the Menu Button to open the...

Page 44: ...se this type of configuration if you want to receive two satellites from one LNB each It does not matter If you use one or two dishes to achieve this Connect the two coax cables from the two LNBs to a...

Page 45: ...ngs Make sure you know which satellite is connected to which input on the Toneburst switch If you do not findany services in the transponder scan later exchange the two satellites in this list and try...

Page 46: ...igation Buttons choose the option Port B 12 With the Navigation Buttons choose the desired Satellite 13 Press the OK Button to save this settings Make sure you know which satellite is connected to whi...

Page 47: ...10 With the Navigation Buttons choose the desired Satellite 11 With the Navigation Buttons choose the option Port B 12 With the Navigation Buttons choose the desired Satellite 13 With the Navigation B...

Page 48: ...tons choose the option Setup and pressthe OK Button 3 With the Navigation Buttons choose the option Services and Recordings and press the OK Button 4 With the Navigation Buttons choose the option Serv...

Page 49: ...Buttons choose the option Services and Recordings and press the OK Button 4 With the Navigation Buttons choose the option Service Searching and press theOK Button 5 With the Navigation Buttons choose...

Page 50: ...n manual of your positioner for the number of the saved position 19 Press the OK Button to save this settings 6 2 DVB C Tuner configuration DVB C Tuner configuration Follow these steps 1 Press the Men...

Page 51: ...th the Navigation Buttons choose the option Used service scan type 2 With the Navigation Buttons choose the option Frequency Steps 3 With the Navigation Buttons choose the option Frequency scan step s...

Page 52: ...ss the OK Button to save this settings 6 4 Automatic scan Follow these steps 1 Press the Menu Button to open the main OSD menu 2 With the Navigation Buttons choose the option Setup and press the OK Bu...

Page 53: ...ich results in only new services being added to the channel list In order to find the new services follow this steps 1 Press the Navigation Buttons to open the channellist 2 Press the green Options Bu...

Page 54: ...can see the progress of the scan here The scan is done once you see this menu It shows how many channels were found during the scan Press the OK Button to store the found channels or the EXIT Button t...

Page 55: ...Recordings and press the OK Button 4 With the Navigation Buttons choose the option Service Searching and press the OK Button 5 With the Navigation Buttons choose the option Manual Scan and press the...

Page 56: ...ps 1 Press the MENU Button in order to open the main menu 2 Navigate to the option Information and press theOK Button The Information menu will open up 3 Navigate to the option Service and press theOK...

Page 57: ......

Page 58: ...and Software of your Dreambox Hardware und Software Informationen Follow this steps 1 Press the MENU Button in order to open the main menu 2 Navigate to the option Information and press theOK Button...

Page 59: ...igation Buttons choose the option Software management and press the OK Button 4 With the Navigation Buttons choose the option Backup system settings and press the OK Button 8 2 Restore your settings 1...

Page 60: ...the main OSD menu 2 With the Navigation Buttons choose the menu Standby Restart and press the OK Button 3 With the Navigation Buttons choose the option Standby and press the OK Button 4 Please wait un...

Page 61: ...on GO to start the recovery process Your dreambox will try to download and install the latest software now If there is no internet connection available at this moment it will try to install the softwa...

Page 62: ...e Reposition dish so it has a clear view towards the satellite No reception on a channel that was working before Dish aligned incorrectly or faulty Check dish Channel is transmitted in a new slot Star...

Page 63: ...reamcryptTM 1x HDMI 2 0 Connector 10 100 1000 MBit s compatible Gigabit Ethernet Port 1x USB 2 0 Port 1x USB 3 0 Port Micro SD Card Reader Mini USB Service Port Twin DVB S2x 2 GByte DDR4 RAM 16 GByte...

Page 64: ...n MPEG 2 und MPEG 1 compatible H 265 Video Formats 4 3 16 9 Letterbox for 4 3 TV Device Audio decoder Audiocompression MPEG 1 MPEG 2 Layer I and II Audio Mode Dual main sub Stereo Sampling rate 32 kHz...

Page 65: ...der LNB power and polarisation per tuner LNB Current 400mA max short circuit proof LNB Voltage vertical 14V without load 11 5V at 400mA LNB Voltage horizontal 20V without load 17 3V at 400mA LNB shut...

Page 66: ...nd USALS Channel change in less than a second Start wizard for initial setup Pre installed service list for DVB S unlimited channellist for TV Radio Support of favorite lists full automatic channel sc...

Page 67: ...w Centre 4 Kam Hong Street North Point Hong Kong Technical Support E Mail support dreambox de Tel 49 0 180 3 44 11 30 990 0 09 euro min from germany mobile tari s max 42 ct min on the phone Mo Fr 9 00...

Reviews: