Doro IP500PBXW, Owner'S Manual
The Doro IP500PBXW is a versatile PBX system that offers powerful communication solutions for businesses. Ensure seamless operation by referring to the Owner's Manual available for free download on our website. Stay informed and maximize the features of your IP500PBXW with this comprehensive manual. Download it from manualshive.com.
Share
Download


Reviews:
No comments
Related manuals for IP500PBXW

ESERIES
Brand: NEC Pages: 3

LP-R550USB
Brand: Teac Pages: 2

Maxim III
Brand: TeachLogic Pages: 28

KX-TD816AL
Brand: Panasonic Pages: 67

MME100 - Audio Micro System
Brand: Magnavox Pages: 23

CIT310 - iPhone Cordless Phone
Brand: Linksys Pages: 2

CRL81112
Brand: AT&T Pages: 71

MC-5911SC
Brand: Daewoo Pages: 21

IPC-CDD-02
Brand: Contec Pages: 15

DAISY VR6
Brand: Zack Audio Pages: 32

Mic Mate Pro
Brand: MXL Pages: 6

ONECONCEPT 10029361
Brand: Chal-tec Pages: 29

M4 Lite
Brand: SwiftCam Pages: 2

PowerHouse TR551
Brand: X10 Pages: 2

FC-1507-LCD
Brand: Future Call Pages: 8

CD6229i
Brand: Audiovox Pages: 15

THOMSON DS120CD
Brand: Bigben Pages: 76
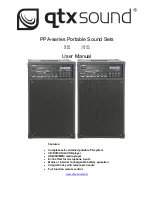
PPA72
Brand: Qtx Pages: 5


