background image

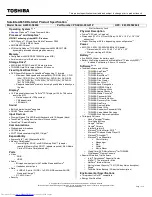
Inspiron 14 5000
Service Manual

Computer Model: Inspiron 14-5468
Regulatory Model: P64G
Regulatory Type: P64G006

Summary of Contents for Inspiron 14 5000 Series

Page 1: ...Inspiron 14 5000 Service Manual Computer Model Inspiron 14 5468 Regulatory Model P64G Regulatory Type P64G006 ...

Page 2: ... the problem WARNING A WARNING indicates a potential for property damage personal injury or death 2016 Dell Inc All rights reserved This product is protected by U S and international copyright and intellectual property laws Dell and the Dell logo are trademarks of Dell Inc in the United States and or other jurisdictions All other marks and names mentioned herein may be trademarks of their respecti...

Page 3: ... 11 Screw list 12 After working inside your computer 13 Removing the battery 14 Procedure 14 Replacing the battery 16 Procedure 16 Replacing the optical drive 17 Prerequisites 17 Procedure 17 Removing the optical drive 20 Procedure 20 Post requisites 20 Removing the keyboard 21 Prerequisites 21 Procedure 21 3 ...

Page 4: ... Procedure 27 Post requisites 27 Removing the coin cell battery 28 Prerequisites 28 Procedure 28 Replacing the coin cell battery 30 Procedure 30 Post requisites 30 Removing the hard drive 31 Prerequisites 31 Procedure 31 Replacing the hard drive 34 Procedure 34 Post requisites 34 Removing the memory modules 35 Prerequisites 35 Procedure 35 4 ...

Page 5: ...dure 41 Post requisites 41 Removing the computer base 42 Prerequisites 42 Procedure 42 Replacing the computer base 47 Procedure 47 Post requisites 47 Removing the optical drive interposer 49 Prerequisites 49 Procedure 49 Replacing the optical drive interposer 51 Procedure 51 Post requisites 51 Removing the heat sink assembly 52 Prerequisites 52 Procedure 52 5 ...

Page 6: ...Procedure 58 Post requisites 58 Removing the system board 59 Prerequisites 59 Procedure 60 Replacing the system board 64 Procedure 64 Post requisites 65 Removing the power adapter port 66 Prerequisites 66 Procedure 66 Replacing the power adapter port 68 Procedure 68 Post requisites 68 Removing the power button board 70 Prerequisites 70 Procedure 70 6 ...

Page 7: ...ocedure 76 Post requisites 76 Removing the display assembly 77 Prerequisites 77 Procedure 77 Replacing the display assembly 81 Procedure 81 Post requisites 81 Removing the palm rest assembly 83 Prerequisites 83 Procedure 84 Replacing the palm rest assembly 85 Procedure 85 Post requisites 85 Removing the display bezel 87 Prerequisites 87 Procedure 88 7 ...

Page 8: ...cedure 92 Post requisites 92 Removing the display panel 94 Prerequisites 94 Procedure 94 Replacing the display panel 97 Procedure 97 Post requisites 97 Removing the display hinges 99 Prerequisites 99 Procedure 99 Replacing the display hinges 101 Procedure 101 Post requisites 101 Removing the display cable 103 Prerequisites 103 Procedure 103 8 ...

Page 9: ...lay back cover and antenna assembly 107 Prerequisites 107 Procedure 108 Replacing the display back cover and antenna assembly 109 Procedure 109 Post requisites 109 Flashing the BIOS 111 Diagnostics 112 Getting help and contacting Dell 114 Self help resources 114 Contacting Dell 114 9 ...

Page 10: ...tion of your operating system for shut down instructions 3 Disconnect your computer and all attached devices from their electrical outlets 4 Disconnect all cables such as telephone cables and network cables from your computer 5 Disconnect all attached devices and peripherals such as keyboard mouse and monitor from your computer 6 Remove any media card and optical disc from your computer if applica...

Page 11: ...y your warranty See the safety instructions that shipped with the product or at www dell com regulatory_compliance CAUTION Before touching anything inside your computer ground yourself by touching an unpainted metal surface such as the metal at the back of the computer While you work periodically touch an unpainted metal surface to dissipate static electricity which could harm internal components ...

Page 12: ...ve assembly Computer base M2 5x5 4 Hard drive bracket Hard drive M3x3 4 Wireless card bracket Wireless card M2x3 1 Computer base Palm rest assembly M2 5x5 13 Heat sink assembly System board M2x3 3 I O board Palm rest assembly M2 5x5 1 System board Palm rest assembly M2x3 1 Power adapter port Palm rest assembly M2x3 1 Power button board Palm rest assembly M2x2 big head 1 Display hinges Palm rest as...

Page 13: ...lace all screws and ensure that no stray screws remain inside your computer 2 Connect any external devices peripherals or cables you removed before working on your computer 3 Replace any media cards discs or any other parts that you removed before working on your computer 4 Connect your computer and all attached devices to their electrical outlets 5 Turn on your computer 13 ...

Page 14: ...re working inside your computer After working inside your computer follow the instructions in After working inside your computer For more safety best practices see the Regulatory Compliance home page at www dell com regulatory_compliance GUID D41367B7 182E 4AEC 84C3 35058353EC72 Procedure 1 Close the display and turn the computer over 2 Slide the battery release latch to the unlock position 14 ...

Page 15: ...battery at an angle and remove the battery from the battery bay 1 battery 2 battery release latch 4 Turn the computer over open the display and press the power button for five seconds to ground the system board 15 ...

Page 16: ...g inside your computer follow the instructions in After working inside your computer For more safety best practices see the Regulatory Compliance home page at www dell com regulatory_compliance GUID 84D588EC A03D 45B0 B499 2E70A47E2634 Procedure Slide the tabs on the battery into the slots on the battery bay and snap the battery into place NOTE The battery release latch returns to the lock positio...

Page 17: ... computer After working inside your computer follow the instructions in After working inside your computer For more safety best practices see the Regulatory Compliance home page at www dell com regulatory_compliance GUID 9CCC3876 D33F 4A82 86C5 360E01796F9E Prerequisites Remove the battery GUID 4AEF5D38 7D9C 4954 9582 6684ED22FE52 Procedure 1 Remove the screw that secures the optical drive assembl...

Page 18: ...c scribe slide the optical drive assembly out of the optical drive bay 1 screw 2 plastic scribe 3 computer base 4 optical drive assembly 3 Carefully pull the optical drive bezel and remove it from the optical drive 18 ...

Page 19: ...4 Remove the screws that secure the optical drive bracket to the optical drive and remove the optical drive bracket 1 optical drive bezel 2 optical drive 3 optical drive bracket 4 screws 2 19 ...

Page 20: ...42C5 847C 6069119BC668 Procedure 1 Align the screw holes on the optical drive bracket with the screw holes on the optical drive 2 Replace the screws that secure the optical drive bracket to the optical drive 3 Align the tabs on the optical drive bezel with the slots on the optical drive assembly and snap the optical drive bezel into place 4 Slide the optical drive assembly into the optical drive b...

Page 21: ... your computer After working inside your computer follow the instructions in After working inside your computer For more safety best practices see the Regulatory Compliance home page at www dell com regulatory_compliance GUID 04CAB8AA 16C0 4A52 824C 92928944B3F2 Prerequisites Remove the battery GUID 60D3DD48 AE02 4FA9 B313 FA9D6C373D7E Procedure 1 Turn the computer over and open the display as far...

Page 22: ... of the keyboard using it to gently release the tabs that secure the keyboard to the palm rest assembly 1 plastic scribe 2 keyboard 3 palm rest assembly 4 tabs 5 3 Carefully turn the keyboard over and place it on the palm rest assembly 22 ...

Page 23: ...4 Open the latch and disconnect the keyboard cable from the system board 1 latch 2 keyboard cable 3 keyboard 4 palm rest assembly 5 Lift the keyboard along with the cable off the palm rest assembly 23 ...

Page 24: ...e safety best practices see the Regulatory Compliance home page at www dell com regulatory_compliance GUID 145778BA DFBD 4DC2 8F80 BD1268D43DB5 Procedure 1 Slide the keyboard cable into the connector on the system board and close the latch to secure the cable 2 Carefully turn the keyboard over slide the tabs on the keyboard into the bottom slots on the palm rest assembly then snap the keyboard int...

Page 25: ...ng inside your computer For more safety best practices see the Regulatory Compliance home page at www dell com regulatory_compliance GUID 97F13B2F B13D 43F8 92D5 1A75EBC3DC5D Prerequisites 1 Remove the battery 2 Remove the optical drive 3 Remove the base cover 4 Follow the procedure from step 1 to step 3 in Removing the hard drive 5 Remove the wireless card 6 Remove the keyboard GUID 1F05B65F 19CC...

Page 26: ...2 Using a plastic scribe gently pry the base cover off the computer base 1 computer base 2 screws 2 3 base cover 26 ...

Page 27: ...w the instructions in After working inside your computer For more safety best practices see the Regulatory Compliance home page at www dell com regulatory_compliance GUID 75756B5F F671 48FD B08F DFEA1B459161 Procedure 1 Slide the tabs on the base cover into the slots on the computer base and snap the base cover into place 2 Replace the screws that secure the base cover to the computer base GUID 29...

Page 28: ...ty best practices see the Regulatory Compliance home page at www dell com regulatory_compliance CAUTION Removing the coin cell battery resets the BIOS setup program s settings to default It is recommended that you note the BIOS setup program s settings before removing the coin cell battery GUID D23A4BFB 4596 4E50 82D2 9A56E3615608 Prerequisites 1 Remove the battery 2 Remove the base cover GUID B5B...

Page 29: ...1 plastic scribe 2 coin cell battery 3 battery socket 29 ...

Page 30: ...nside your computer follow the instructions in After working inside your computer For more safety best practices see the Regulatory Compliance home page at www dell com regulatory_compliance GUID A6F2AC53 84FD 4F8E 9565 FB2C4F400108 Procedure With the positive side facing up snap the coin cell battery into the battery socket on the system board GUID AA93F32F 2905 4E30 9ACC A0A4782F398C Post requis...

Page 31: ...see the Regulatory Compliance home page at www dell com regulatory_compliance CAUTION Hard drives are fragile Exercise care when handling the hard drive CAUTION To avoid data loss do not remove the hard drive while the computer is in sleep or on state GUID DF97DC63 CE15 49CB 8F39 0E7A090F0ACE Prerequisites 1 Remove the battery 2 Remove the base cover GUID E642A587 FB67 4B64 A448 621F01AFFDED Proce...

Page 32: ...3 Lift the hard drive assembly off the computer base 1 screws 4 2 hard drive assembly 3 hard drive cable 4 latch 32 ...

Page 33: ...m the hard drive assembly 1 hard drive assembly 2 hard drive interposer 5 Remove the screws that secure the hard drive bracket to the hard drive and lift the hard drive off the hard drive bracket 1 hard drive 2 hard drive bracket 3 screws 4 33 ...

Page 34: ...GUID F6894FC1 C711 4F5E A2EE FC7959EA809F Procedure 1 Place the hard drive over the hard drive bracket 2 Align the screw holes on the hard drive bracket with the screw holes on the hard drive 3 Replace the screws that secure the hard drive to the hard drive bracket 4 Connect the hard drive interposer to the hard drive assembly 5 Slide the hard drive assembly in the computer base and align the scre...

Page 35: ...puter For more safety best practices see the Regulatory Compliance home page at www dell com regulatory_compliance GUID 93527083 1E73 4E3B A7C9 4BDD2BC84BE1 Prerequisites 1 Remove the battery 2 Remove the base cover GUID F603FF19 8194 4FD7 B2AE 57E72D19A383 Procedure NOTE Depending on the configuration ordered the memory module and number of memory module slots may be different on your computer 1 ...

Page 36: ...2 Slide and remove the memory module from the memory module slot 1 securing clips 2 2 memory module 36 ...

Page 37: ...the steps in Before working inside your computer After working inside your computer follow the instructions in After working inside your computer For more safety best practices see the Regulatory Compliance home page at www dell com regulatory_compliance GUID 4A1CA5FA 650B 45B9 9702 581BF482454B Procedure 1 Align the notch on the memory module with the tab on the memory module slot 37 ...

Page 38: ...odule down until it clicks into place NOTE If you do not hear the click remove the memory module and reinstall it 1 notch 2 memory module 3 securing clips 4 memory module slot 5 tab GUID E91B0E23 1E75 4172 A675 AF4372A1510F Post requisites 1 Replace the base cover 2 Replace the battery 38 ...

Page 39: ... in After working inside your computer For more safety best practices see the Regulatory Compliance home page at www dell com regulatory_compliance GUID 258BB6C3 17C8 444C BDF2 CE5CEE4EC19A Prerequisites 1 Remove the battery 2 Remove the base cover GUID 72FE2FE3 443D 4704 8278 F900879D53B1 Procedure 1 Remove the screw that secures the wireless card bracket to the wireless card 2 Lift the wireless ...

Page 40: ...4 Slide and remove the wireless card out of the wireless card slot 1 wireless card 2 wireless card slot 3 screw 4 antenna cables 2 5 wireless card bracket 40 ...

Page 41: ... to the wireless card do not place any cables under it 1 Align the notch on the wireless card with the tab on the wireless card slot and slide the card into the slot 2 Connect the antenna cables to the wireless card The following table provides the antenna cable color scheme for the wireless card supported by your computer Connectors on the wireless card Antenna cable color Main white triangle Whi...

Page 42: ...inside your computer For more safety best practices see the Regulatory Compliance home page at www dell com regulatory_compliance GUID 97F13B2F B13D 43F8 92D5 1A75EBC3DC5D Prerequisites 1 Remove the battery 2 Remove the optical drive 3 Remove the base cover 4 Follow the procedure from step 1 to step 3 in Removing the hard drive 5 Remove the wireless card 6 Remove the keyboard GUID F3A8B22A BD0A 4D...

Page 43: ...2 Remove the screws that secure the computer base to the palm rest assembly 1 optical drive cable 2 latch 3 screws 2 3 Close the display and turn the computer over 43 ...

Page 44: ...ews that secure the computer base to the palm rest assembly 1 screws 13 2 computer base 5 Using a plastic scribe pry up the computer base from the palm rest assembly starting from the area around the display hinges 44 ...

Page 45: ...6 Lift the computer base off the palm rest assembly 1 palm rest assembly 2 plastic scribe 3 computer base 45 ...

Page 46: ...7 Lift the optical drive interposer along with the cable off the computer base 1 computer base 2 optical drive interposer 3 optical drive cable 46 ...

Page 47: ...he computer base and snap it into place 2 Turn the computer base over 3 Align and place the computer base on the palm rest assembly 4 Press the computer base down along the edges to snap it into place 5 Replace the screws that secure the computer base to the palm rest assembly 6 Turn the computer over and open the display 7 Replace the screws that secure the computer base to the palm rest assembly...

Page 48: ...6 Replace the battery 48 ...

Page 49: ...For more safety best practices see the Regulatory Compliance home page at www dell com regulatory_compliance GUID 9953856D 1A75 4D18 8037 730FB5086D44 Prerequisites 1 Remove the battery 2 Remove the base cover 3 Remove the optical drive 4 Follow the procedure from step 1 to step 3 in Removing the hard drive 5 Remove the wireless card 6 Remove the keyboard GUID 7A2672D8 AEA1 4CF7 A9A9 93DC85348685 ...

Page 50: ...3 Lift the optical drive interposer along with the cable off the computer base 1 computer base 2 optical drive interposer 3 optical drive cable 50 ...

Page 51: ...ctices see the Regulatory Compliance home page at www dell com regulatory_compliance GUID 734A947E 7B54 45CD BA9A 313C9FF23853 Procedure 1 Align the optical drive interposer with the slot on the computer base and snap it into place 2 Follow the procedure from step 1 to step 5 in Replacing the computer base GUID 6B7886A2 FD1F 4BA3 9200 9A6D81EA1FDC Post requisites 1 Replace the keyboard 2 Replace t...

Page 52: ... sink to cool before you touch it CAUTION For maximum cooling of the processor do not touch the heat transfer areas on the heat sink The oils in your skin can reduce the heat transfer capability of the thermal grease GUID 2C58456A 1752 41D4 9864 67C574180A4B Prerequisites 1 Remove the battery 2 Remove the base cover 3 Remove the optical drive 4 Follow the procedure from step 1 to step 3 in Removin...

Page 53: ...aptive screws that secure the heat sink assembly to the system board 3 Remove the screws that secure the heat sink assembly to the system board 4 Lift the heat sink assembly off the system board 1 screws 3 2 fan cable 3 heat sink assembly 4 captive screws 3 5 system board 53 ...

Page 54: ...tem board and fan are reinstalled together If either the system board or the fan is replaced use the thermal pad provided in the kit to ensure that thermal conductivity is achieved GUID 33C9F96A 82A7 434D A213 EB687B0C3797 Procedure 1 Align the screw holes on the heat sink assembly with the screw holes on the system board 2 In sequential order as indicated on the heat sink assembly tighten the cap...

Page 55: ...5 Replace the memory modules 6 Replace the optical drive 7 Replace the base cover 8 Replace the battery 55 ...

Page 56: ...ory Compliance home page at www dell com regulatory_compliance GUID 665224D1 DB48 4C4C 9A04 EAF518114940 Prerequisites 1 Remove the battery 2 Remove the base cover 3 Remove the optical drive 4 Follow the procedure from step 1 to step 3 in Removing the hard drive 5 Remove the wireless card 6 Remove the keyboard 7 Remove the computer base GUID 24A82D4B 190D 49C5 9F6C C3A917235684 Procedure 1 Remove ...

Page 57: ...4 Lift the I O board off the palm rest assembly 1 I O board 2 I O board cable 3 latch 4 screw 57 ...

Page 58: ...nce GUID 68E6B63E A1EE 4E2A AC4A 4E59FABE42C4 Procedure 1 Slide the I O board cable into the connector on the I O board and close the latch to secure the cable 2 Turn the I O board over and align the screw hole on the I O board with the screw hole on the palm rest assembly 3 Replace the screw that secures the I O board to the palm rest assembly GUID CC32F53D 2685 4E17 82F8 3E707844DAAB Post requis...

Page 59: ...after you replace the system board NOTE Replacing the system board removes any changes you have made to the BIOS using the BIOS setup program You must make the appropriate changes again after you replace the system board NOTE Before disconnecting the cables from the system board note the location of the connectors so that you can reconnect the cables correctly after you replace the system board GU...

Page 60: ...s possible 2 Open the latches and disconnect the touch pad cable and the power button board cable from the system board 1 power button board cable 2 palm rest assembly 3 touch pad cable 3 Close the display and turn the computer over 4 Open the latch and disconnect the display cable from the system board 60 ...

Page 61: ...able from the system board 6 Peel the tape from the antenna cables 7 Remove the screw that secures the system board to the palm rest assembly 1 screw 2 display cable 3 speaker cable 4 system board 5 palm rest assembly 6 tape 61 ...

Page 62: ...lm rest assembly and carefully turn the system board over 1 system board 2 palm rest assembly 9 Disconnect the power adapter port cable from the system board 10 Open the latch and disconnect the I O board cable from the system board 62 ...

Page 63: ...11 Lift the system board off the palm rest assembly 1 system board 2 power adapter port cable 3 I O board cable 4 latch 63 ...

Page 64: ... made to the BIOS using the BIOS setup program You must make the appropriate changes again after you replace the system board GUID 8F53B13B 4B28 4100 80CA A63BEEF6B213 Procedure 1 Connect the power adapter port cable to the system board CAUTION To avoid damaging the system board ensure that no cables are placed under it 2 Slide the I O board cable into its connector on the system board and close t...

Page 65: ...board cable into their connectors on the system board and close the latches to secure the cables GUID D017B5DD EB6A 4CF6 A80D BDE51AB3383C Post requisites 1 Replace the I O board 2 Replace the heat sink assembly 3 Replace the computer base 4 Replace the keyboard 5 Replace the wireless card 6 Follow the procedure from step 5 to step 7 in Replacing the hard drive 7 Replace the memory modules 8 Repla...

Page 66: ...e page at www dell com regulatory_compliance GUID 3A5B5686 B6B7 42E5 BE56 E41783FEF06F Prerequisites 1 Remove the battery 2 Remove the base cover 3 Remove the optical drive 4 Remove the memory modules 5 Follow the procedure from step 1 to step 3 in Removing the hard drive 6 Remove the wireless card 7 Remove the keyboard 8 Remove the computer base 9 Remove the heat sink assembly 10 Remove the I O b...

Page 67: ...res the power adapter port to the palm rest assembly 3 Lift the power adapter port along with the power adapter port cable off the palm rest assembly 1 screw 2 power adapter port 3 power adapter port cable 4 palm rest assembly 67 ...

Page 68: ...UID BF398AE8 203B 4595 87BC 1108ADEDA2CA Procedure 1 Place the power adapter port into the slot on the palm rest assembly 2 Route the power adapter port cable through its routing guides on the palm rest assembly 3 Replace the screw that secures the power adapter port to the palm rest assembly GUID 71BAAC1F AD36 426F A833 770D230F4A54 Post requisites 1 Replace the system board 2 Replace the I O boa...

Page 69: ...10 Replace the base cover 11 Replace the battery 69 ...

Page 70: ...t www dell com regulatory_compliance GUID 052CCD12 38C9 4BF4 9311 FB3DAE121EA0 Prerequisites 1 Remove the battery 2 Remove the base cover 3 Remove the optical drive 4 Remove the memory modules 5 Follow the procedure from step 1 to step 3 in Removing the hard drive 6 Remove the wireless card 7 Remove the keyboard 8 Remove the computer base 9 Remove the heat sink assembly 10 Remove the I O board 11 ...

Page 71: ...3 Lift the power button board along with its cable off the palm rest assembly 1 screw 2 power button board 3 tape 4 power button board cable 71 ...

Page 72: ...ompliance GUID F760289F 174A 473F AB01 8B9B47C80F6D Procedure 1 Align the screw hole on the power button board with the screw hole on the palm rest assembly 2 Adhere the tape on the power button board 3 Replace the screw that secures the power button board to the palm rest assembly GUID 415B643A 3242 49FB ABB2 5DCF86D21855 Post requisites 1 Replace the system board 2 Replace the I O board 3 Replac...

Page 73: ...10 Replace the base cover 11 Replace the battery 73 ...

Page 74: ...de your computer For more safety best practices see the Regulatory Compliance home page at www dell com regulatory_compliance GUID B1342BBB A06E 45A4 A555 939CA3A82B08 Prerequisites 1 Remove the battery 2 Remove the base cover 3 Remove the optical drive 4 Follow the procedure from step 1 to step 3 in Removing the hard drive 5 Remove the wireless card 6 Remove the keyboard 7 Remove the computer bas...

Page 75: ...2 Lift the speakers along with the speaker cable off the palm rest assembly 1 speaker cable 2 speakers 2 3 palm rest assembly 75 ...

Page 76: ...ices see the Regulatory Compliance home page at www dell com regulatory_compliance GUID E8CB3C57 F1C3 4CB8 9A95 1DB48AD1B926 Procedure 1 Using the alignment posts align and place the speakers on the palm rest assembly 2 Connect the speaker cable to the system board GUID 53F0CF8B E3E3 4F5A AC3B 75AE491A44AC Post requisites 1 Replace the computer base 2 Replace the keyboard 3 Replace the wireless ca...

Page 77: ...e page at www dell com regulatory_compliance GUID 085D0E34 796C 47EE 974F FD132BFF6357 Prerequisites 1 Remove the battery 2 Remove the base cover 3 Remove the optical drive 4 Remove the memory modules 5 Follow the procedure from step 1 to step 3 in Removing the hard drive 6 Remove the wireless card 7 Remove the keyboard 8 Remove the computer base 9 Remove the heat sink assembly 10 Remove the I O b...

Page 78: ... 2 routing guides 3 antenna cables 2 3 Turn the computer over and open the display at an angle of 90 degrees 4 Turn the computer over and place it on the edge of the table in a position that allows access to the screws on the display hinges 5 Remove the screws that secure the display hinges to the palm rest assembly 78 ...

Page 79: ...6 Carefully lift the display assembly from the palm rest assembly 1 computer base 2 screws 3 3 display hinges 2 4 display assembly 79 ...

Page 80: ...7 Carefully place the display assembly on a clean flat surface 1 display assembly 80 ...

Page 81: ...the edge of the table with the speakers facing away from the edge 2 Align the screw holes on the palm rest assembly with the screw holes on the display hinges 3 Replace the screws that secure the display hinges to the palm rest assembly 4 Route the antenna cables through its routing guides on the palm rest assembly 5 Route the display cable through its routing guides on the palm rest assembly GUID...

Page 82: ...9 Replace the optical drive 10 Replace the base cover 11 Replace the battery 82 ...

Page 83: ...gulatory Compliance home page at www dell com regulatory_compliance GUID FCA6B1D8 C807 4087 AB9B 48AD48361A94 Prerequisites 1 Remove the battery 2 Remove the base cover 3 Remove the optical drive 4 Remove the memory modules 5 Follow the procedure from step 1 to step 3 in Removing the hard drive 6 Remove the wireless card 7 Remove the keyboard 8 Remove the computer base 9 Remove the speakers 10 Rem...

Page 84: ...GUID AD41B5E5 BC9F 472C 8879 14566B1F0F77 Procedure After performing the steps in the prerequisites we are left with the palm rest assembly 1 palm rest assembly 84 ...

Page 85: ...e page at www dell com regulatory_compliance GUID 6232DAED 6B4A 44F8 854F 41A75BE451EF Procedure Place the palm rest assembly on a clean and flat surface GUID 6C4B48FD 963C 4D1C AD0B F156FF759B2D Post requisites 1 Replace the display assembly 2 Replace the power button board 3 Replace the power adapter port 4 Replace the system board 5 Replace the I O board 6 Replace the heat sink assembly 7 Repla...

Page 86: ...13 Replace the optical drive 14 Replace the base cover 15 Replace the battery 86 ...

Page 87: ... For more safety best practices see the Regulatory Compliance home page at www dell com regulatory_compliance GUID 619F7DFA 44FF 4A4B AC92 1E2A0895892E Prerequisites 1 Remove the battery 2 Remove the base cover 3 Remove the optical drive 4 Remove the memory modules 5 Follow the procedure from step 1 to step 3 in Removing the hard drive 6 Remove the wireless card 7 Remove the keyboard 8 Remove the ...

Page 88: ...6FEB5E6C BA6F 4D61 9801 5CCC4AE67115 Procedure 1 Using your fingertips gently pry up the inner edges of the display bezel 1 display bezel 2 display panel 2 Lift the display bezel off the display assembly 88 ...

Page 89: ...ll com regulatory_compliance GUID 2F2F1AA9 582D 4A40 8378 6A5B001C5640 Procedure Align the display bezel with the display back cover and gently snap the display bezel into place GUID E26201CA 1B8B 4DB7 913F CA85289E3B6C Post requisites 1 Replace the display assembly 2 Replace the system board 3 Replace the I O board 4 Replace the heat sink assembly 5 Replace the computer base 6 Replace the keyboar...

Page 90: ... page at www dell com regulatory_compliance GUID 173A4BBC 1988 42AF BD63 CD0857B8BE3D Prerequisites 1 Remove the battery 2 Remove the base cover 3 Remove the optical drive 4 Remove the memory modules 5 Follow the procedure from step 1 to step 3 in Removing the hard drive 6 Remove the wireless card 7 Remove the keyboard 8 Remove the computer base 9 Remove the heat sink assembly 10 Remove the I O bo...

Page 91: ...2 Using a plastic scribe gently pry the camera off the display back cover 1 plastic scribe 2 camera cable 3 camera 4 display back cover 91 ...

Page 92: ...liance GUID 5C0CEC57 CE59 47A8 8B91 F60577ECC0C9 Procedure 1 Align the camera to the slot on the display back cover and adhere the camera in place 2 Connect the camera cable to the camera GUID CB0B4DC7 6509 4B96 9A3D BF4A688DD310 Post requisites 1 Replace the display bezel 2 Replace the display assembly 3 Replace the system board 4 Replace the I O board 5 Replace the heat sink assembly 6 Replace t...

Page 93: ...13 Replace the battery 93 ...

Page 94: ... dell com regulatory_compliance GUID 20967EA2 1E13 4690 9519 BE1BB8AEB83A Prerequisites 1 Remove the battery 2 Remove the base cover 3 Remove the optical drive 4 Remove the memory modules 5 Follow the procedure from step 1 to step 3 in Removing the hard drive 6 Remove the wireless card 7 Remove the keyboard 8 Remove the computer base 9 Remove the heat sink assembly 10 Remove the I O board 11 Remov...

Page 95: ... display panel over 1 screws 4 2 display panel 3 display back cover 3 Peel the tape that secures the display cable to the display panel 4 Open the latch and disconnect the display cable from the display panel 95 ...

Page 96: ...5 Lift the display panel off the display back cover 1 display back cover 2 latch 3 display cable 4 tape 5 display panel 96 ...

Page 97: ... Slide the display cable into the connector on the display panel and close the latch to secure the cable 2 Adhere the tape that secures the display cable to the display panel 3 Turn the display panel over and place it on the display back cover 4 Align the screw holes on the display panel with the screw holes on the display back cover 5 Replace the screws that secure the display panel to the displa...

Page 98: ...9 Follow the procedure from step 5 to step 7 in Replacing the hard drive 10 Replace the memory modules 11 Replace the optical drive 12 Replace the base cover 13 Replace the battery 98 ...

Page 99: ...latory_compliance GUID 52973351 A544 4FDD 819D 9C0A4914C5A6 Prerequisites 1 Remove the battery 2 Remove the base cover 3 Remove the optical drive 4 Remove the memory modules 5 Follow the procedure from step 1 to step 3 in Removing the hard drive 6 Remove the wireless card 7 Remove the keyboard 8 Remove the computer base 9 Remove the heat sink assembly 10 Remove the I O board 11 Remove the system b...

Page 100: ...2 Carefully lift the display hinges off the display back cover 1 screws 12 2 display hinges 2 3 display back cover 100 ...

Page 101: ...C CB75 421C B1E8 2BE321BFF408 Procedure 1 Align the screw holes on the display hinges with the screw holes on the display back cover 2 Replace the screws that secure the display hinges to the display back cover GUID 7C8D73E1 451B 43F8 8160 276E630EF867 Post requisites 1 Replace the display panel 2 Replace the display bezel 3 Replace the display assembly 4 Replace the system board 5 Replace the I O...

Page 102: ...13 Replace the base cover 14 Replace the battery 102 ...

Page 103: ...latory_compliance GUID BACE68EF ED07 4B1F AAAC 91BA7D74E582 Prerequisites 1 Remove the battery 2 Remove the base cover 3 Remove the optical drive 4 Remove the memory modules 5 Follow the procedure from step 1 to step 3 in Removing the hard drive 6 Remove the wireless card 7 Remove the keyboard 8 Remove the computer base 9 Remove the heat sink assembly 10 Remove the I O board 11 Remove the system b...

Page 104: ...the display cable routing and remove the display cable from the routing guides on the display back cover 4 Note the camera cable routing and remove the camera cable from the display back cover 1 display cable 2 display back cover 3 camera cable 4 tape 104 ...

Page 105: ...B04 F600AC7A77ED Procedure 1 Route the display cable through the routing guides on the display back cover 2 Connect the camera cable to the camera 3 Adhere the tape that secures the camera cable to the display back cover GUID 46309FD5 5AE7 4EB5 94E1 972CCB251104 Post requisites 1 Replace the display hinges 2 Replace the display panel 3 Replace the display bezel 4 Replace the display assembly 5 Rep...

Page 106: ...13 Replace the optical drive 14 Replace the base cover 15 Replace the battery 106 ...

Page 107: ...Regulatory Compliance home page at www dell com regulatory_compliance GUID DE42C8B9 87C3 4326 83F7 8E25CD12799E Prerequisites 1 Remove the battery 2 Remove the base cover 3 Remove the optical drive 4 Remove the memory modules 5 Follow the procedure from step 1 to step 3 in Removing the hard drive 6 Remove the wireless card 7 Remove the keyboard 8 Remove the computer base 9 Remove the heat sink ass...

Page 108: ...E5E521 7E1B 424A 917F D4F24F35AD16 Procedure After performing the steps mentioned in the prerequisites we are left with the display back cover and antenna assembly 1 display back cover and antenna assembly 108 ...
Page 109: ... the Regulatory Compliance home page at www dell com regulatory_compliance GUID 3A8D5B1E 3EF4 4DF0 BB5E 776AE7F5EA0C Procedure Place the display back cover and antenna assembly on a clean flat surface GUID 66270DF7 91D0 4A83 82A8 87B363F9A715 Post requisites 1 Replace the display cable 2 Replace the display hinges 3 Replace the display panel 4 Replace the camera 5 Replace the display bezel 6 Repla...

Page 110: ...13 Follow the procedure from step 5 to step 7 in Replacing the hard drive 14 Replace the memory modules 15 Replace the optical drive 16 Replace the base cover 17 Replace the battery 110 ...

Page 111: ... Submit NOTE If you do not have the Service Tag use the auto detect feature or manually browse for your computer model 4 Click Drivers downloads Find it myself 5 Select the operating system installed on your computer 6 Scroll down the page and expand BIOS 7 Click Download to download the latest version of the BIOS for your computer 8 After the download is complete navigate to the folder where you ...

Page 112: ... and the battery has less than 5 percent charge Off Power adapter is connected and the battery is fully charged Computer is running on battery and the battery has more than 5 percent charge Computer is in sleep state hibernation or turned off The power and battery status light blinks amber along with beep codes indicating failures For example the power and battery status light blinks amber two tim...

Page 113: ...ound but invalid The computer may emit a series of beeps during start up if the errors or problems cannot be displayed The repetitive beep codes help the user troubleshoot problems with the computer Camera status light Indicates whether the camera is in use Solid white Camera is in use Off Camera is not in use Caps Lock status light Indicates whether Caps Lock is enabled or disabled Solid white Ca...

Page 114: ...t and press Enter Online help for operating system www dell com support windows www dell com support linux Troubleshooting information user manuals setup instructions product specifications technical help blogs drivers software updates and so on www dell com support Learn about your operating system setting up and using your computer data backup diagnostics and so on See Me and My Dell at www dell...

Page 115: ...ountry and product and some services may not be available in your country NOTE If you do not have an active internet connection you can find contact information on your purchase invoice packing slip bill or Dell product catalog 115 ...

Reviews: