DAITEM SH630AX, Installation Manual
The DAITEM SH630AX Installation Manual is available for free download on our website. This comprehensive manual provides detailed step-by-step instructions for installing and configuring the DAITEM SH630AX system. Ensure a seamless installation process by accessing the manual from manualshive.com, your go-to resource for user manuals.
Share
Download


Reviews:
No comments
Related manuals for SH630AX
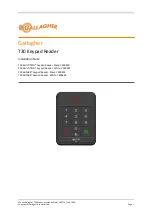
T30
Brand: Gallagher Pages: 13

JA-81F
Brand: olympia electronics Pages: 2

K12
Brand: Bewator Pages: 32

H85/DEC Series
Brand: Roger Pages: 60

SpreadNet SN991-REMOTE
Brand: IntelliSense Pages: 2

CS450
Brand: Aritech Pages: 39

900-239-230-001
Brand: YASKAWA Pages: 2

A0129
Brand: Channel Vision Pages: 9

JA-81F
Brand: olympia electronics Pages: 2

Spectra 1689
Brand: Paradox Pages: 47

598
Brand: Xantech Pages: 1

XKPADUBK
Brand: Hamlet Pages: 2

DG-160
Brand: Gianni Pages: 2

DGT 61
Brand: fadini Pages: 3

Noteworthy NW21USB
Brand: PORT Pages: 7

XL STAR 4500
Brand: FBII Pages: 6

VS-HP1000-000
Brand: Vivint Pages: 2

KP01
Brand: Vivint Pages: 9


