


D-Link Technical Support – DS-60x VPN to DIR-130
Page
1
of
13
DS-60x VPN to DIR-130
Configuration of DIR-130
Step 1:
Open your web browser and type in the IP address of the router (
192.168.0.1
by
default). Enter the username (
admin
by default) and password (blank by default), and then
click
OK
.
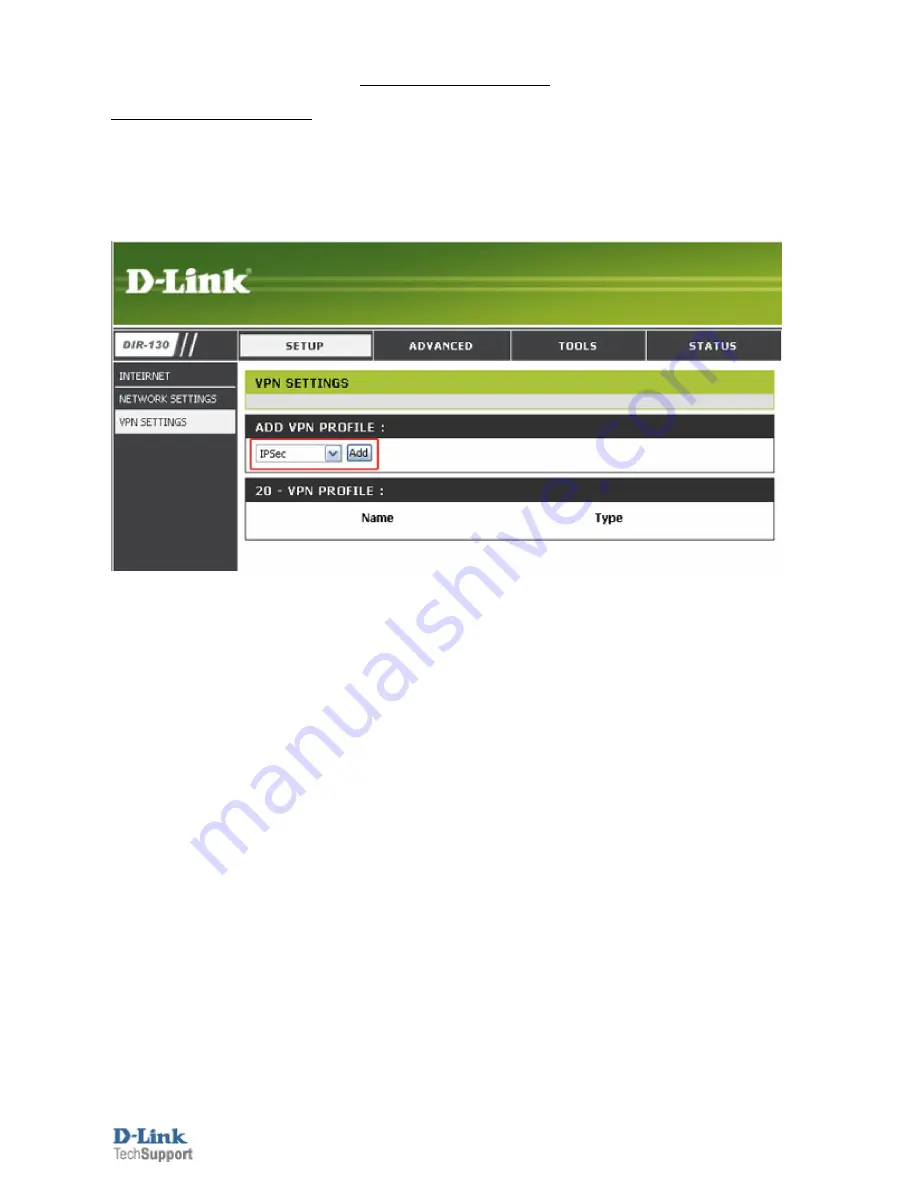
Step 2:
Click on
SETUP
and select
VPN SETTINGS
. Choose
IPSec
from the
ADD VPN
PROFILE
dropdown menu and click
Add
.


