Copyright © 2021 Cyber Power Systems, Inc. All rights reserved.
2
3
1
INSTALLATION GUIDE
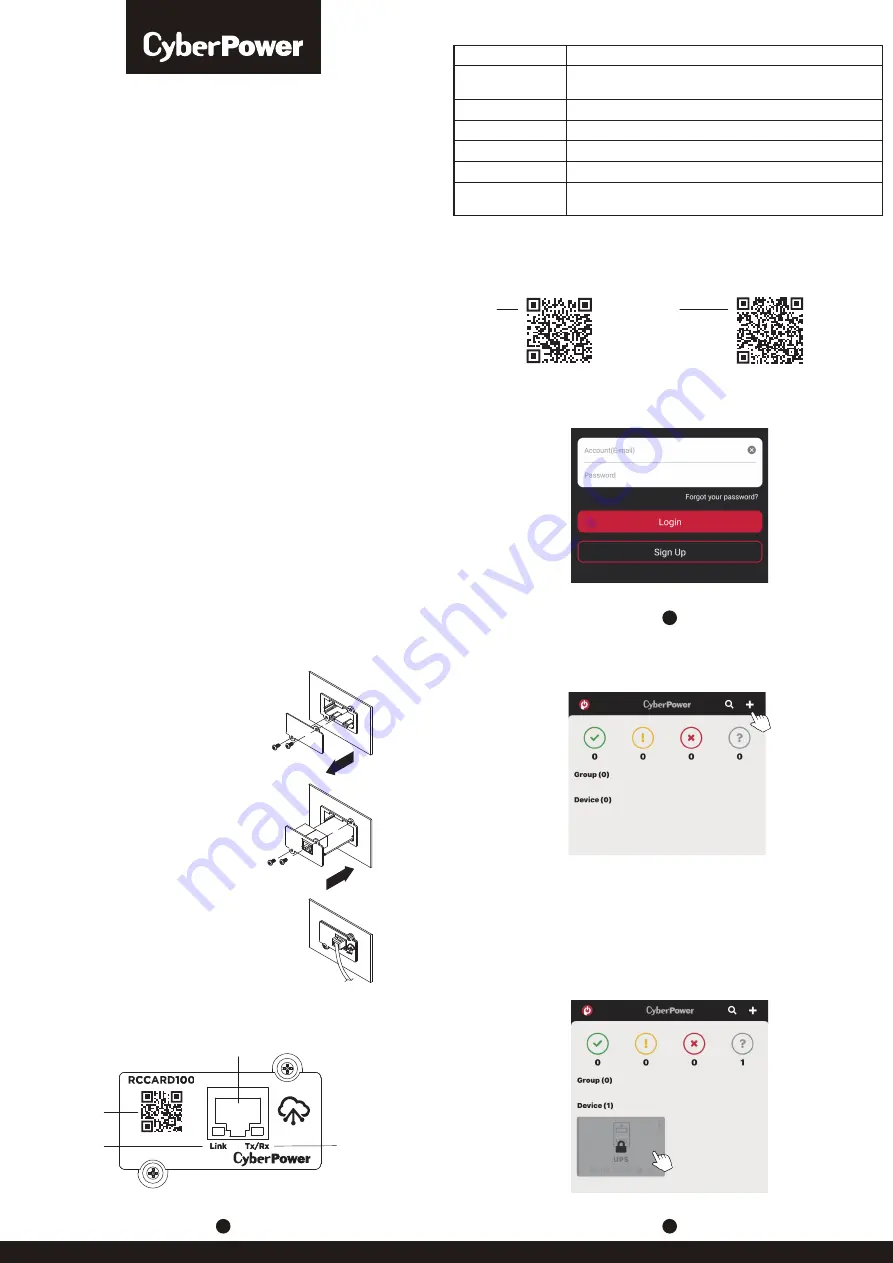
3. Insert and tighten the
retaining screws.
4. Connect an Ethernet cable to
the Ethernet port of the
Remote Cloud Card.
2. Install the Remote Cloud
Card into the expansion slot.
1. Remove the two retaining
screws from the expansion
slot, and remove the cover.
Step 1. Hardware Installation
Definitions for the LED Indicators
Step 2. Application Installation
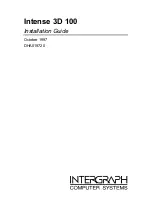
Install the “POWERPANEL” application available for download on
the Apple App Store or Google Play, then launch the application.
Figure 1
Step 3. Sign Up and Login, as shown in Figure 1
Step 4. Add a device in the POWERPANEL app
1. Click “+” in the upper right corner of the homepage, as shown in
Figure 2.
Figure 2
iOS
Android
Tx/R
x
Link
RCCARD100
CyberPower
Tx/R
x
RCCA
RD100
CyberPower
Link LED color
Off
On (Yellow)
Tx/Rx LED color
Off
On (Green)
Flashing
Condition
The Remote Cloud Card is not connected to the
Network/ or the Remote Cloud Card power is off.
The Remote Cloud Card is connected to the Network.
The Remote Cloud Card power is off.
The Remote Cloud Card power is on.
- Receiving/transmitting data packet
- Reset finished
Quick Start Guide
REMOTE CLOUD CARD
RCCARD100
REMOTE CLOUD CARD
RCCARD100
NOTE:
The Remote Wireless Cloud Card is
hot-swappable, so you do not need to turn off the
device to install it.
QR Code
LINK Indicator
Tx/Rx Indicator
Ethernet Port
Cloud
Figure 3
2. Locate the “Add Device by QR Code” to add your Remote Cloud Card.
3. Scan the QR Code on the Remote Cloud Card you are adding.
If the QR Code scan was successful, click “Add” and name the
device you are monitoring.
4. After the setup is completed, you will see your device on the
homepage, as shown in Figure 3.