background image

P - 1

Warning

TO PREVENT FIRE OR SHOCK HAZARD, DO NOT EXPOSE THE APPLIANCE
TO RAIN OR MOISTURE.

To avoid electrical shock, do not open the cabinet.
Refer servicing to qualified service personnel only.
The AC adaptor must only be changed at qualified service facility.

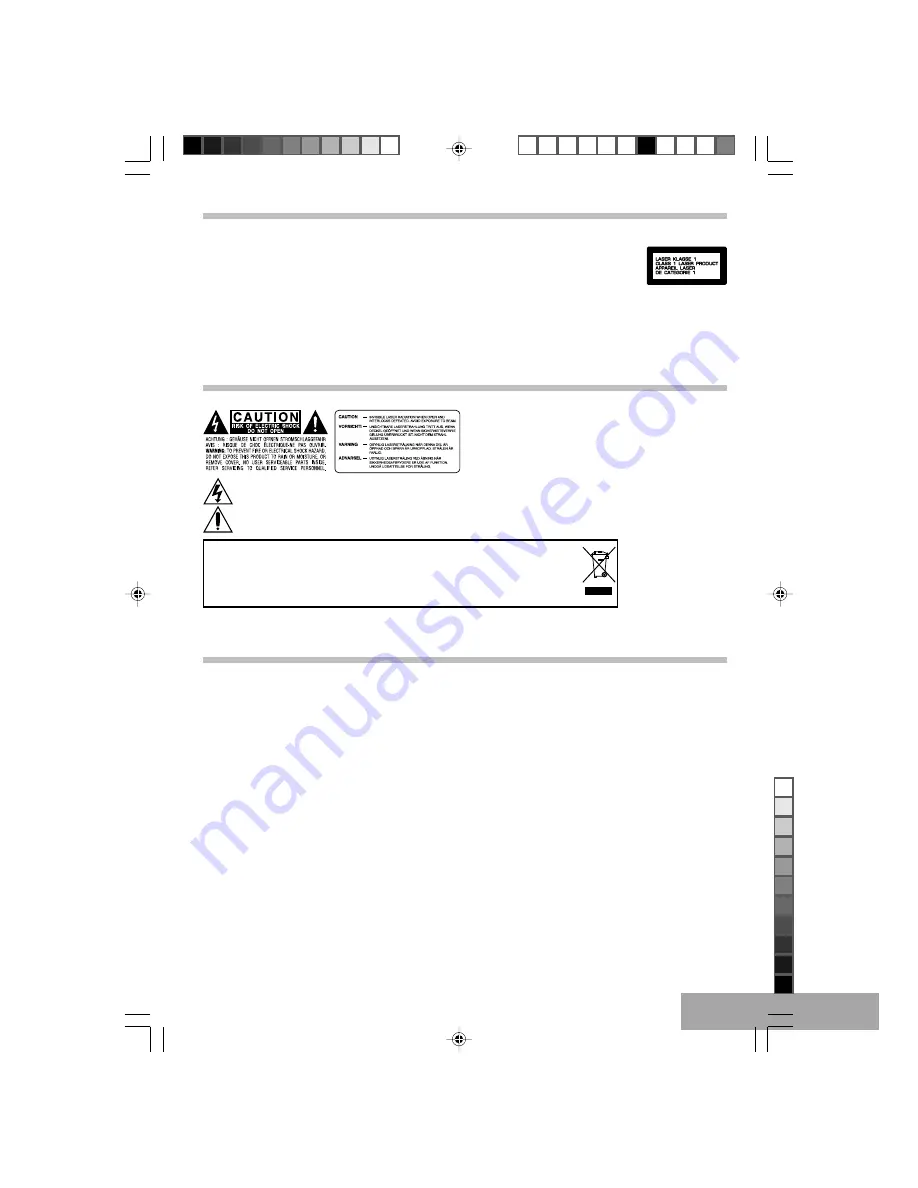
This appliance is classified as a CLASS 1 LASER product.

The CLASS 1 LASER PRODUCT MARKING is located on the rear panel.

This product contains a low power laser device. To ensure continued safety, do not remove any cover or attempt to
gain access to the inside of the product. Refer all servicing to qualified personnel only.

Caution

The following marking is printed on the rear panel.

This symbol is intended to alert the user of the presence of uninsulated “dangerous voltage” within the product
enclosure that may be of sufficient magnitude to constitute a risk of electric shock to persons.

This symbol is intended to alert the user to the presence of important operating and maintenance (servicing)
instructions in the literature accompanying the applicance.

You can help protect the environment!
Please remember to respect the local regulations: hand in the non-working electrical
equipments to an appropriate waste disposal center.

For rechargeable battery

Attention: Ni MH batteries must be recycled or disposed of properly.

In case of malfunction due to elec-
trostatic discharge, reset the ap-
paratus by disconnecting from
mains supply.

FCC NOTICE:

This equipment has been tested and found to comply with the limits for a Class B digital device, pursuant to part 15 of
the FCC Rules. These limits are designed to provide reasonable protection against harmful interference in a residential
installation. This equipment generates, uses and can radiate radio frequency energy and, if not installed and used in
accordance with the instructions, may cause harmful interference to radio communications.
However, there is no guarantee that interference will not occur in a particular installation. If this equipment does cause
harmful interference to radio or television reception, which can be determined by turning the equipment off and on, the
user is encouraged to try to correct the interference by one or more of the following measures:

Reorient or relocate the receiving antenna.

Increase the separation between the equipment and receiver.

Connect the equipment into an outlet on a circuit different from that to which the receiver is connected.

Consult the dealer or an experienced radio/TV technician for help.

FCC Caution:

To assure continued compliance, follow the attached installation instructions and use only shielded cables when connect-
ing to other devices.
Modifications not authorized by the manufacturer may void user’s authority to operate this device.

610 CURTIS eng A5 ib.p65

5/3/2006, 3:31 PM

1

Black

Summary of Contents for DVD8433

Page 1: ...rly In case of malfunction due to elec trostatic discharge reset the ap paratus by disconnecting from mains supply FCC NOTICE This equipment has been tested and found to comply with the limits for a Class B digital device pursuant to part 15 of the FCC Rules These limits are designed to provide reasonable protection against harmful interference in a residential installation This equipment generate...

Page 2: ...nt where they exit from the unit 3 Enclosure removal Never remove the enclosure 4 Drop Do not drop the unit or apply strong shock to it 5 Ventilation Avoid hindering the ventilation of the unit when playing in the car with pouch ensure is kept the pouch opening 6 Abnormal smell If an abnormal smell or smoke is detected immediately turn the power OFF and pullout the AC adaptor from wall outlet Cont...

Page 3: ...AUDIO MENU BUTTON 30 AUDIO MODE BUTTON 31 ZOOM BUTTON 32 CLEAR BUTTON 33 DIGEST BUTTON 34 STANDBY ON OFF BUTTON 35 SCREEN ON OFF BUTTON Point remote control unit no more than 6m from the remote sensor and within about 300 of the front of the unit Gettingstarted Unpacking Unpack the unit and make sure that all accessories are put aside so they will not be lost We recommend that you retain the origi...

Page 4: ... 10 SPEAKERS 11 ENTER BUTTON 12 NETVIGATION BUTTONS 13 SETUP BUTTON 14 TITLE MENU BUTTON 15 DVD MENU BUTTON 16 DISPLAY BUTTON 17 SKIP FORWARD BUTTON 18 PLAY BUTTON 19 PAUSE BUTTON 20 STOP BUTTON 21 SKIP REVERSE BUTTON 22 DISC COMPARTMENT OPEN BUTTON 23 DISC COMPARTMENT 24 OPEN SLIDE KNOB 25 REMOTE SENS 26 FULL INDICATOR 27 CHARGE INDICATOR 28 STANDBY INDICATOR 29 POWER SLIDE KNOB Location of featu...

Page 5: ...light on GREEN Notes Disconnect the AC adapter plugs from both the battery and the AC outlet when charging is completed or not necessary Battery recharge circuit operates in OFF mode Switch off the unit for battery recharge When battery is fully charge and released from unit the CHARGE indicator will light on RED it means the charge circuit is ON Battery Low Indication When using the rechargeable ...

Page 6: ...ng DVD disc a MENU appears on the TV screen Press the or Arrow buttons to select the desired item then press the ENTER button Playback of the selected item will start Note For more details please refer to the jacket or case of the disc If the password is set and the inserted disc is within the Parental Ratings set then the Password screen will appear prompting you to enter the password If playing ...

Page 7: ...could damage user s ears Connect the DC plug Connect the DC plug at the end of the adapter cord or connect the Car Adapter optional into the DC IN jack then plug the other end into the car cigarette lighter socket SYSTEM CONNECTION Use audio cable Red White video cable Yellow to connect from player to TV set and amplifier CONNECT THE PLAYER TO TV SET BY AUDIO AV CABLE Use audio cable Red White vid...

Page 8: ...d Press the PLAY X button to resume normal playback Title Chapter Search Use this feature to directly go to a specific title and or chapter Press the SEARCH button once Press the buttons to select the TITLE then use the numeric buttons to select the desired title number Press the buttons to select the CHAPTER then use the numeric buttons to select the desired chapter number Title Time Search Use t...

Page 9: ... until OFF will shown on the TV screen A B REPEAT button Note MP3 discs does not support this function DVD CD VCD disc This player can repeatedly play back a specific section While in the Playback mode press the Repeat A B button to define where you want the section to start Press the Repeat A B button again to define where you would like the section to end the unit will then play the selected are...

Page 10: ... until all desired title chapters have been programmed up to 20 You can repeat a title chapter more than once if desired 4 Press the button to select START position 5 Press the PLAY X button to begin programmed playback Playback will begin on the first title chapter that you programmed and the player will continue to play all of the tracks that you programmed in the order in which you programmed t...

Page 11: ...ess the ENTER button This is not available on all discs Audio Mode Audio CDs only While playing an audio CD not DVD you can cycle between the audio modes as follows Press the AUDIO MODE button to cycle through the audio modes The audio modes vary depending on the disc inserted but include MONO LEFT MONO RIGHT MIX MONO STEREO etc DISC NOT SUPPORT will appear if the disc does not support audio mode ...

Page 12: ...me discs may not work Bookmark function Storing playing and clearing a bookmark in the memory up to 12 points can be memorized for each disc Zoom Function Note MP3 discs does not support this function Press ZOOM button Zoom x2 x3 x4 during normal slow or still playback mode This player can magnify a picture and use Navigation Arrow buttons to select desired part of the zoomed picture Viewing from ...

Page 13: ...digest Title digest Chapter digest The screen shows the starting picture of all the tracks on the screen simultaneously Input your desired track by Number buttons and press ENTER to confirm to play from that track onwards If the tracks are more than 6 choose to look at the next page Choose EXIT to leave the track digest screen Choose MENU to return to Select Digest Type Menu Playing for Disc Inter...

Page 14: ... Basic Operation Playback of MP3 Disc After disc LOADING or read memory card dialog box will appear on the screen The Root Folder menu and STOP Mode on screen button will appear on the screen e g 610 CURTIS eng A5 ib p65 5 3 2006 3 31 PM 14 Black ...

Page 15: ...s the NAVIGATION button to select your de sired track then press PLAY X or ENTER button to playback the PLAY X indicator show on screen The player will continous playback until finish all tracks in such folder the player will stop automatically e g Selecting Folder Tracks Using the Number Buttons During playback press the Numeric buttons corresponding to the track numbers to select your desired tr...

Page 16: ...es must be stored in jpeg format file extension jpg otherwise they won t be recognized When you have inserted a CD with jpeg files you see a menu showing the folders files on the CD Use the navigations keys to select the desired folder then press ENTER The files inside are displayed Use the navigation keys to choose the desired file and the picture preview on the right frame if press the ENTER but...

Page 17: ...TV Wide Screen images are shown on the screen but with some parts cut automatically 2 Normal LB Note LB stand for Letter Box This is selected when the unit is connected with a normal TV Wide screen images are shown on the screen with black belt on the top and bottom 3 Wide This is selected when the unit is connected with a wide screen TV TV TYPE You may select according to the color system of the ...

Page 18: ...btitle To change the subtitle language choose the language using the buttons and press ENTER to confirm Disc menu To change the language of menu choose the language using the buttons and press ENTER to confirm Parental You can control access to the player and the type of discs your family can watch with the rating function There are eight levels of parental conrol Rating Level 1 KID SAF 2 G 3 PG 4...

Page 19: ...2cm single sided dual layer 12cm double sided single layer 8 cm single sided single layer 8 cm single sided dual layer 8 cm double sided single layer 2 Compact disc 12cm disc 8 cm disc Video output level 1 Vp p Audio output level 1 Vrms 1 KHz 0dB Audio signal output characteristics Frequency responses DVD linear audio 20Hz 20KHz 48KHz sampling 20Hz 20KHz 96KHz sampling CD audio 20Hz 20KHz S N rati...

Page 20: ...sor No key operation by the main unit and or the remote control unit is effective Press POWER to set the player to the standby mode and then back to ON Alternatively press POWER to set the player to the standby mode disconnect the power plug and then reconnect it The player may not be operating properly due to lightning static electricity or some other external factor Play does not start even when...

Page 21: ...res for extended periods of time Discs should be returned to their cases after use Do not apply paper or write anything on the disc surface Handle the disc by its edge Do not touch the playing surface glossy side Fingerprints and dust should be carefully wiped off the playing surface of the disc with a soft cloth Disc Cleaning Never use chemicals such as aerosol cleaners benzene anti static liquid...

Page 22: ...P 22 TFT PORTABLE DVD PLAYER MODEL DVD8433 610 CURTIS eng A5 ib p65 5 3 2006 3 31 PM 22 Black ...

Reviews: