cuisinecraft BF210, User Manual
Introducing the Cuisinecraft BF210, a revolutionary kitchen appliance designed to elevate your culinary experience. With its advanced features and sleek design, this user-friendly device is a must-have for any aspiring chef. Enhance your cooking skills by downloading the free user manual from manualshive.com and unlock the full potential of this exceptional product.
Share
Download


Reviews:
No comments
Related manuals for BF210

Frostig BF91
Brand: IKEA Pages: 48

accucold ACF33L
Brand: Summit Pages: 20
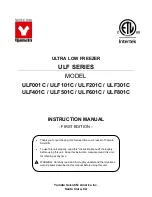
ULF001C
Brand: Yamato Pages: 20

Air-O-Chill 726990 (AOFP101CU4)
Brand: Electrolux Pages: 2

AOFP101C 726749
Brand: Electrolux Pages: 4

Air-O-Chill 726992
Brand: Electrolux Pages: 2

Air-O-Chill 726998 (AOFP202RCU4)
Brand: Electrolux Pages: 2

AOF2028CRD 726860
Brand: Electrolux Pages: 4

CI 800 FA
Brand: Electrolux Pages: 16
E32AF75FPS - Icon - Refrigerator
Brand: Electrolux Pages: 22

Chest freezers
Brand: Electrolux Pages: 10

D)
Brand: Electrolux Pages: 8

ARCTIS 80220 GS
Brand: Electrolux Pages: 20

ARTHUR MARTIN ACN3058
Brand: Electrolux Pages: 6

CV 850 S/2
Brand: Electrolux Pages: 15

Athur Martin ACN21105W
Brand: Electrolux Pages: 24

CFI 105
Brand: Electrolux Pages: 4

Concept Counters 728304
Brand: Electrolux Pages: 4


