Crane EE-4109, Instruction Manual
The Crane EE-4109 is a versatile and efficient appliance designed to provide soothing comfort in any space. With its user-friendly features and advanced technology, this Instruction Manual offers step-by-step guidance on setting up and using the product effectively. Download the free manual from manualshive.com to maximize your Crane EE-4109 experience today.
Share
Download


Reviews:
No comments
Related manuals for EE-4109

KLIMATRONIC Monsun 2.500 moodlight
Brand: Suntec Wellness Pages: 105

RM001
Brand: Remedies Pages: 10

WF-HH-229
Brand: Walton Pages: 6

PDD 85200 FAMOUS
Brand: Puredry Pages: 42

DDR050BJPWDB-RF
Brand: Danby Pages: 25

WDH-898MD
Brand: Aktobis Pages: 4

HE12
Brand: CLEAN COMFORT Pages: 8
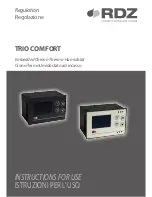
TRIO COMFORT
Brand: RDZ Pages: 32

TT-2X4
Brand: Metro DataVac Pages: 4

ECO Series
Brand: Seedmax Pages: 28

EverHeart EH-01
Brand: Biocare Pages: 13

4028600
Brand: thermastor Pages: 10

Quest 335
Brand: thermastor Pages: 24

4032350
Brand: Therma-Stor Pages: 9

SRC-1000
Brand: Sullair Pages: 66

SU-2628B
Brand: SPT Pages: 4

HI-E Dry 100
Brand: Quest Engineering Pages: 16

105 Dual
Brand: Quest Engineering Pages: 18


