Craftsman 536.292521, Operating Instructions Manual
The Craftsman 536.292521 Operating Instructions Manual is a comprehensive guide that provides step-by-step instructions on how to effectively operate and maintain your Craftsman 536.292521 product. It is available for free download from our website, making it easily accessible for all users seeking reliable and detailed guidance.
Share
Download


Reviews:
No comments
Related manuals for 536.292521

PPCRT14
Brand: Poulan Pro Pages: 40

12226
Brand: Bolens Pages: 36

YCAA-B
Brand: York International Pages: 72

ESEW-0100D
Brand: Conair Pages: 94

BLC-1/2
Brand: Glastender Pages: 20

19DK
Brand: Carrier Pages: 26

P030
Brand: Riedel Pages: 44

RD-T08
Brand: Raider Pages: 112
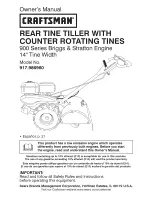
900 Series
Brand: Craftsman Pages: 52

CMXGVAMKC25C
Brand: Craftsman Pages: 40

YK
Brand: York Pages: 28

NRA
Brand: AERMEC Pages: 4

BM11ACTIL
Brand: Black Max Pages: 28

ST5.5H
Brand: Merry Tiller Pages: 20

GP20-50 Series
Brand: Sterling Pages: 4

STERLCOOL CFP05-25A
Brand: Sterling Pages: 40

ElectricTiller
Brand: Mantis Pages: 20

PK32640
Brand: PowRkraft Pages: 17


