Craftsman 315.269221, Operator'S Manual
The Craftsman 315.269221 Operator's Manual is essential for mastering your tool. Download this comprehensive manual for free at manualshive.com, allowing you to access step-by-step instructions, safety guidelines, and maintenance tips. Maximize your productivity with this user-friendly manual that guarantees successful operation of the Craftsman 315.269221.
Share
Download


Reviews:
No comments
Related manuals for 315.269221

SD-10E
Brand: Cembre Pages: 56

ASV 12 EA
Brand: Narex Pages: 36

CIT310 - iPhone Cordless Phone
Brand: Linksys Pages: 2

102964
Brand: Parkside Pages: 58

Aastra 620d
Brand: Aastra Pages: 22

M12 CHZ-0
Brand: Milwaukee Pages: 9

CRS180L
Brand: Ryobi Pages: 16

XSR917
Brand: Uniden Pages: 36

DMPVC
Brand: REED Pages: 2

GH3028AT
Brand: Southwestern Bell Pages: 14

4000 Classic
Brand: BT Pages: 64

V2560
Brand: Amtech Pages: 4

EM6130
Brand: Emerson Pages: 2

EM6120-2
Brand: Emerson Pages: 28

EM7000
Brand: Emerson Pages: 1

AmpliDECT400BT
Brand: Geemarc Pages: 94
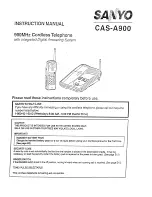
CAS-A900
Brand: Sanyo Pages: 38

DM62
Brand: AGP Pages: 16


