Craftsman 11580 - C3 19.2 Volt Hammer, Operator'S Manual
The Craftsman 11580 - C3 19.2 Volt Hammer is a powerful tool designed to deliver maximum impact force. To ensure safe and efficient usage, make sure to refer to the comprehensive Operator's Manual. You can conveniently download this manual for free from our website, giving you all the necessary instructions to optimize your experience with the product.
Share
Download


Reviews:
No comments
Related manuals for 11580 - C3 19.2 Volt Hammer

25357
Brand: Hamilton Beach Pages: 24

GR195
Brand: Jata electro Pages: 20

PRO RDP-CDD02
Brand: Raider Pages: 62

0662H000
Brand: EIBENSTOCK Pages: 44

6 AS Series
Brand: Ingersoll-Rand Pages: 60

GRILL-4100
Brand: ohmex Pages: 38

GBC873W
Brand: Gold unitflame Pages: 32
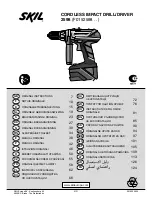
2598
Brand: Skil Pages: 10

ZPG-6002B3
Brand: Z GRILLS Pages: 30

6730
Brand: Cloer Pages: 12

6731
Brand: Cloer Pages: 24

GR 938
Brand: Hyundai Pages: 28

HAWAII
Brand: G21 Pages: 44

Vendetta 3.0 TI
Brand: Klarstein Pages: 56

415.154050
Brand: Kenmore Pages: 16

415.161108
Brand: Kenmore Pages: 28

415.161110
Brand: Kenmore Pages: 32

415.16105
Brand: Kenmore Pages: 28


