background image

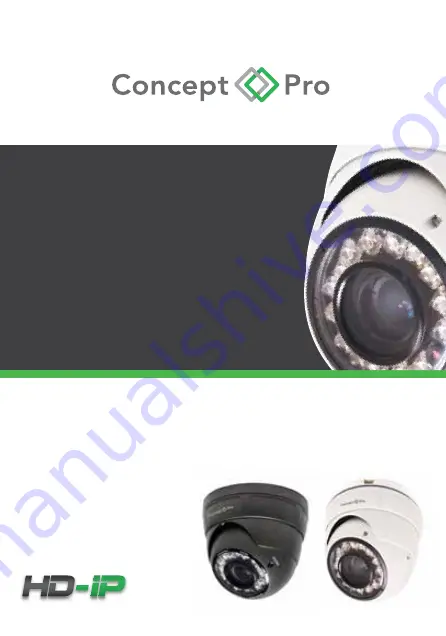
CVP9328DNIR-IP4M

IP High Definition IR Eyeball Camera

USER MANUAL

FINDING THE CAMERA’S IP ADDRESS


IP CAMERA RANGE

2. Finding the camera’s IP address Using NVMS

1.Install NVMS from the CD. Now Double-click the NVMS icon            on the Desktop. 

   The log in screen appears. 

2.Under User Name and Password, enter the default NVMS user name (admin) and

   password (admin). Click Login

3. NVMS opens and scans the local network for connected cameras. Detected camera IP addresses on 

the LAN appear in the Device List on the left side of the screen with a        icon. 

4. Click on a camera IP address in Device List to login.

5. Under User Name, enter the user name for the camera (default: admin)

    Under Password, enter the password for the camera (default: admin)

    Click Continue. 


Enter Camera User

(default:

admin

)

Enter Camera Password

(default:

admin

)


Click Continue to login

6. The camera appears under the camera IP address. Click and drag the camera to the display grid to 

open it.


Click and drag the 

camera to the display 

grid to open it


NOTE: For detailed instructions on using NVMS, see the NVMS manual on the CD.

1. Click Start>Computer>Network. The camera’s IP address appears under Network Infrastructure. 

Double- click to open 

the camera

Network

2. Double-click the camera to open it in your default browser.

3. Under User Name and Password, enter the camera’s User Name (default: admin) and Password 

(default: admin) and click Login.


4. Finding the camera’s IP address using Bonjour® in Mac OS®

NOTE: To use this method, the camera computer must be on the same network. Bonjour® is 

enabled by default, and can be enabled/disabled using NVMS (check the NVMS manual for 

details)

1. Open Safari® browser and click the Bookmarks button 

2. Click Bonjour. The camera’s IP address appears in the Monjour Devices list.

3.Double-click the camera to open it in Safari.

Bookmarks 

button

Bonjour


Double-click the camera’s IP address

4. Under User Name and Password, enter the camera’s User Name (default: admin) and Password 

(default: admin) and click Login.

Enter admin

Enter admin

Click Login

Found camera

IP address

1. Finding the camera IP using BNC Test Cable

When the BNC test cable is connected to the camera, the IP address is shown on the test monitor. The 

camera must be connected to power to use the BNC test cable.

NOTE: The default IP address of 192.168.0.120 is shown if the camera cannot obtain an IP address 

from the router. Check the Ethernet/power connections and router

configuration.

3. Finding the Camera’s IP Address using UPnP in Windows® 7.

NOTE: To use this method, your router must support UPnP and the camera and computer must be on 

the same network. UPnP is enabled in the camera by default, and can be enabled/disabled using NVMS 

(Check the NVMS manual for details). 

Use the steps below to find the camera’s IP address and connect to the camera over the local area 

network (LAN) using NVMS, UPnP on Windows®7 or Bonjour in Mac OS®

Remove 2 screws to access 

Factory Reset

Micro SD Card Slot*

SVO

*Micro SD card slot max 64GB supported; SanDisk™/Kingstorm 

brand memory cards only.

Factory Reset

Enter Camera User Name (default:

admin

Enter Camera Password (default:

admin

Click

Enter Camera User Name (default:

admin

Enter Camera Password (default:

admin

Click

Design and specification are subject to change without notice.

Summary of Contents for CVP9328DNIR-IP4M

Page 1: ...CVP9328DNIR IP4M IP High Definition IR Eyeball Camera USER MANUAL ...

Page 2: ...rly 6 Never use the camera close to a gas or oil leak 7 Do not disassemble the camera 8 Never keep the camera face to strong light directly this can damage the sensor 9 Ensure all removable covers are replaced to protect the inner components 10 Do not install near devices which emit a strong electro magnetic field 11 Use a dry or damp cloth only for cleaning 12 Do not drop the camera or subject th...

Page 3: ...rate the camera and middle ring from the base l Using the mounting template mark the holes for drilling l Using the supplied fitting screws securely attach the base to the drilled surface l Place the camera on the base and adjust the camera to the correct position l Replace the middle ring and tighten together using the base ring l Carefully clean the lens cover with a soft lint free cloth FIXING ...

Page 4: ...pply to the camera as this is not required l View the image on your monitoring device to check the power and video connection is working properly l A quick method would be to connect a BNC test Monitor to the SVO PSU Power connector Network Cable RJ45 70 Mounting Holes 70 ø120 Focus Adjustment Screw View Angle Adjustment Screw Lens Adjustment Tool Pan 360 Three axis rotate SWITCH MODEM PC Laptop A...

Page 5: ...DIMENSIONS 70 mm 3 70 mm 3 Ø 120 mm 4 1 2 m m 0 2 1 2 1 4 m m 5 5 0 1 4 ...

Page 6: ... of the screen with a icon Enter admin Enter admin Click Login Found camera IP address 1 Finding the camera IP using BNC Test Cable When the BNC test cable is connected to the camera the IP address is shown on the test monitor The camera must be connected to power to use the BNC test cable NOTE The default IP address of 192 168 0 120 is shown if the camera cannot obtain an IP address from the rout...

Page 7: ...drag the camera to the display grid to open it Click and drag the camera to the display grid to open it NOTE For detailed instructions on using NVMS see the NVMS manual on the CD 1 Click Start Computer Network The camera s IP address appears under Network Infrastructure 3 Finding the Camera s IP Address using UPnP in Windows 7 NOTE To use this method your router must support UPnP and the camera an...

Page 8: ...using Bonjour in Mac OS NOTE To use this method the camera computer must be on the same network Bonjour is enabled by default and can be enabled disabled using NVMS check the NVMS manual for details 1 Open Safari browser and click the Bookmarks button 2 Click Bonjour The camera s IP address appears in the Monjour Devices list 3 Double click the camera to open it in Safari Enter Camera User Name de...

Page 9: ... the camera s User Name default admin and Password default admin and click Login Remove 2 screws to access Factory Reset Micro SD Card Slot SVO Micro SD card slot max 64GB supported SanDisk Kingstorm brand memory cards only Factory Reset Enter Camera User Name default admin Enter Camera Password default admin Click ...

Page 10: ...ct to the camera on a web browser using local IP address See steps above Verify the camera s local IP address using one of the methods listed in Finding the Camera s IP Address Can t connect to camera on a web browser using a DDNS address Port forwarding not set up Make sure the HTTP port default 80 and Control port default 30001 are forwarded on your router to the camera s local IP address Multip...

Page 11: ...l 0 100 ADC intelligent switch Auto Manual Timing Auto DC drive 4MP 3mm 12mm IR Lens Stream1 2688x1520 2560x1440 2304x1296 1920x1080 Stream2 1280x720 D1 VGA 640x360 CIF QVGA Stream3 2688x1520 2560x1440 2304x1296 1920x1080 1280 720 D1 VGA 640x360 CIF QVGA 2688x1520 2560x1440 up to 15fps 2304x1296 up to 20fps 1920x1080 up to 25fps Time Date Camera Custom OSD Yes Yes H 264Base Profile H 264 Main Prof...

Page 12: ...Design and specification are subject to change without notice ...

Reviews: