Comtrend Corporation Wireless-N Broadband Router, User Manual
The Comtrend Corporation Wireless-N Broadband Router offers a reliable and high-speed internet connection for your home or office needs. Enhance your network experience with this advanced router by easily accessing the comprehensive User Manual, available for free download at our website.
Share
Download


Reviews:
No comments
Related manuals for Wireless-N Broadband Router

RV2458
Brand: Magnadyne Pages: 8

WE865-DUAL
Brand: Telit Wireless Solutions Pages: 48

SP918GK
Brand: MicroNet Pages: 46

NC-AP212
Brand: NC-link Pages: 13
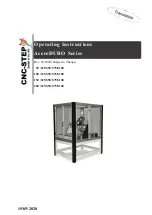
AceroDURO 100/S100
Brand: CNC-Step Pages: 86

L1-RW332
Brand: Link-One Pages: 77

ZSR4124WE
Brand: Zonet Pages: 9

Wi-Fi Bubble SpitFire
Brand: NAUTITECH Pages: 22

AJ-WM50P
Brand: Panasonic Pages: 4

RP-HF410B
Brand: Panasonic Pages: 19

RP-HF410
Brand: Panasonic Pages: 20

RP-HD305B
Brand: Panasonic Pages: 22

RP-HD305
Brand: Panasonic Pages: 22

RB-M300B
Brand: Panasonic Pages: 21

RP-HD805N
Brand: Panasonic Pages: 24

RB-M700B
Brand: Panasonic Pages: 22

RP-HTX90N
Brand: Panasonic Pages: 26

RB-M700
Brand: Panasonic Pages: 25


