1
92XX-SA and BBG-1090-Series Quick Start
The –SA and BBG-1090-Series standalone devices (hereinafter referred to as “BBG-1090-
Series”) are managed through the Dashboard application. Dashboard can control the BBG-1090-
Series devices as well as openGear frames (where BBG-1090-Series devices appear as a frame
connection). The user interface for the BBG-1090-Series devices is essentially the same as the
corresponding openGear cards.
The steps are as follows:
1.
The first step is to install the Dashboard software. Dashboard is available for Windows,
Linux
1
, and Mac OSX.
2.
By default, the BBG-1090-Series devices are configured with a factory IP address of
192.168.1.30 and a subnet mask of 255.255.255.0. In order to perform the initial
configuration, you will need to configure the PC/Mac running Dashboard for an IP
address in the same network. We suggest you use 192.168.1.2. Once you gain access to
the BBG-1090-Series device, you can reconfigure its IP address to whatever value you
require, or configure it to run DHCP.
3.
Connect the PC/Mac running Dashboard and the BBG-1090-Series device to the same
network. For simplicity, even running an Ethernet cable between the two devices will
work. The BBG-1090-Series device has auto-crossover capabilities, so any Ethernet
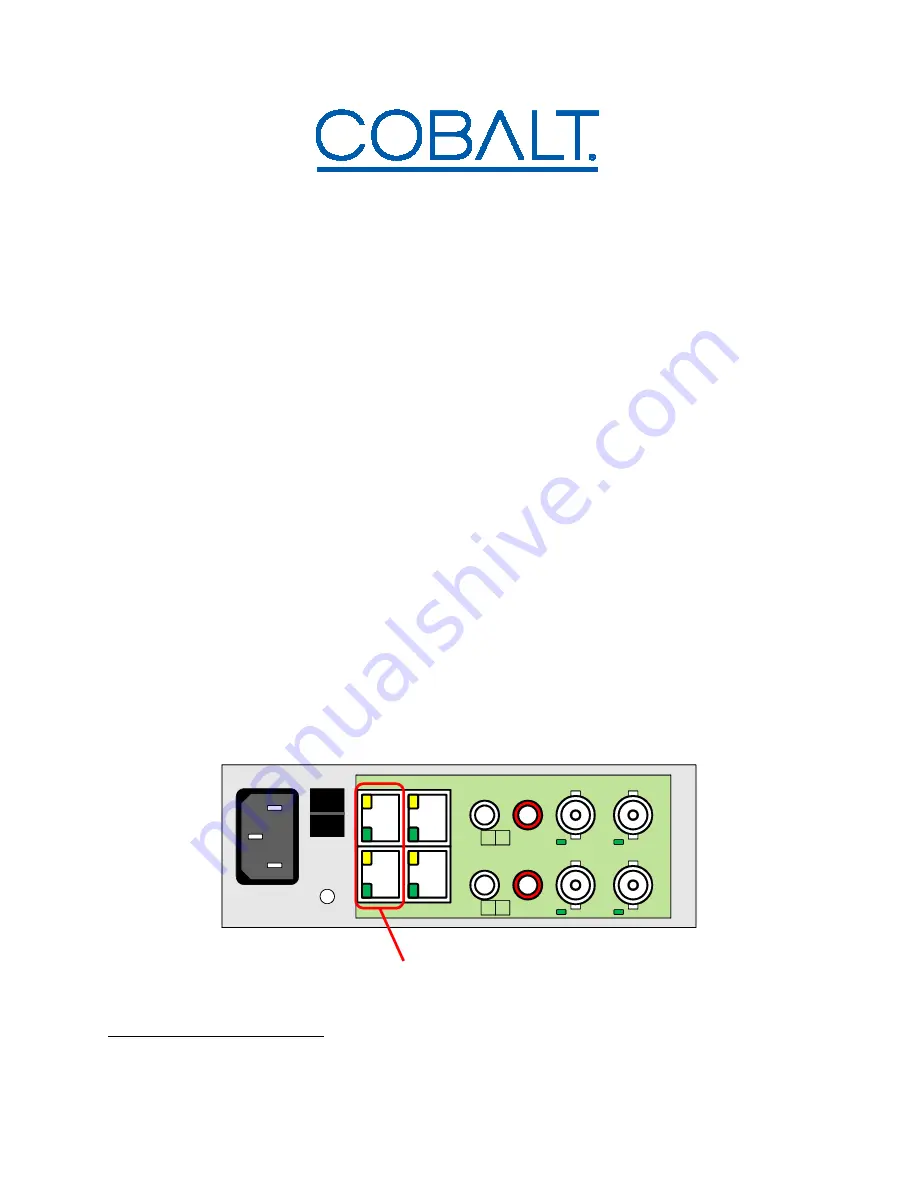
cable will work. Connect the cable to a control ports in the BBG-1090-Series device, as
illustrated below:
BBG-1090-Series Rear Panel (Typical)
ETH1
CTRL1
L AUD1 R
ASI1 VID1
ETH2
CTRL2
L AUD2 R
ASI2 VID2
I
0
Control Ports
1
Dashboard is not officially supported in 64-bit Linux distributions. Please consult the README.TXT file in the
Linux directory for more details.