3
2
fold size: 105 x146mm (-14pcs 210
Materiel: 80 gms paper
x146mm)
BK+BK Black on white
IMPORTANT NOTES
CG201 SERIES
Wireless Home Automation System
CityGrow Technology
www.citygrow.org
User Manual
PLANNING
To fully understand this product and its proper functions, please read this manual
before installation.
IMPORTANT
1.All products can be installed in standard BS4662 single switch boxes with
internal dimensions of 65mm x 65m x 35mm .
2.This device requires a neutral AC connection
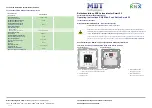
3.This system requires a COORDINATOR, Model number is CG100C. The appearance
of this COORDINATOR is same as an one gang light switch. It works as the heart of
the system, it also works same as an one gang light switch. In order to identify the
COORDINATOR, you can either look at the model label at the rear cabinet, or
looking at the label "COORDINATOR"------- located inside the switch cover.
4.Within a network, you only need one COORDINATOR, more than one
COORDINATOR is not allowed.
WIRELESS REMOTE CONTROLLER
The Wireless remote controller operates at 2.4GHz, IEEE802.15.4, The operating range is
approximately 60 meters in an open area point to point, subject to environment
conditions. The control distance can be extended if you install more devices at
different locations.
PRODUCT SAFETY
In accordance with BS4662, all switch products can be installed in a standard switch
box. The unit complies with EN60669-1 , EN60669-2
(for switch, dimmer ) and BS1363( for AC socket). Furthermore, the effective radiated
power of the device does not exceed 100mW which complies with Office of the
Telecommunication Authority (OFTA), Hong Kong telecommunication order.
!
WARNING!
Improper use or installation can cause SERIOUS INJURY, DEATH or
LOSS/DAMAGE OF PROPERTY.
!
WARNING!
Install in accordance with all national and local electrical codes.
!
WARNING!
Have a professional electrician do the installation
!
Important!
CityGrow is NOT liable for any damage incurred with the misuse of this product.
!
Important!
Do NOT use a power screw driver to install this device
!
Important!
Pre-setup only could be done by professional worker or manufacturer agent.
TROUBLESHOOTHING
If unit does not function properly after installation, please refer to the
TROUBLESHOOTING GUIDE section
CHOOSING THE RIGHT LOCATION
It is important to select the right location for your light switch, dimmer and AC socket
It should be:
1.Easily accessible for programming and other operations.
2.In a location away from water, humidity, direct sunlight and dust.
3.The performance of wireless network relies on the wireless connection between the devices
location in your house. During installation, pay attention that the range and performance of
the wireless control system is highly dependent on
a. Distance between devices
b. Layout of the house
c. Walls separating devices
d. Electrical equippment located near the devices
e. Refer to Quick Installation Guide for the selection of installation location
12/6/09 VER 4.0 - US IB
FCC RF Radiation Exposure statement
This equipment complies with FCC RF radiation exposure limits set forth for an uncontrolled
environment. This equipment should be installed and operated with a minimum distance of
20 centimeters between the radiator and your body.
FCC ID: WSFCG201AS-EM
This device complies with Part 15 of the FCC Rules. Operation is subject to the following two
conditions: (1) this device may not cause harmful interfence, and (2) this device must accept
any interference received, including interference that may cause undesired operation.
This equipment has been tested and found to comply with the limits for a Class B digital device,
pursuant to Part 15 of the FCC Rules. These limits are designed to provide reasonable protection
against harmful interference in a residential installation. This equipment generates, uses, and can
radiate radio frequency energy and, if not installed and used in accordance with the instructions,
may cause harmful interference to radio communications. However, there is no guarantee that
interference will not occur in a particular installation. If this equipment does cause harmful
interference to radio or television reception, which can be determined by turning the equipment
off and on, the user is encouraged to try to correct the interference by one or more of the following
measures:
- Reorient or relocate the receiving antenna.
- Increase the separation between the equipment and receiver.
- Connect the equipment into an outlet on a circuit different from that to which the receiver
is connected.
- Consult the dealer or an experienced radio/TV technician for help.
IMPORTANT! Changes or modifications not expressly approved by the party responsible for
compliance could void the user's authority to operate the equipment.
REGULATORY COMPLIANCE