Chauvet Colordash, User Manual
The Chauvet Colordash is a versatile lighting fixture that adds vibrant colors to any event. Enhance your next party or performance with ease by referring to our detailed User Manual available for free download from our website. Discover the full potential of your Colordash and create unforgettable lighting effects.
Share
Download


Reviews:
No comments
Related manuals for Colordash
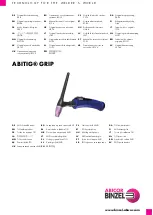
ABITIG GRIP 1502
Brand: Abicor Binzel Pages: 168

WAL-SM-MHFL-1000W-50C
Brand: Larson Electronics Pages: 2

HAL-36-25W-LED-20C
Brand: Larson Electronics Pages: 2

277G59
Brand: OttLite Pages: 2

CLB2.4 Compact
Brand: Stairville Pages: 52

HazStar
Brand: NightSearcher Pages: 6

VEGA plus
Brand: Solux Pro Pages: 3

4-80004
Brand: Xtricity Pages: 2

703515
Brand: Mäktig Pages: 3

STAIRVILLE xBrick HEX 16x8W RGBAW UV
Brand: thomann Pages: 36

EPLC2-AMB-70LED-50
Brand: Larson Electronics Pages: 2

Flashlight Lite
Brand: HOTO Pages: 7

MasterColor P-5496-E
Brand: Philips Pages: 2

MJ series
Brand: Philips Pages: 2

LivingColors 6950230PU
Brand: Philips Pages: 2

LivingColors 6950230PH
Brand: Philips Pages: 2

LivingColors 6950060PU
Brand: Philips Pages: 2

LivingColors 6950030PU
Brand: Philips Pages: 2


