background image

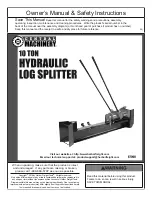
LOG SPLITTER

WITH ROBIN

®

 ENGINE

Models

91839, 91840 & 92199

Set up And OperAting inStructiOnS

WARNING!

IMPORTANT INFORMATION

This  trailer’s  Hitch  Coupler  MUST  be 

properly secured to the hitch ball of the towing 

vehicle.  After assembly and attachment, pull 

up  and  down  on  the  Hitch  Coupler  to  make 

sure the hitch ball is fitting snugly in the Hitch 

Coupler.  

There must be no play between 

the hitch ball and Hitch Coupler.

  If there is 

play, tighten the Adjustment Nut until no play 

is present.  If the Adjustment Nut is too tight, 

the Handle will not lock.  

Carefully read and 

follow  the  complete  instructions  in  this 

manual BEFORE setup or use.

If  the  Coupler  is  not  secured 

properly,  the  ball  could  come  loose 

while the trailer is in motion, possibly 

causing  property  damage,  SERIOuS 

PERSONAL INjuRy, or dEATH.

Diagrams within this manual may not be drawn proportionally.

Due to continuing improvements, actual product may differ slightly from the product described herein.

distributed exclusively by Harbor Freight tools

®

.

3491 Mission Oaks Blvd., Camarillo, CA 93011

Visit our website at: http://www.harborfreight.com

 read this material before using this product.  

Failure to do so can result in serious injury. 

SAVe tHiS MAnuAl.

Copyright

©

 2004 by Harbor Freight Tools

®

.  All rights reserved.  No portion of this manual 

or any artwork contained herein may be reproduced in any shape or form without the 

express written consent of Harbor Freight Tools.

For technical questions or replacement parts, please call 1-800-444-3353.

reV 04k,06b,07j

Summary of Contents for 91839

Page 1: ...secured properly the ball could come loose while the trailer is in motion possibly causing property damage serious personal injury or death Diagrams within this manual may not be drawn proportionally...

Page 2: ...u will need the manual for the safety warnings and precautions assembly instructions operating and maintenance procedures parts list and diagram Keep your invoice with this manual Write the invoice nu...

Page 3: ...lignment and binding of moving parts any broken parts or mounting fixtures and any other condition that may affect proper operation Any part that is damaged should be properly repaired or replaced by...

Page 4: ...ote It may be necessary to reset the wheel bearings after the Log Splitter has been towed The wheel manufacturer states the maximum speed is not to exceed 40 MPH The tires are DOT approved for public...

Page 5: ...aped bracket on the Oil Tank Assembly 10B Secure it with a Hex Head Nut 17 Refer to the Hex Head Nut 17 attached to the Hex Head Bolt 16 just above the tire in FIGURE 1 below Insert the Push Pin 26 th...

Page 6: ...operation or being transported close the air inlet hole by tightening the Oil Plug 37 3 Make certain that the maximum length of each log does not exceed 25 inches with a diameter of 8 inches Transport...

Page 7: ...move the Directional Valve 58 away from the log you just split FIGURE 6 Directional Handle 58 To stop movement of the Log Splitter move the Directional Valve 58 into the midpoint Do not go near the s...

Page 8: ...g and At 500 MILE intervals during Every trip check and tighten the Tire Lug Nuts Torque from 85 to 90 ft lb 7 EVERY 2 000TO 3 000 MILES OFTravel lubricate the Hub Assemblies with a heavy weight beari...

Page 9: ...Male Connector 1 37 Oil Plug 1 38 High Pressure Fitting 1 39 90 Elbow Fitting 2 2 40 90 Elbow Fitting 3 2 41 Hex Head Bolt 3 8 3 4 1 42 Hex Head Bolt 5 16 1 4 43 Oil Filter 1 44 Pump Mounting Bracket...

Page 10: ...Page 10 For replacement parts please call 1 800 444 3353 SKUs 91839 91840 92199 Assembly Drawing REV 07e...

Page 11: ...ase call 1 800 444 3353 SKUs 91839 91840 92199 Hydraulic Ram Seals Warning Only a qualified technician should repair or service the internal hydraulic system of this unit Seal Kits Model Part Sku 9183...

Page 12: ...arings and the rest of the parts in the Hub assembly of all grease dirt metal shavings or any other foreign object The parts must be cleaned even if they are new or appear clean 2 Allow all pieces to...

Reviews: