background image

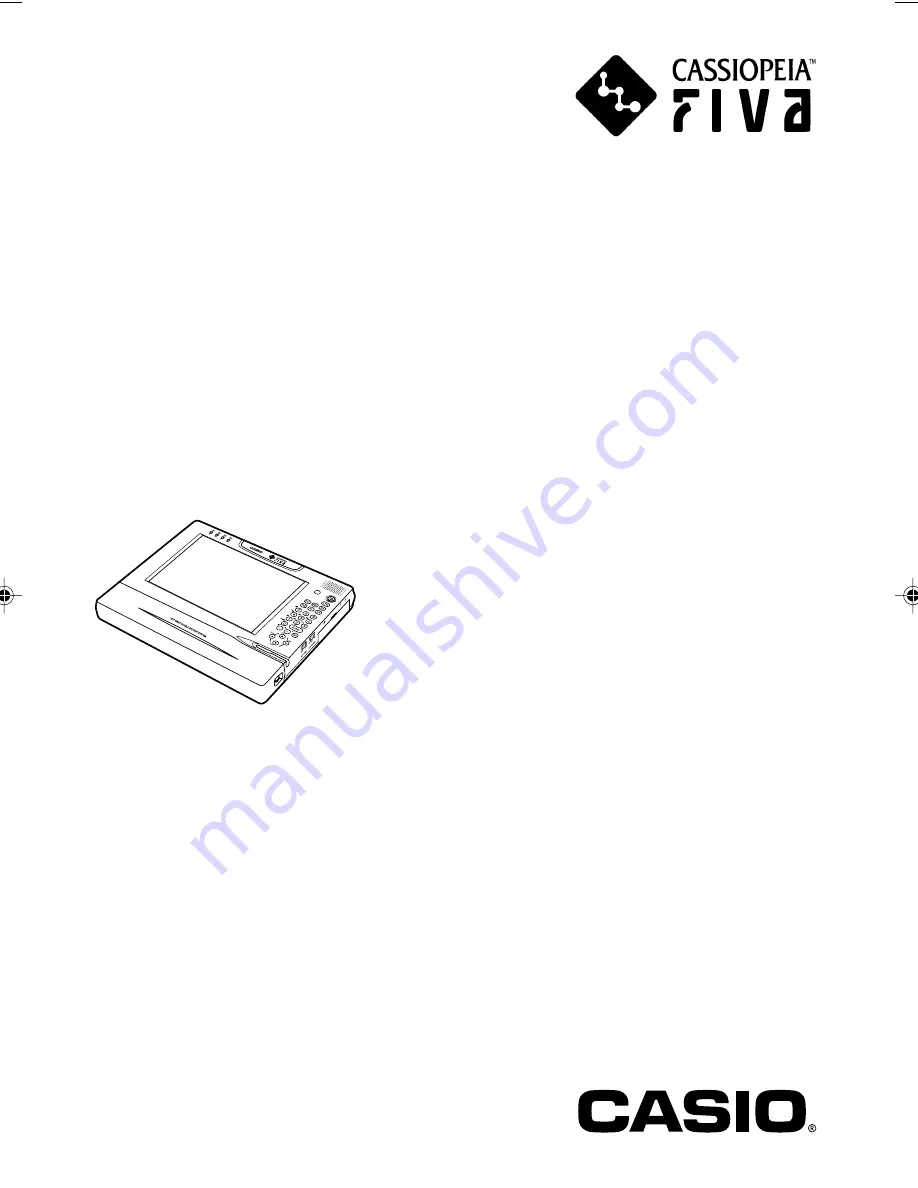
Thank you for purchasing the CASIO MPC-701 series.
This guide describes the basic operations of the
MPC-701 series.
Read this guide in its entirely before handling or
operating the product, and keep it close at hand so it
can be easily referenced.

FIVA

User’s Guide

(Product No: MPC-701 series)

 FIVAMPC701M50E#Hyo_1~4

02.11.6, 5:45 PM

1

Summary of Contents for CASSIOPEIA FIVA MPC-701 Series

Page 1: ...eries This guide describes the basic operations of the MPC 701 series Read this guide in its entirely before handling or operating the product and keep it close at hand so it can be easily referenced...

Page 2: ...have been judged to meet International ENERGY STAR standards ENERGY STAR is a U S registered mark Power Plug and AC Adapter Note AC cord plug and wall outlet illustrated in this User s Guide shows th...

Page 3: ...items included with this product is given below Confirm that nothing is missing or damaged If anything is missing or damaged contact the dealer from which you purchased this product FIVA MPC 701 Styl...

Page 4: ...also to prevent damage to property and this product The icons and definitions are given below Indicates that there is a risk of severe injury or death if used incorrectly Indicates that injury or dam...

Page 5: ...ntact your original retailer or authorized distributor Never bring in FIVA a bathroom or any other location where the possibility of splashing or high humidity exists Use of FIVA in such an area creat...

Page 6: ...in plug type It may not be the same shape of AC cord plug used in your area Use only a proper AC electric outlet 100V 240V when powering FIVA with the AC adapter Use of an outlet with a different volt...

Page 7: ...ged and never try to modify them in any way Continued use of a damaged power cord can cause deterioration of the insulation exposure of internal wiring and shorting which creates the danger of electri...

Page 8: ...verheating fire and bursting of the battery pack Never throw the battery pack into fire or otherwise expose it to direct flame Doing so creates the danger of fire and explosion Never allow the positiv...

Page 9: ...tor vehicle or any other area subject to very high temperatures The above conditions can cause malfunction or deformation of FIVA which creates the danger of fire When transporting FIVA take care to a...

Page 10: ...age it break the wiring or cause short creating the danger of fire and electric shock Never touch the plug while your hands are wet Doing so creates the danger of electric shock Pulling on the cord ca...

Page 11: ...rized distributor CASIO COMPUTER CO LTD shall not be held liable for any loss or claims due to using this product except as instructed to do so in this User s Guide CASIO COMPUTER CO LTD shall not be...

Page 12: ...s A virus can enter your system via a floppy diskette or network Taking the following precautions are normally sufficient to protect against having a virus invade your system Write protect the master...

Page 13: ...on of FIVA Do not turn power off and then suddenly back on again Doing so can cause data to be lost or corrupted and can lead to malfunction of FIVA Cables Never pull on cable or place a heavy object...

Page 14: ...or water droplets with a dry cloth Hard Disk Data The hard disk drive can be damaged by shock The exchange of the hard disk sometimes becomes necessary when strong vibration or impact are given to it...

Page 15: ...tip of your stylus becomes damaged Screen Protective film Purchase a new screen protective film when the one on your FIVA becomes scratched to the point that it makes display contents difficult to se...

Page 16: ...hey originally came with Disposal When it comes time to dispose of your FIVA do so in accordance with local regulations in your area Contact your local government authorities for details about proper...

Page 17: ...ion of FIVA Never use such agents when cleaning FIVA Use only the stylus accompanied with the FIVA or specified by CASIO for inputting on the LCD screen Before using the stylus remove any dirt from th...

Page 18: ...tlet and contact your original dealer or authorized distributor Damaged power cord or plug Liquid leaking from FIVA Exposure of FIVA to water or rain Unit being dropped Damaged unit cover Very abnorma...

Page 19: ...the Neck Strap 30 Pulling out the Stylus 31 Connecting the AC Adapter 31 Power Supply 32 Attaching and Removing the Battery Pack 32 Charging the Battery Pack 34 Turning on Power 36 Turning on the pow...

Page 20: ...rtcuts 76 Library 78 Library Manager 78 Using the Libraries Window 80 Properties 81 Quitting smARTwriter 84 Using smARTscribble 85 Basic Concepts 85 Starting Up smARTscribble 85 Working with Images 85...

Page 21: ...ent Setting 126 Settings Preferences 129 Using the Terminal Equipment 1456VQL19V INT built in Modem 136 IMPORTANT SAFETY INSTRUCTIONS 136 For users in the United States 136 Notice Concerning FCC Radia...

Page 22: ...equired procedures for turning power on and off for the first time Chapter 2 Using FIVA This chapter explains how to turn on power and perform a number of basic computer operations Chapter 3 Supplemen...

Page 23: ...Chapter 1 Getting Ready This chapter provides you with general description of functions and part names It also explains required procedures for turning power on and off for the first time...

Page 24: ......

Page 25: ...hot swapping function allows two power supplies battery pack or AC adapter to be used FIVA also comes with various power management functions 10 key pad with backlight for mobile use is provided with...

Page 26: ...in this chapter are used throughout the rest of this User s Guide qLCD screen wIndicator lamps eBrightness sensor rSpeaker yMicrophone port uHeadphone port iUSB port oBacklight switch 1Hook 2Stylus 3...

Page 27: ...ower on off and is used for suspending FIVA yMicrophone port Used for connecting a commercially available voice input microphone uHeadphone port Used for connecting commercially available audio use he...

Page 28: ...rtment wHook ePC card slot rUSB port tModem port yLAN port uPower adapter port iCF card slot oInfrared communications port 0RGB port 1Ventilation hole 5Battery release latch 4Battery pack 3Reset switc...

Page 29: ...ns with another computer equipped with the infrared IrDA interface and connections with an IrDA network that is compliant with the IrDA standard 0RGB port RGB Used for connecting an external monitor 1...

Page 30: ...pad and arrow keys Function Control Keys 10 key Pad Arrow Keys Description Cancels an operation Deletes the character to the right of the cursor Deletes the character to the left of the cursor Inputs...

Page 31: ...er sound Changes the destination at which the screen is displayed when an external monitor is connected page 107 Starts up Windows Security Launches the screen calibration routine page 58 Launch previ...

Page 32: ...Screen Protective Film The surface with the corners pointing upward must face to your side and the other side must face to the LCD screen Affix it as shown in the illustration Connecting the Neck Str...

Page 33: ...us or screen is dirty can damage the screen Connecting the AC Adapter Connect the AC adapter to FIVA as shown in the illustration below To prevent unnecessary consumption of electrical power do not le...

Page 34: ...e danger of fire When a two battery pack is exchanged simultaneously Please connect AC adapter when you exchange two battery packs simultaneously Or please prepare a full charged battery pack then cha...

Page 35: ...adapter data may be erased Also if you remove the battery pack while FIVA is in Stand by Mode data may be erased To prevent data from erasing be sure to connect the AC adapter The charged battery pack...

Page 36: ...ack can be used without doing this the indicated remaining power of the battery pack may be inaccurate 1 Attach the battery pack following the procedure above 2 Attach the AC adapter to the FIVA unit...

Page 37: ...harging it may become warm to the touch this is not a malfunction but it just the normal operation of the battery pack Locate the AC adapter power cord in a place where it will not be tripped over Whe...

Page 38: ...automatically when you turn on the power Note The screen goes through a number of changes and may even flicker while Windows 2000 operating system is starting up This is normal and does not indicate m...

Page 39: ...l need to do these settings in advance To prevent power from being disconnected during the setup connect the AC adapter for extra safety Setup Items Description Licensing Agreement Agreement with term...

Page 40: ...you agree with the terms of this agreement select I accept this agreement and click Next If you do not agree to these terms you cannot use Windows 2000 operating system provided on FIVA To read all u...

Page 41: ...s displayed Register your name and the name of your organization When you have entered your name press the tab The cursor moves to the textbox for entering the name of your organization Personal setti...

Page 42: ...holding down the CTRL key press 8 repeatedly when i appears release the CTRL key and the 8 key i is displayed on the screen v While holding down the CTRL key press 9 repeatedly when v appears release...

Page 43: ...of the FIVA If you make a mistake when entering the product key an error will be displayed and you can enter the product key again This key will be needed when you ask for customer support or when yo...

Page 44: ...e corrected is the preceding letter press the BS key or touch the appropriate letter with the stylus and input it again Key Change characters Description ALT 8 Letters that are valid as product IDs ar...

Page 45: ...43 1 6 The screen for entering the name of the computer and the administrator system manager password is displayed 7 Setting the date and time Set the correct date and time to FIVA...

Page 46: ...on not only to FIVA but that is also shared with other computers over a network If you do not know this information ask the system administrator of the network you are using or the system supervisor a...

Page 47: ...ting system setup screen select Exit This reboots FIVA and the Windows 2000 initial screen is displayed 10 Enter the user name and password in this field to log on After doing the input setup closes a...

Page 48: ...e Stand by Mode for a very long time If you do not plan to use FIVA for long time turn it off or put it in the Hibernation Mode Do not connect a peripheral to the FIVA or do not disconnect it in the S...

Page 49: ...operating system from the Start menu Selecting Shut Down from the Start menu Shutdown Restart Stand by and Hibernate can be selected in the Windows Shutdown dialog box The following describes how to...

Page 50: ...or a long time for example when power is not to be turned on until the following day or when adding on memory 1 Select Shutdown 2 Check the screen and click OK This completely shuts down the system an...

Page 51: ...currently active session completely shuts down the system and then restart the system as in a normal bootup Select this method when you are experiencing a problem in the application or when you want t...

Page 52: ...active applications are saved to memory so that they can be immediately used In this mode the Power indicator lamp flashes amber and only a slight amount of power is constantly consumed To resume use...

Page 53: ...is supplied To resume use of FIVA lightly press the power switch to restart FIVA operation from the previous state page 129 1 Select Hibernation 2 Check the screen and click OK This completely shuts d...

Page 54: ...g the Hibernation Mode while a communication operation is in progress will cause an error on the other computer The Standby Mode and Hibernation Mode are disabled in the MS DOS You can reset FIVA and...

Page 55: ...rnate in the Windows Shutdown dialog box page 51 Select Stand by in the Windows Shutdown dialog box page 50 Press the power switch to select Hibernate page 129 Press the power switch to select Stand b...

Page 56: ...54...

Page 57: ...Chapter 2 Using FIVA This chapter explains how to turn on power and per form a number of basic computer operations...

Page 58: ......

Page 59: ...oing this from the keyboard and from the Mobile Cockpit q From the keyboard page 29 Fn 1 turns down darkens the brightness Fn 2 turns up lightens the brightness w From the Mobile Cockpit page 130 Clic...

Page 60: ...tion may not be performed To calibrate the screen 1 Open the Taskbar touch Start Programs FIVA TOOLS and then Calibration Tool This causes the calibration screen shown below to appear with a cross mar...

Page 61: ...icking with a mouse w Drag Touching an icon causes it to change colors Holding the stylus against the icon and dragging causes the icon to move along with the stylus e Drag and Drop Depend on the appl...

Page 62: ...hted Key lock The key lock switch is located on the right side of the FIVA unit This switch has two settings LOCK and FREE and is for preventing wrongful entry on the keyboard When this switch is set...

Page 63: ...riting input panel The most appropriate keyboard for the type of operation you are performing appears list and you can switch between keyboards smARTwriter handwriting input panel Use this input panel...

Page 64: ...o the pointer changes from to Drag the stylus on the screen to change the size of the keyboard Note that the size of the smARTwriter handwriting input panel cannot be changed Moving the Mobile Keyboar...

Page 65: ...ations You can select the one that suits you best To change the configuration of the Mobile Keyboard tap the icon in the upper left corner of the current keyboard and then select the keyboard you want...

Page 66: ...64 t Ten key...

Page 67: ...eout occurs when you lift the stylus for a certain time interval smARTwriter passes the recognized output to the active application The recognition process is performed by comparing the symbols you wr...

Page 68: ...commend that you edit the Library and delete any redundant or incorrect models See Library on page 78 for more information Using Quick Trainer Quick Trainer is an application you can use to teach smAR...

Page 69: ...dicates the progress of the session 5 After you finish writing all the characters tap the Accept button If you want to clear the screen and start over tap the Clear button Note You can repeat Quick Tr...

Page 70: ...This indicates that smARTwriter is active smARTwriter Modes You can control stylus operations and handwriting recognition using the smARTwriter icon in the bottom right corner of the screen The shape...

Page 71: ...sor appears You are ready to start writing on the screen 3 Using the stylus write a few words in the Pocket Word document area Write continuously It is not necessary to pause after each letter smARTwr...

Page 72: ...the screen 3 This causes the character to the left of the cursor position to be deleted Activating the Correction Box The Correction Box is a built in tool that makes it easy to correct misrecognized...

Page 73: ...rection Box The Correction Box displays the characters that make up the selected word with a down arrow underneath each one To make corrections 1 Tap the down arrow under the character you want to cha...

Page 74: ...smARTwriter your handwriting style See Training smARTwriter on page 65 Library Opens the Library Manager See Library Models on page 79 Properties Displays the smARTwriter Properties dialog box See Pro...

Page 75: ...ray select Train from the smARTwriter Menu and then select one of the training options Character Macros and Gestures or Application Shortcuts Character This option opens the Trainer dialog box You can...

Page 76: ...er in the As box will be associated with the ink pattern in the Trainer dialog box 4 Tap the Train button to train the character and save your changes to the Library of Models 5 Tap the close box to c...

Page 77: ...her pattern by tapping the Clear Ink button and then drawing another ink pattern 2 When the ink pattern is the way you want tap the Next button to continue To cancel training tap the Cancel button 3 I...

Page 78: ...st ink pattern you wrote or selected Use this dialog box to teach smARTwriter to interpret the pattern as a shortcut to launch an application To teach smARTwriter an application shortcut 1 Display the...

Page 79: ...step 3 of the above procedure New Shortcut 1 Tap the Browse button On the dialog box that appears select the application for which you want to create a shortcut and then tap OK 2 The path to the appli...

Page 80: ...iodically use Library Manager to delete redundant or unnecessary models from the library Library Manager Library Manager lets you maintain the list of character shapes and symbols in a specific Librar...

Page 81: ...models To view the models associated with a specific character select a category from Type of Models list Then tap a character in the Library Models list The database of models for the character you s...

Page 82: ...enever you create a minimal library smARTwriter automatically launches Quick Trainer See Using Quick Trainer on page 66 To open an existing library and change the active library 1 On the Libraries Win...

Page 83: ...m 0 1 to 1 5 seconds Enhanced recognition of English Checking this box enables the smARTwriter linguistic layer which allows smARTwriter to recognize rules and guidelines for the English language For...

Page 84: ...of 1 to 5 points Ink Color This area shows a sample of the color currently selected for the ink and provides a button for changing the color To change the color of the ink 1 Tap the Change button to...

Page 85: ...n make sure that this setting is the same for both writing and training sessions Eliminate random ink spikes Check this option to remove sharp ink edges making the edges of the electronic ink appear r...

Page 86: ...y combination of sets to fit your writing style Note For every recognition operation smARTwriter searches through all the character sets that are checked on the Constraints tab The following is an exa...

Page 87: ...icon Working with Images To draw an image Simply use the stylus to draw on the screen of the FIVA as if you were drawing on paper To edit an image Use standard Windows editing procedures to edit imag...

Page 88: ...Copied images can be pasted into documents created with other applications such as Word To paste an image from the clipboard 1 Tap the Paste button 2 Drag the pasted image which is surrounded by a se...

Page 89: ...t you want to select To delete text Select the text and then tap the Delete button To cut text Select the text and then tap the Cut button This deletes the text from the screen and places it onto the...

Page 90: ...the ink Note For more information about using this dialog box refer to your Windows documentation Changing the Ink width smARTscribble supports three ink widths thin medium and thick The currently se...

Page 91: ...n the File menu To save the current page in bitmap format that you can print select Export Page as Bitmap on the File menu Navigating Around a Document A smARTscribble document can have up to 20 pages...

Page 92: ...area of the page off the bottom of the screen by using the vertical scrollbar on the right of the page Note When you switch between pages smARTscribble automatically adjusts the page size so all the d...

Page 93: ...u charge the battery pack fully before trying to use it to power FIVA You can use any of the following three methods to check the current charge level of the battery pack The color of the BAT LED indi...

Page 94: ...attery pack Connect the AC adapter to FIVA and use FIVA while charging the battery pack Suspend FIVA and replace with a charged battery pack Important Turning on power while battery power is below the...

Page 95: ...s mobile computing Power Management functions help to ensure that you get maximum power out of the battery pack See page 126 Note You can extend your running time by taking the battery out when you ha...

Page 96: ...with a new one The Mobile Cockpit displays a message notifying you when to replace the battery pack Look at battery life under battery control on the Mobile Cockpit If the signal is red it is time to...

Page 97: ...ps When the battery pack being charged becomes fully charged charging of the other battery pack is started If the battery pack standing by to be charged is replaced with a battery pack that has more r...

Page 98: ......

Page 99: ...Chapter 3 Supplementary Information This chapter contains information about how to connect peripherals and what to do when you experience problems...

Page 100: ......

Page 101: ...tual connection methods and settings depend on the peripheral When connecting a peripheral use the procedures provided in this user s guide in combination with the documentation that comes with the pe...

Page 102: ...on the right of this unit For details of the volume adjustment see u Adjusting the volume on page 131 Use a headphone which has the stereo mini jack 3 5 mm Connect the headphone plug to the headphone...

Page 103: ...le is necessary when connecting to the Ethernet After connecting setting the software is necessary in order to connect to the network using the TCP IP function 1 Connect one end of the Ethernet cable...

Page 104: ...ary in order to perform the connection for communication via the telephone or facsimile line Modular cable 1 Confirm that the power of this unit is turned off Connecting or disconnecting the modular c...

Page 105: ...send and receive data to and from another computer Infrared communications port Locate FIVA and the other device supporting the IrDA interface so that they directly face each other Wireless link icon...

Page 106: ...y with the plug s mark facing upwards Important When this unit enters the Suspend Mode such as the Hibernation or Standby Mode while USB devices are connected the USB devices may not be used after the...

Page 107: ...drive while the access lamp is lit Doing so may cause malfunction of the floppy disk drive or corruption of data Note When using the floppy disk that is not formatted for the Windows formatting is req...

Page 108: ...for using the printer The printer driver that comes with this unit or one stored in a CD floppy disk etc that comes with the printer can be used When a printer compatible with the plug and play funct...

Page 109: ...of the FIVA Connect the power cord of the monitor to other power outlet For details see the manual that comes with the monitor 2 Turn on the power of the external monitor After that turn on the power...

Page 110: ...d Screen area settings you want The following table shows the setting combinations that can be made for Colors and Screen area The screen may not be always displayed in all resolutions and numbers of...

Page 111: ...can create the danger of burns Never insert or remove a PC card while an application is running Never insert or remove a PC card while the unit is in the Suspend Mode such as the Hibernation Mode or...

Page 112: ...that the PC card is oriented correctly insert the PC card into the PC card slot Though you may be aware of some resistance while inserting the PC card push the card carefully and horizontally until i...

Page 113: ...ard button or double click the PC Card button on the indicator area to open PC Card PCMCIA Properties Select the card name from the list and then click Stop to cut off the power to the PC card When Yo...

Page 114: ...rt or remove a CF card while an application is running Never insert or remove a CF card while the unit is in the Suspend Mode such as the Hibernation Mode or Standby Mode Doing so may cause data to be...

Page 115: ...is oriented correctly insert the CF card into the CF card slot Though you may be aware of some resistance while inserting the CF card push the card carefully and horizontally until it goes to the last...

Page 116: ...end Mode 1 Stop using the CF card Click the Mobile Cockpit PC Card button or double click the PC Card button on the indicator area to open PC Card Properties Select the card name from the list and the...

Page 117: ...original retailer or authorized distributor Important The interior of FIVA can become quite hot during normal use In this case leave the unit for about 10 minutes to allow the interior of the unit to...

Page 118: ...of the expansion memory board with the protrusions w of the expansion memory slot and insert the expansion memory board diagonally while paying attention to its orientation and insertion angle until i...

Page 119: ...end it w q q 6 Fit in the memory replacement cover and fix with the screw Checking the capacity of the expansion memory Be sure to check that the expansion memory board is installed correctly and FIVA...

Page 120: ...gs Preferences Set to each of the Full power Normal Economy or User Adjusts the brightness of display Setting LAN use at multiple locations enables the LAN to be used easily at different locations Adj...

Page 121: ...So you can follow the procedure displayed in the window Launcher bar By registering the applications up to 19 applications in the tool bar the applications start up when you click the button It is co...

Page 122: ...om the My Computer in the Windows to the Launcher bar 2 Confirm that the button of the application you registered is displayed in the Launcher bar To start up the application you registered 1 Clicking...

Page 123: ...not displayed in the Launcher bar The button of the application is only not displayed The application itself is not deleted To move the application you registered 1 Clicking the Switching the tool bar...

Page 124: ...the tool bar and the Windows taskbar are displayed together the Windows taskbar has priority over the tool bar When the tool bar of the Mobile Cockpit is displayed on the left or right side of the sc...

Page 125: ...setting allows you to display the tool bar in front even when other windows are displayed Sound Effect The effective sound can be heard when you click each button of the Mobile Cockpit This lets you k...

Page 126: ...you know how to operate Version info This displays the version information of the Mobile Cockpit Exit This closes the application of the Mobile Cockpit3 When you want to use the tool bar of the Mobil...

Page 127: ...g the Reference button and select the desired application and then register it to each of the one touch operation buttons If you do not register an application to the buttons leave the textbox vacant...

Page 128: ...e power management setting for the system and the devices can be specified by selecting USER AC or USER DC and the setting for this unit can be specified by selecting FULL POWER NORMAL or ECONOMY The...

Page 129: ...127 3 FULL POWER NORMAL ECONOMY...

Page 130: ...128 USER AC This setting is when the power is supplied to this unit by the AC adapter USER DC This setting is when the power is supplied to this unit by the battery packs...

Page 131: ...Built in LAN When you do not use the built in LAN remove the check mark from the check box When the built in LAN settings have been changed a message prompting you to reboot the computer is displayed...

Page 132: ...t of the button is turned on or off according to the operation you click the icon When the battery pack is used the indicator on the lower right of the button is turned on or off according to the oper...

Page 133: ...set when the LAN connection switch button is pressed the following dialog box is displayed To add new LAN settings click New and to correct existing LAN settings click Edit This enables any LAN to be...

Page 134: ...o Long Run setting By setting the function range of CPU of this unit you can decrease the power consumption and prolong the using time of the battery packs The CPU functions within the upper value an...

Page 135: ...to replace with a new battery pack etc The reading of the Rated capacity does not guarantee the actual capacity of the battery packs which are being used Therefore the capacity of the full charged bat...

Page 136: ...oth wear down at the same rate When using the AC adapter and battery pack If the AC adapter is connected the battery packs will be charged all the time Regarding the order of priority in charging the...

Page 137: ...etting is set to on the unit is restored from the Standby Mode when the time you set comes 3 Hibernation Mode When you click the hibernation button this unit enters the Hibernation Mode You can also s...

Page 138: ...an electrical storm There may be a remote risk of electric shock from lightning 3 Do not use the FIVA connected to a telephone output to report a gas leak in the vicinity of the leak 4 Use only the po...

Page 139: ...ake necessary modifications to maintain uninterrupted service If trouble is experienced with this equipment 1456VQL19V INT for repair or warranty information please contact CASIO INC 973 361 5400 If t...

Page 140: ...ent registration or not will require a Part 68 compliance evaluation You may need to test and make a modification filing to the FCC before that new component can be used Any modification update made b...

Page 141: ...some situations Repairs to certified equipment should be coordinated by a representative designated by the supplier Any repairs or alterations made by the user to this equipment or equipment malfunct...

Page 142: ...In the event of problem you are advised to contact your local dealer or CASIO distributor in the first instance Network compatibility The modem has been designed for the use with the following network...

Page 143: ...V32bis ITU T V34 V 90 K56flex ITU T V 27ter ITU T V 29 ITU T V 17 300 2400 1200 9600 4800 14400 12000 9600 7200 4800 33600 31200 28800 26400 24000 21600 19200 16800 14400 12000 9600 7200 4800 2400 56...

Page 144: ...em shall be used to connect the modem to the telephone line In this case if the telephone line is available through the modular jack it is possible to connect the modem to the telephone line directly...

Page 145: ...such as hot and humid or exposed to direct sunlight since it is a precision product 3 Do not spill any liquid such as water on the product 4 Do not touch electronic terminals without discharging stat...

Page 146: ...ormation that appears on the display Message numbers and codes that appear on the display may provide hints to the cause of the problem and what you need to overcome it Keep notes of such information...

Page 147: ...by visiting the CASSIOPEIA Website at http www casio co jp English system Model Unit ID Number on the bottom panel Memory Capacity MB FIVA Hard Disk Capacity GB Hard Disk Free Space MB Battery Pack Us...

Page 148: ...er from the wall outlet Contact your original dealer or authorized distributor Have the following information on hand Product name and model number Date of purchase Current status and the names of app...

Page 149: ...s not supply much operation time even after a full charge Recommended Action Use the AC adapter to power FIVA Use a fully charged battery pack If the battery pack has small charge when power is turned...

Page 150: ...you can view the display at a different angle Use Fn 1 or Fn 2 to adjust display brightness If the display remains dim at a bright setting it may mean that it has reached the end of its service life...

Page 151: ...e same as that set on the other device Change the distance between FIVA and the other device Move the two devices to an area that is not exposed to direct sunlight or fluorescent lighting Tap the Mobi...

Page 152: ...on you are using press the RESET switch and restart Windows Try turning power off and then back on again Memory may be low which means you have to increase it by installing a separately available DIMM...

Page 153: ...s menu If Mobile Cockpit is not running tap the Taskbar s Start button and start up Mobile Cockpit from the Programs menu If the Mobile Cockpit toolbar is hidden tap the Mobile Cockpit icon on the Tas...

Page 154: ...7 Limits and methods of measurement of radio disturbance characteristics of information technology equipment EN55024 1998 Information technology equipment Immunity characteristics Limits and methods o...

Page 155: ...ent from that to which the receiver is connected Consult the dealer or an experienced radio TV technician for help FCC WARNING Changes or modifications not expressly approved by the party responsible...

Page 156: ...B 1 channel USB 2 channels left USB Ver 2 0 right USB Ver 1 1 LAN 1 channel 100Base TX 10 Base T compatible Modem Baud rate 56 kbps max V 90Kflex FAX 14 4 kbps Sound functions Speaker built in monaura...

Page 157: ...B part No MPC 240FDD part No MPC 253RAM 128 MB part No MPC 754RAM 256 MB AC adapter Battery holder part No AD S60160A E part No MPC 720CS Stand Screen protector part No MPC 710ST part No MPC 730PS5 CD...

Page 158: ......

Page 159: ...te as possi ble However if any unclear portions or omissions are found please contact your dealer Descriptions and specifications furnished herein the User s Guide by CASIO Computer Co Ltd are believe...

Page 160: ...CASIO COMPUTER CO LTD 6 2 Hon machi 1 chome Shibuya ku Tokyo 151 8543 Japan...

Reviews: