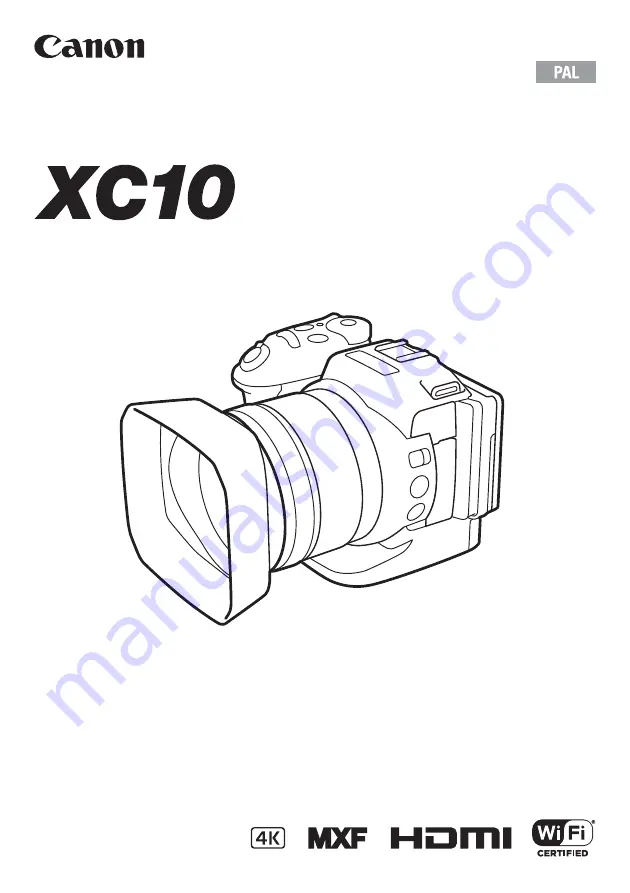
background image

PUB. DIE-0468-000

4K Camcorder

Quick Guide

This guide introduces only basic functions. To download the Instruction Manual, which contains more advanced 
information, refer to page 

5.

Summary of Contents for XC10

Page 1: ...PUB DIE 0468 000 4K Camcorder Quick Guide This guide introduces only basic functions To download the Instruction Manual which contains more advanced information refer to page 5...

Page 2: ...n above an applicable threshold specified in the Battery Directive This product should be handed over to a designated collection point e g on an authorized one for one basis when you buy a new similar...

Page 3: ...countries IOS is a trademark or registered trademark of Cisco in the U S and other countries and is used under license Google Android Google Play are trademarks of Google Inc Wi Fi is a registered tra...

Page 4: ...mcorder CA 570 Compact Power Adapter incl power cord LP E6N Battery Pack incl protective cover Lens Hood Viewfinder Unit incl viewfinder unit cover Lens Cap RC 6 Wireless Remote Controller incl CR2032...

Page 5: ...ecifications About the Camcorder s Wi Fi Functions You can enjoy a variety of Wi Fi functions with your camcorder To read about all the convenient ways you can use your camcorder using Wi Fi refer to...

Page 6: ...US focus mode switch 67 4 Shoulder strap mount 25 5 MIC microphone terminal 79 6 HDMI OUT terminal 112 7 USB terminal 87 115 8 DC IN terminal A 17 9 DISP display button 47 Assignable button 1 98 10 PU...

Page 7: ...7 Names of Parts 1 2 3 1 Air intake vent 48 2 Shoulder strap mount 25 3 headphone terminal 85 4 5 6 4 Tally lamp 39 5 Remote sensor 36 6 Lens hood 22...

Page 8: ...AGN magnification button 70 Assignable button 3 98 3 MENU button 29 4 Joystick 29 5 ACCESS indicator A 26 6 CARD OPEN open recording media slot cover lever A 26 7 Recording media slot cover 8 CFast ca...

Page 9: ...START STOP button A 29 PHOTO button A 29 When you are recording video clips this button is referred to in this manual as the START STOP button when you are shooting photos it is referred to as the PHO...

Page 10: ...ames of Parts 2 4 3 6 5 1 1 Battery compartment 2 Battery release latch A 17 3 BATT OPEN open battery compartment switch A 17 4 Battery compartment cover A 17 5 Lens hood mount index 22 6 Tripod socke...

Page 11: ...11 Names of Parts Viewfinder unit RC 6 Remote Controller 1 2 3 1 Viewfinder unit latch 22 2 Eye cup 3 Dioptric adjustment lever 23 6 4 5 4 Delay switch 36 5 Battery compartment cover 6 Transmit button...

Page 12: ...Some icons that appear in mode also appear in mode If the camcorder is in mode and you do not find an icon in these tables for mode refer to Icons that appear during mode A 15 Icons that appear during...

Page 13: ...e 62 Looks 64 O Peaking 70 ND ND filter 133 Light metering mode 61 z Zebra patterns 75 Digital tele converter 66 STBY REC HDMI recording command 137 GPS signal continuously on satellite signal acquire...

Page 14: ...ayed in minutes next to the icon When the icon appears in red followed by END there is no more available space and recording will stop Zoom indicator 66 000 Mbps Frame rate Bit rate 49 File format 49...

Page 15: ...hite balance 62 Looks 64 Light metering mode 61 p Drive mode 41 Orientation detection 93 Icon Display Description 8000 Recording media and available number of photos Optional Speedlite has been attach...

Page 16: ...ile the PHOTO button is pressed halfway In green focus and exposure are locked during auto focus mode exposure is locked manual focus mode In yellow flashing focus is not locked If the zoom is operate...

Page 17: ...ow and open the battery compartment cover 5 Insert the battery pack all the way into the compartment as shown in the illustration Push it all the way in until the battery release latch secures it in p...

Page 18: ...mately 4 hours The following table shows the typical recording and playback times for a fully charged battery pack using the listed frame rate and bit rate Actual times will vary according to factors...

Page 19: ...and ships DC AC inverters etc NOTES We recommend charging the battery pack in temperatures between 10 C and 30 C If either the ambient temperature or the battery pack s temperature is outside the ran...

Page 20: ...t that may hit the lens Place the lens hood on the front of the lens so that the hood s lens mount index covers the index on the lens and turn it 90 degrees clockwise until it clicks Be careful not to...

Page 21: ...as necessary You can also push the joystick to change the field 4 Set the correct date and time by changing all the fields in the same way 5 Touch Y M D M D Y or D M Y to select the date format you p...

Page 22: ...time zone date and time again Using the optional GP E2 GPS Receiver you can have the camcorder adjust settings automatically according to the UTC date time information received from the GPS signal 87...

Page 23: ...nient when you travel so that you can set the camcorder to match the time of your home location or that of your travel destination 1 Press the MENU button 2 Open the Time Zone DST screen System Setup...

Page 24: ...set the movie photo switch to v to shoot photos set it to Setting the Shooting Mode You can select a shooting mode to match your shooting style While pressing down the shooting mode dial button turn...

Page 25: ...ch your fingers in to return to the index screen Also used during photo playback to zoom out from a photo that has been zoomed in Pinch Out Place two fingers on the screen and move them apart Used on...

Page 26: ...with the label facing up all the way into the slot Make sure the you insert the CFast card into the slot so that the connectors in the card match the orientation shown on the illustration to the left...

Page 27: ...ff the camcorder Do not open the recording media slot cover Inserting and Removing an SD Card 1 Make sure the ACCESS indicator is off 2 Slide the CARD OPEN switch in the direction of the arrow and ope...

Page 28: ...open the recording media slot cover SD cards have front and back sides that are not interchangeable Inserting an SD card facing the wrong direction can cause a malfunction of the camcorder Be sure to...

Page 29: ...ording media as necessary A 26 27 Insert a CFast card to record 4K clips insert an SD card to record HD clips and photos 5 Adjust the viewfinder unit if necessary 23 Recording 1 Set the movie photo sw...

Page 30: ...If the subject is not in focus g will flash in yellow Once the focus is automatically adjusted g will turn green and one or more AF autofocus frames will appear You can also change the autofocus metho...

Page 31: ...o select the frame rate and bit rate Choose the combination of frame rate and bit rate that best suits your needs 1 Press the MENU button 2 Open the 4K Recording or HD Recording submenu 3 Recording Se...

Page 32: ...press the DISP button to display the playback controls You can use the touch panel or joystick to operate the playback controls Playing back clips Playback will start from the selected clip until the...

Page 33: ...dex screens If an index screen is currently displayed start from step 2 1 Touch the index screen button 2 Select the desired index screen The index screen of the current recording type will appear 3 T...

Page 34: ...to Proceed Yes The photo is deleted and the next photo is displayed You can drag your finger left right select another photo to delete and then touch Proceed again 4 Touch X 5 In the playback controls...

Page 35: ...NOTES The HDMI OUT terminal is for output only Do not connect the camcorder to another device s output terminal using the HDMI OUT terminal as this will cause a malfunction When using a commercially...

Page 36: ...F Utility for XF AVC is available for free download from the following Canon Web site http www canon com icpd To download click on your country region and follow the onscreen instructions For details...

Page 37: ...al access point wireless router etc 2 Direct connection to one Wi Fi enabled device where the camcorder serves as the Wi Fi access point Function Description Wi Fi connection Infrastructure1 CameraAcc...

Page 38: ...Mbps 50 00P 5 3 W Optional Accessories Canon offers a wide range of optional accessories for your camcorder See Optional Accessories 153 for details Use of genuine Canon accessories is recommended The...

Page 39: ...5 2555 CENTRO Y SURAM RICA http www cla canon com CANON LATIN AMERICA INC NEW ZEALAND http www canon co nz Canon New Zealand Ltd 0800 222 666 within New Zealand only 64 09 489 0300 SINGAPORE Canon Sin...

Reviews: