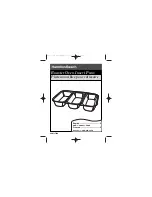
background image

PROFESSIONAL 1000

TRADITIONAL 1000

Use and Installation Instructions

This appliance must be installed in accordance with the regulations in force and

only used in a well ventilated space.

The data badge is fitted on the rear panel. The model/serial number can also be found

on a badge located below the left-hand oven door beneath the door seal.

Read


t

h

ese


instructions

 b

e

f

ore


installin

or


usin

t

h

e


a

pp

liance


and


retain

t

h

e

m f

or

 f

uture


re

f

erence

.

T

h

ese


instructions


are


onl

y v

alid

 f

or


t

h

e


countries

 wh

ose


s

ymb

ols


a

pp

ear


in


t

h

e

 m

anual

and


on


t

h

e


serial


nu

mb

er

 p

late

.

Summary of Contents for PROESSIONAL1000

Page 1: ...pace The data badge is fitted on the rear panel The model serial number can also be found on a badge located below the left hand oven door beneath the door seal Read these instructions before installi...

Page 2: ...12 Griddle 14 Some recipe ideas for your griddle 15 Twin Grill 16 Fan Oven 17 Conventional Oven 19 Oven Cooking Chart 20 The Slow Cook Setting 22 Care and Cleaning 23 Something wrong with your Cooker...

Page 3: ...oom is well ventilated e g open a window or use an extractor fan and that persons who may be sensitive to the odour avoid any fumes It is suggested that any pets be removed from the room until the sme...

Page 4: ...handles cannot acciden tally be caught or knocked or become heated by other burners ALWAYS keep the cooker clean as a build up of grease or fat from cooking can cause a fire ALWAYS allow the cooker to...

Page 5: ...king NEVER operate the grill with the grill doors closed This may cause overheating of your cooker NEVER line the shelves floor or sides of the oven or grill with aluminium foil as over heating and da...

Page 6: ...nd vegetables should be cooked as soon as possible 5 Dishes containing left over cooked poultry or meat for example Shepherds Pie should not be cooked automati cally if there is to be a delay period 6...

Page 7: ...et a time period of up to 23 hours 59 minutes that will count down When it reaches zero the timer will emit an audible tone For Example If you set 20 minutes the audible tone will occur 20 minutes lat...

Page 8: ...Step 2 Press and hold the Minute Minder button Step 3 With the Minute Minder button held in set the required Minute Minder period using the and buttons A bell symbol will light up Release all buttons...

Page 9: ...5 Press and hold in the End Time button The display will read the earliest possible end time for the Cook Period that you have set above The Auto symbol and cookpot symbol will be lit Step 6 With the...

Page 10: ...he Cook Period button the display will read 0 00 and the cookpot symbol will light up With the Cook Period button still held in set the required Cook Period using the and buttons Example 1hr 30 minute...

Page 11: ...ng the End Time button 3 Having set a Cook Period and End Time an electronic device stores the information The device within the timer will switch the oven s on and off at the required times 4 When se...

Page 12: ...ize cookware use any of the two burners in any orientation All pans should be placed centrally over the burners TO USE THE HOTPLATE 1 Press the ignition button and then push in and turn the control kn...

Page 13: ...ip pans more than one third full with oil or fat 2 Never leave oil or fat unattended during the heating or cooling period 3 Never heat fat or fry with a lid on the pan 4 Always dry food thoroughly bef...

Page 14: ...tton and then push in and turn the control knob s of the burners anticlockwise to the large flame symbol Continue to press the ignition button until the spark lights the gas Preheat the griddle plate...

Page 15: ...te 4 Turn each scone when bubbles start to burst on the upper side 5 Cook on the reverse side until light brown and the scone when split is dried through 6 Allow approx 3 minutes for the first side an...

Page 16: ...t tilt the handle over the recess adjacent to the bracket A Slide the handle towards the centre of the pan B and let the handle locate over the bracket C For a detachable handle Remove the screw and w...

Page 17: ...y giving approximate cooking temperatures and times To suit personal taste and requirements it may be necessary to increase or decrease temperatures by 10 C Unless otherwise indicated in the charts fo...

Page 18: ...nnecessary oven splashing and evaporation of meat juices d Additional fat should not be added except for veal very lean meat or poultry which can be larded with bacon fat or brushed very sparingly wit...

Page 19: ...es unnecessary oven splashing and evaporation of meat juices Additional fat should not be added except for veal very lean meat or poultry which can be larded with bacon fat or brushed very sparingly w...

Page 20: ...e heat Temperature C Time approx Position in Oven from bottom Beef No 160 180 20 25 mins per 450g 1lb 20 mins over In meat pan on runner 2 Lamb No 160 180 25 mins per 450g 1lb 25 mins over Pork No 160...

Page 21: ...prox 1 2 hrs Runner 2 Baked Custard No 140 150 C approx 40 50 mins Runner 2 Bread Yes 200 210 C approx 40 45 mins Runner 2 Meringues No 70 80 C approx 3 4 hrs Runner 1 Conventional Oven Cooking Food P...

Page 22: ...should reach at least 88 C 6 This method is unsuitable for stuffed meat and stuffed poultry 7 Always bring soups casseroles and liquids to the boil before putting in the oven 8 Cover casseroles with f...

Page 23: ...ime When repositioning the cooker ensure that it is level Take care to ensure that any floor covering is not damaged HEAT CLEAN LINERS The oven linings are coated with a special enamel which has a con...

Page 24: ...e bodies over the electrodes Glass As for enamel cleaning Polish with a clean dry cloth or kitchen roll Chromium Plating Oven shelves grill pan grid grill pan handle support Wipe with a cloth wrung ou...

Page 25: ...ught on the ignitor or burner body NOTE Satisfactory ignition will only be achieved if all the hotplate burners are fitted In the event of an electricity failure all burners can be lit with a match Ca...

Page 26: ...nces The European Directive 2002 96 EC on Waste Electrical and Electronic Equipment WEEE requires that old household electrical appliances must not be disposed of in the normal unsorted municipal wast...

Page 27: ...that of safety to ensure compliance with the law In the UK CORGI registered installers work to safe standards of practice The cooker must also be installed in accordance with BS 6172 Failure to insta...

Page 28: ...1 at 37 mbar BURNER HEAT INPUT HEAT INPUT INJECTOR HEAT INPUT GAS RATE INJECTOR BY PASS HOTPLATE Front Left 1 90 kW 102 Z 1 90 kW 138 g hr 64 35 HOTPLATE Rear Left 3 00 kW 116 Y 3 00 kW 218 g hr 86 44...

Page 29: ...suitable box spanner and discard 3 Replace the injector with the appropriate replacement see Table on page 28 4 Repeat for each burner 5 Replace the burner bodies and caps taking care that they are p...

Page 30: ...ustrates the minimum clearance between the cooker and adjacent walls cupboards etc The wall behind the cooker 50mm below and 450mm above and the width of the cooker must be a non combustible material...

Page 31: ...r sufficiently to allow a comfortable grip on the underside front edge of the oven roof avoiding any grill or oven interior furniture and then lift and slide back at the same time Your cooker must sta...

Page 32: ...70 450 250 750 750 Connection to the cooker should be made with an approved appliance flexible connection to BS 669 A length of 0 9 to 1 25m is recommended The length of hose chosen should be such tha...

Page 33: ...y This appliance conforms to EN55014 regarding suppression of radio and television interference Access to the mains terminals is gained by removing the rear access cover The mains cable must pass thro...

Page 34: ...34...

Page 35: ...glect or interference or as a result of improper installation Replacement of any consumable item or accessory These include but are not limited to plugs cables batteries light bulbs fluorescent tubes...

Page 36: ...parts as well as accessory products that protect and hygienically clean your appliance to keep it looking good and functioning efficiently throughout its life UK 08709 077 077 Republic of Ireland 0818...

Reviews: