CAB A+, Operator'S Manual
The Supermicro A+ User Manual is a comprehensive guide that provides step-by-step instructions for setting up and configuring your Supermicro A+ product. This manual is available for download, completely free of charge, from our website. Simplify your experience with our detailed manual, exclusively at manualshive.com.
Share
Download


Reviews:
No comments
Related manuals for A+

ME2TMDS
Brand: Melitta Pages: 12

Minuto HD8661/09
Brand: Saeco Pages: 68

Coffee Vito
Brand: Schaerer Pages: 2

439 001
Brand: Lagrange Pages: 32

DIM-70
Brand: Daewoo Pages: 29

AU 411
Brand: Aurora Pages: 12

CG408 DT/TT
Brand: SATO Pages: 2

HISU050
Brand: Ice-O-Matic Pages: 49

GranAroma
Brand: Saeco Pages: 33

MAGIC M2+
Brand: Saeco Pages: 48

KCM514ER - JavaStudio Stainless-Steel Programmable Coffeemaker
Brand: KitchenAid Pages: 3

KCM0402
Brand: KitchenAid Pages: 32

JAVASTUDIO 4KCM511
Brand: KitchenAid Pages: 44

7413
Brand: AMW Pages: 2
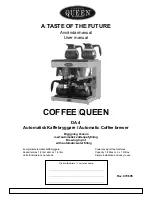
DA 4
Brand: Coffee Queen Pages: 28

IM-65L
Brand: PolyCool Pages: 10

EC 152 CD
Brand: DeLonghi Pages: 14

FIM-450HS
Brand: Whynter Pages: 12


