Brookstone Slimline Music System, User Manual
The Brookstone Slimline Music System offers a dynamic audio experience in a sleek and compact design. Enhance your music enjoyment with this user-friendly system. Easily access the user manual for free download at manualshive.com, to get started and unlock the full potential of your music system.
Share
Download


Reviews:
No comments
Related manuals for Slimline Music System

NP-H750
Brand: Teac Pages: 3

SC-HC49
Brand: Panasonic Pages: 4

WK 200
Brand: JAMO Pages: 72

JWM40
Brand: Jensen Pages: 2

XMIC
Brand: FCS Pages: 23

DJ-24
Brand: Numark Pages: 16

1680335
Brand: Speaka Professional Pages: 8

p2chanter
Brand: Solda Pages: 22

CA-UXP400
Brand: JVC Pages: 32

CA-V508T
Brand: JVC Pages: 48
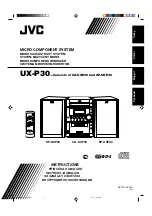
CA-UXP30
Brand: JVC Pages: 34

CA-UXP550
Brand: JVC Pages: 81

CA-UXS57
Brand: JVC Pages: 90

CD Portable System RC-EX36S
Brand: JVC Pages: 2

MDR624
Brand: Samson Pages: 24

BTB8000
Brand: Philips Pages: 24

BTB2670
Brand: Philips Pages: 24

Freedom FR-2
Brand: Sound Projections Pages: 2


