Britax ISOFIX COMPATIBLE, Instruction Manual
The Britax ISOFIX COMPATIBLE car seat comes with a comprehensive Instruction Manual, providing you with all the necessary information to ensure safe installation and optimal usage. For hassle-free access, this manual is available for free download from our website. Your child's safety is our top priority.
Share
Download


Reviews:
No comments
Related manuals for ISOFIX COMPATIBLE

SLSA02800
Brand: Mamas & Papas Pages: 12

ALICIA PRONE STANDER
Brand: Prospect Designs Pages: 7

Playpen Barrier
Brand: Perma child safety Pages: 16

GARDA TILT
Brand: FIM Pages: 16

medland changing unit
Brand: mothercare Pages: 24

darlington cot top changer
Brand: mothercare Pages: 20

apsley
Brand: mothercare Pages: 32

Rhyme Tyme 2 in 1 Activity Centre
Brand: Mother's Choice Pages: 16

FSMVPT2090
Brand: Mosaic Pages: 6

Playful Puppy Bouncer
Brand: Banzai Pages: 9
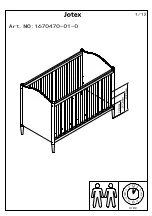
1670470-01-0
Brand: JOTEX Pages: 12

AURORA
Brand: Cosatto Pages: 18

3SIXTI
Brand: Cosatto Pages: 27

Continuum
Brand: Safety 1st Pages: 32

Cherry
Brand: Safety 1st Pages: 60

TWINSON CLICK
Brand: deceuninck Pages: 22

Rainbow
Brand: Britton Pages: 21

Bath&Change
Brand: Britton Pages: 21


