Braun Champion, User Manual
The Küschal Champion is a top-tier user-friendly device designed to elevate your gaming performance. Unlock the power and precision of this cutting-edge gadget with our comprehensive User Manual, available for free download at manualshive.com. Enhance your gaming prowess and conquer new challenges with ease!
Share
Download


Reviews:
No comments
Related manuals for Champion

DV-6400
Brand: C*Pix Pages: 14

NXT rome
Brand: IDS Pages: 32

ENVIROMUX-IPCAM-NPOE
Brand: NTI Pages: 5

FVK2200
Brand: TCS Pages: 8

C21EN0291
Brand: Sigma Pages: 116

SF 26
Brand: Leica Pages: 358

DV087
Brand: Conbrov Pages: 10

NCP-DVRGPSWIFI
Brand: NanoCam Plus Pages: 48

MDC-i4240
Brand: Microdigital Pages: 11

WR525
Brand: Wixey Pages: 4

DPF716
Brand: Curtis Pages: 7

13MM-C
Brand: Vivitar Pages: 16

C 3.0 C
Brand: JENDIGITAL Pages: 30

PTZ2300SIR
Brand: IC Realtime Pages: 41
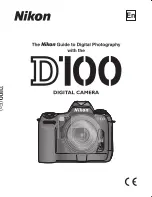
D100
Brand: Nikon Pages: 212

Z 6
Brand: Nikon Pages: 496

26309
Brand: Nikon Pages: 204

NIKKOR Z 28-75mm
Brand: Nikon Pages: 16


