Wireless G All-In-One Print Server
Quick Installation Guide
(a) Wireless-Connection LED
Solid Blue
The Print Server is connected to a wireless
access point (AP) or station.
Blinking Blue
The Print Server is trying to connect to the
AP or station.
Off
The wireless mode of the Print Server
is disabled.
(b) Print-Server and Printer-Status LED
Solid Blue
Firmware is being upgraded to the Print Server.
(If the Print Server upgrade fails, the LED will
light steadily.)
Blinking Blue
The multi function printer (MFP) or standard
printer is connected (blinks regardless of
whether or not print jobs are being processed by
the Print Server).
Off
No link is established with the MFP or standard
printer, or the printer is turned off.
(c) LAN-Link/Activity LED
Solid Blue
The LAN cable is connected to Print Server.
Blinking Blue
Data is being transmitted and received through
this port.
Off
No link is established.
Step 1. Connect
Connect the Wireless G All-In-One Print Server
1.1 Connect the Print Server to your network by attaching one end of the network cable to the Print Server’s
network port and the other to an available port on your router.
1.2 Plug one end of the power adapter to the Print Server and the other into an electrical outlet. The Print Server
will perform a Power-On Self-Test (POST) after it is powered on. When the “Status” (
) LED light goes off,
the Print Server is ready.
NOTES:
a. To prevent compatibility problems, power on the Print Server before powering on the MFP or
standard printer.
b. Before connecting the MFP or standard printer via USB cable, please read the printer’s manual.
Some MFPs and standard printers require users to install drivers and utilities before connecting the
MFP to the computer. Some MFPs and standard printers require users to connect the printer to the
computer during installation.
Step 2. Install Utilities
Install Server Software
Before you start, verify your computer’s operating system. This program can be run in Windows 2000 SP4 or above,
and Windows XP SP1 or above.
2.1 Insert the included CD into your CD-ROM drive. The autorun.exe program should start automatically. If it does
not, run autorun.exe manually from your CD-ROM drive. To do this, manually navigate to your CD-ROM drive
and double-click on “autorun.exe” to start the install.
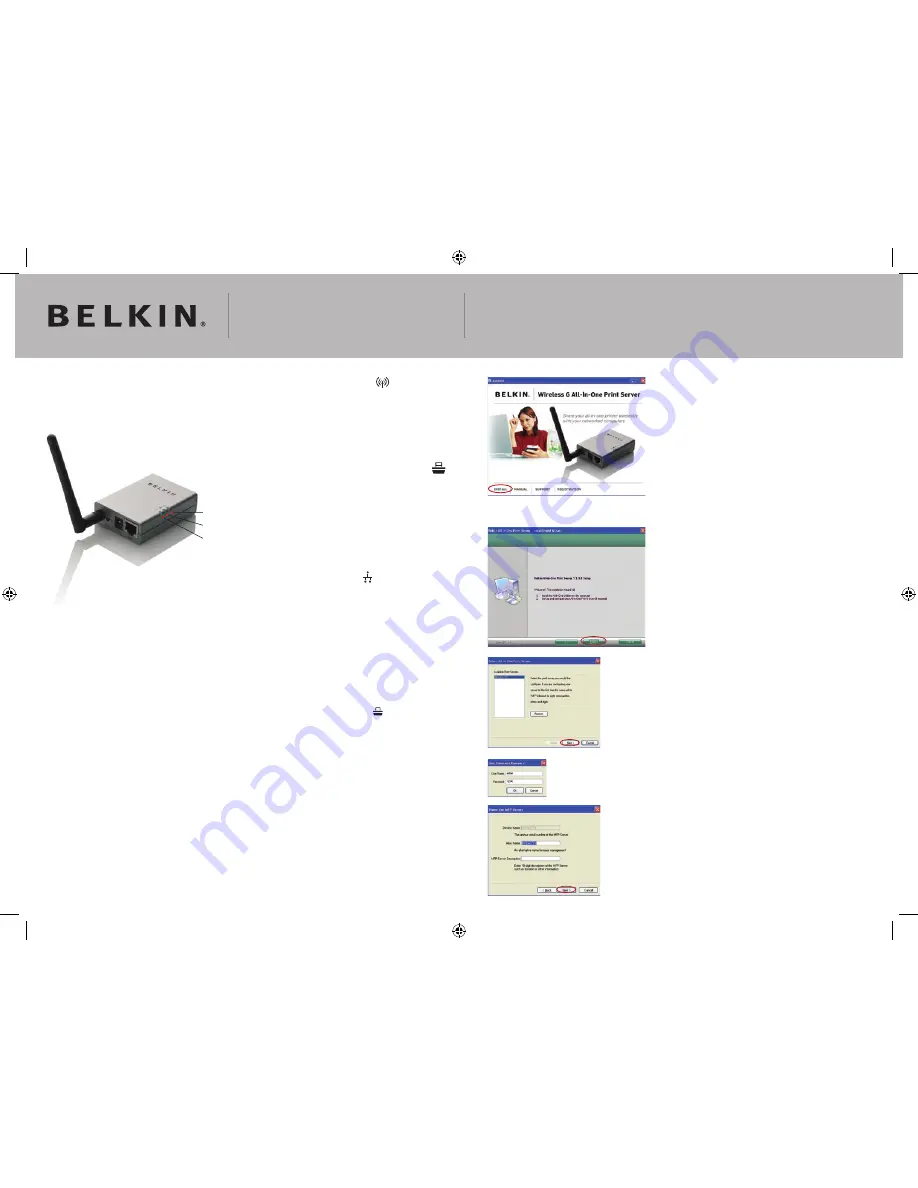
2.2 The following screen will be displayed. Click
“Install” to launch the Installation Wizard.
2.3 The “Belkin All-In-One Print Server
Utilities - InstallShield Wizard” will appear. Click
“Next” until the system starts to install the utilities.
2.4 The “Server Configuration” screen will appear.
To configure the Print Server, click “Next”
(recommended for first install) and go to
step 2.5, following.
If you do not want to configure the Print Server at
this point, select “No, please skip this setup”.
Then, click “Next” to complete the installation
(when adding a new client PC to share a preexisting
print-server setup).
2.5 Click “Yes, I would like to configure my
All-In-One Print Server”.
2.6 The Print-Server list will search for Print Servers
on the network. Select the “Wireless G All-In-One
Print Server” and click “Next”.
2.7 Enter the user name and password of the Print
Server you have selected to log in. The default user
name is “admin”; the default password is “1234.”
2.8 Set the alias name and description of the Print
Server here. Click “Next”.
NOTE: You can define the MFP’s location or
other information about it in the “MFP Server
Description” field.
(a)
(b)
(c)